


You've probably heard the travel tip that you should, when possible, bring one or two brand new (to your child) toys with you, so your
For our recent trip, I decided to make a few new things for bug, and today I'm showing you the first one.
I present:
Easy to make. Fun for hours.
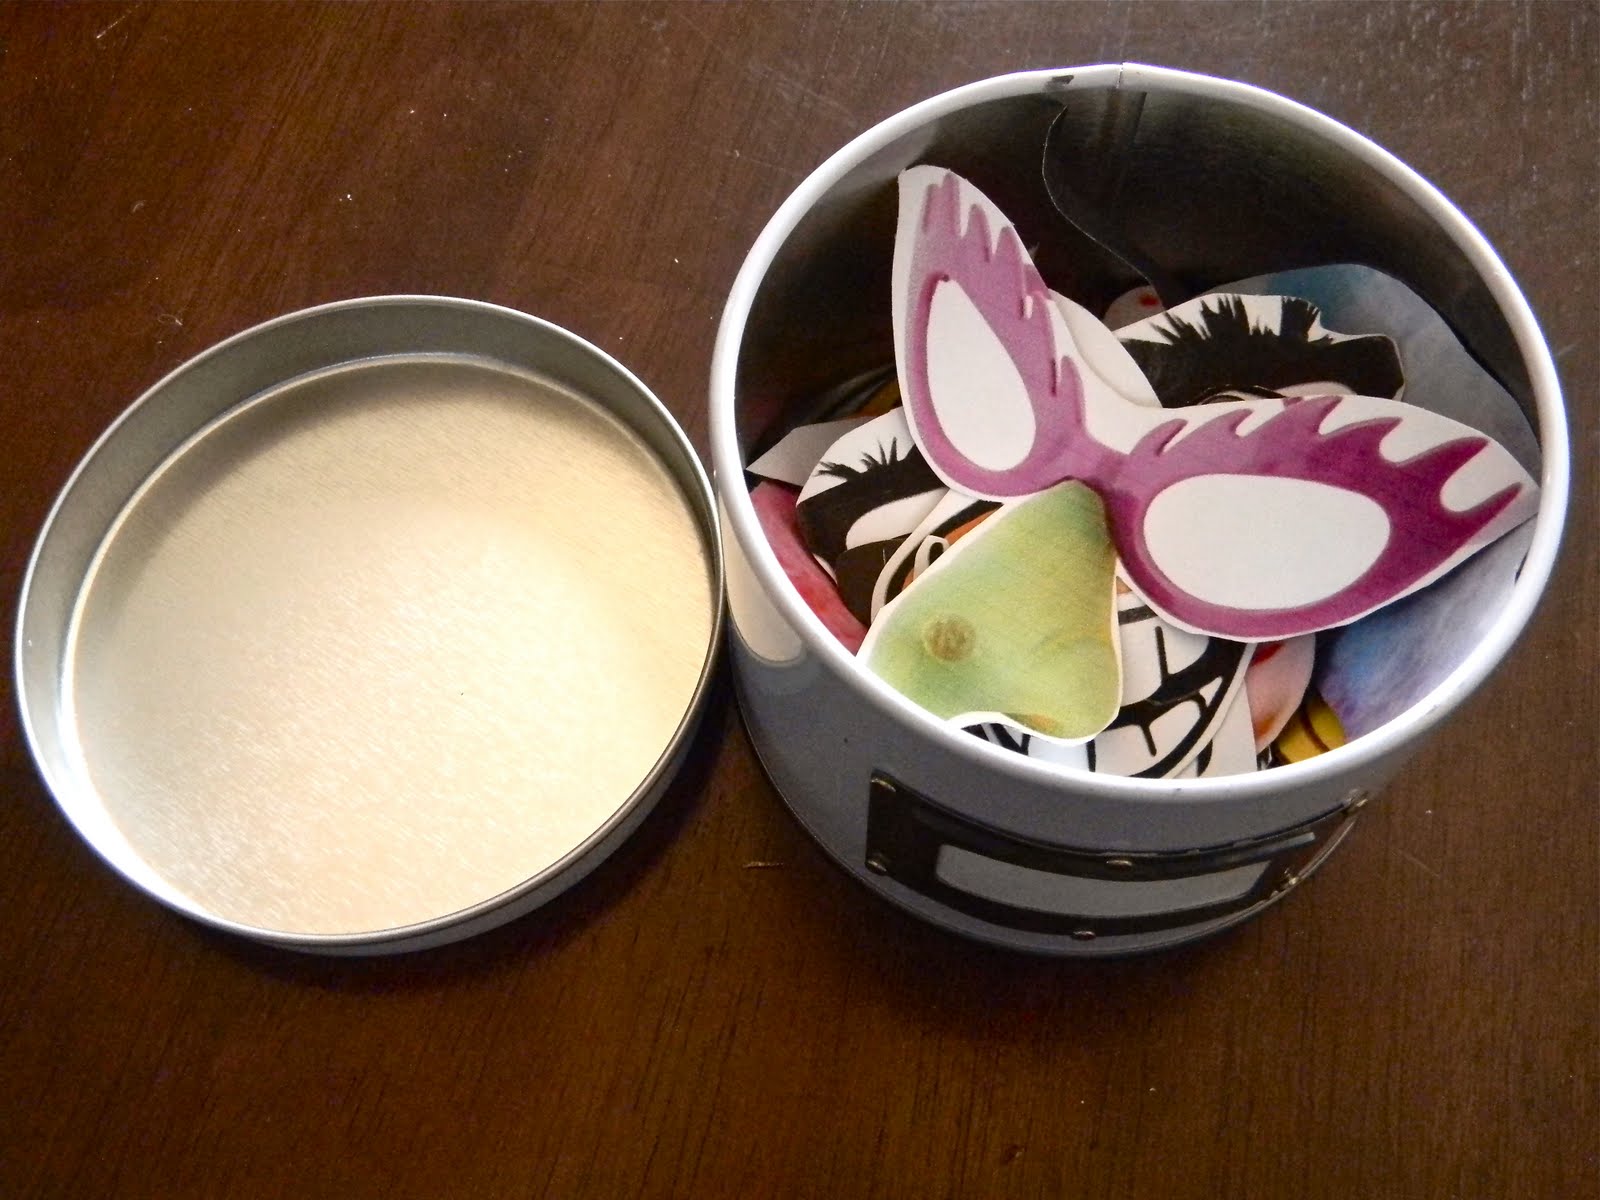
Start with this little round tin from the dollar bins at Target.

Run on down to your computer, and print out a bunch of faces and/or facial features on magnetic sheets.

Cut them all out.

And using your tin as a head, start making faces.

Go crazy! Or, you know, you could let your kid try it out. Since you made it for him and all.
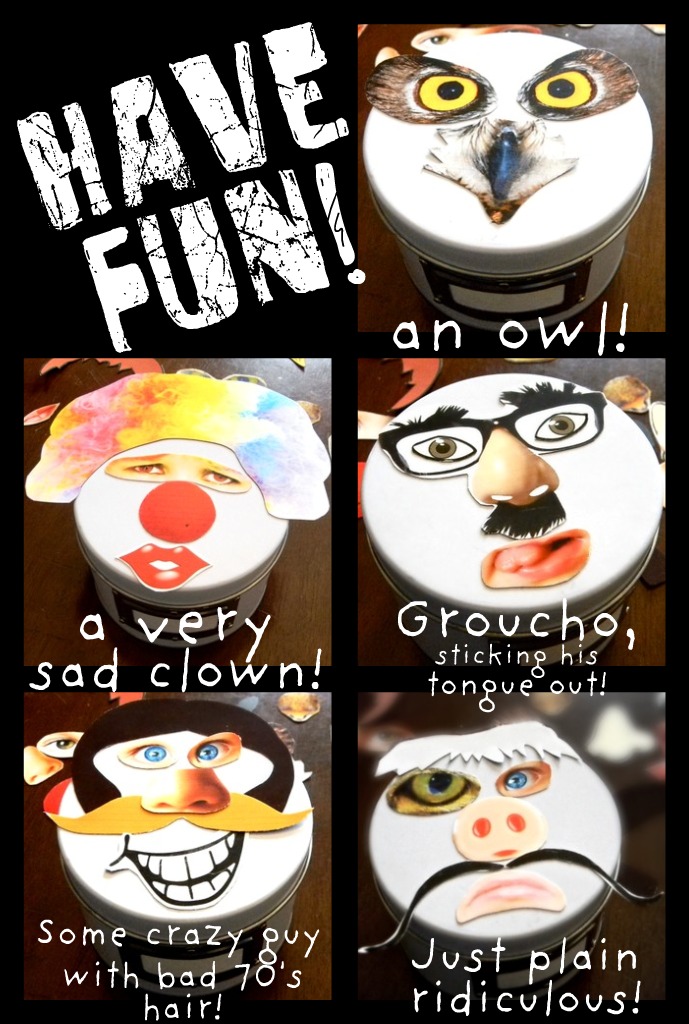
The pieces fit nicely inside the head, er, tin for easy clean up and storage, not to mention extreme travelability. It's small, it's compact, it's fun!
Take that on your next plane ride.

A few tips:
1. I found all of my facial features online simply by searching for different features in Google Images. For instance, "blue eyes" yielded lots of results. You can search for specifics - "funny glasses." Or you can search very generically - "faces." After searching for specific facial features, I realized it was a lot easier to just find full faces I liked and that were proportioned well and then cut them apart to use all the features. Clip-art is another good source.
2. You need to make sure that your facial features are the right size in proportion to the "head." Measure across the head to find the diameter. Then, download the pictures you find to your computer, put them in your software of choice (I used Pages on my mac) and resize them according to the diameter of the tin.
3. Be creative! You can cut out the eyes individually so you can mix up the colors and sizes to make super silly faces, or put them inside glasses frames. Go for animal features as well as humans. Use photos of your own kids!
Tomorrow, I've got some more magnet fun for you!

*Be sure to check just below for all the fun parties I link to!


8 comments:
Love this idea!
Kimberly,
that is a very cute project! Would work for any small child.
Oh, I love it! My son loves Mr. Potato Head and I bet he'd like this just as much. Thanks for stopping by to check out my canvas tutorial. Can't wait to see what you do with it!
Amy @ Living Up
Goodness, Kimberly! This just brilliant. I consider myself very crafty, but I didn't even know you could buy "magnetic sheets". Wow! I'm so doing this for our 9-hour drive to Williamsburg, VA in July. :)
this is soooo cool! i have to make one for myself,...uh,...my KIDS pronto!
awesome :o)
How fun! My kids would love this!
This is AWESOME! I can't wait to try this out! I even have magnetic paper sitting around waiting for this! Thanks for sharing!
Fantastic - I could have my kiddos make these! Thanks
Post a Comment