Tuesday, November 4, 2014

Tough Guy


Do you remember my favorite local photo spot?  The one I take the kids to every year just before school starts for some "new school year" photos?  I did that again this year - the first week of September (when the weather was still nice).  I just barely finished editing my favorites.  It took a lot longer than normal because mr. got me the awesomest birthday present this year - Adobe Lightroom!  Aw, man, I'm excited!  I've been watching tutorials and trying to learn the ins and outs and downloading free presets like mad!  I've still got so far to go, but I'm happy with how these turned out.  And I'm finally ready to share them.
I'm splitting this up into a few posts, though, because honestly, if I put all of them in one it would probably crash your computer and mine trying to load it...

So I thought I'd start with the eldest.


This boy.

This little man who started out as bugaboo.  

This little man who was my first.  Who answered so many prayers and yearnings and heartaches and hopes and dreams.

Who entered my physical world after I knew him for so long as only flutters, bumps and constant movements big and small... after knowing only his heartbeat and outline and stubborn reluctance to be born.  Who entered my physical world and in a gasp and tiny cry flipped everything upside down.

Who changed me.  Who unapologetically, unequivocally, unabashedly changed everything I thought I knew.  About love.  About being a mother.  About myself.

This boy who entered the world so seriously, with such old eyes and so wise a soul that his name changed instantly upon meeting him.  This boy called Ezra.

This boy with his reluctant baby smiles and reserved baby giggles, but his content and good-natured attitude nonetheless.  He, more than anyone and anything else makes me question my world.

Not only because he questions everything himself, searching for answers not easily obtained, but because the very make up of this boy - this serious, earnest, sensitive, inquisitive, brilliant, analytical, literal, boy - is as much a foreign object to me as Saturn or the murky and unattainable depths of bottomless ocean trenches.

He and I, it seems, were not cut from the same cloth.

This logical, stuck in his head, too small for his big ideas and big thinking and big emotions boy.  Our cloth, as they say, is as different as two cloths could be.  Burlap and satin.  Silk and denim.  Chiffon and felt.

But it doesn't really matter, not at all.  Because through the differences and locked horns, the head-scratching and questioning, he's still my first.

And there's something special about that.  About being the first to clutch my heart in a way no one else could.  Being the first to say my calling instead of my name - "mama" instead of "Kim."  Being the first to cry and smile and laugh and hug and reach out for me.  Maybe he feels like a tough guy now.  But he was the first to truly need me.

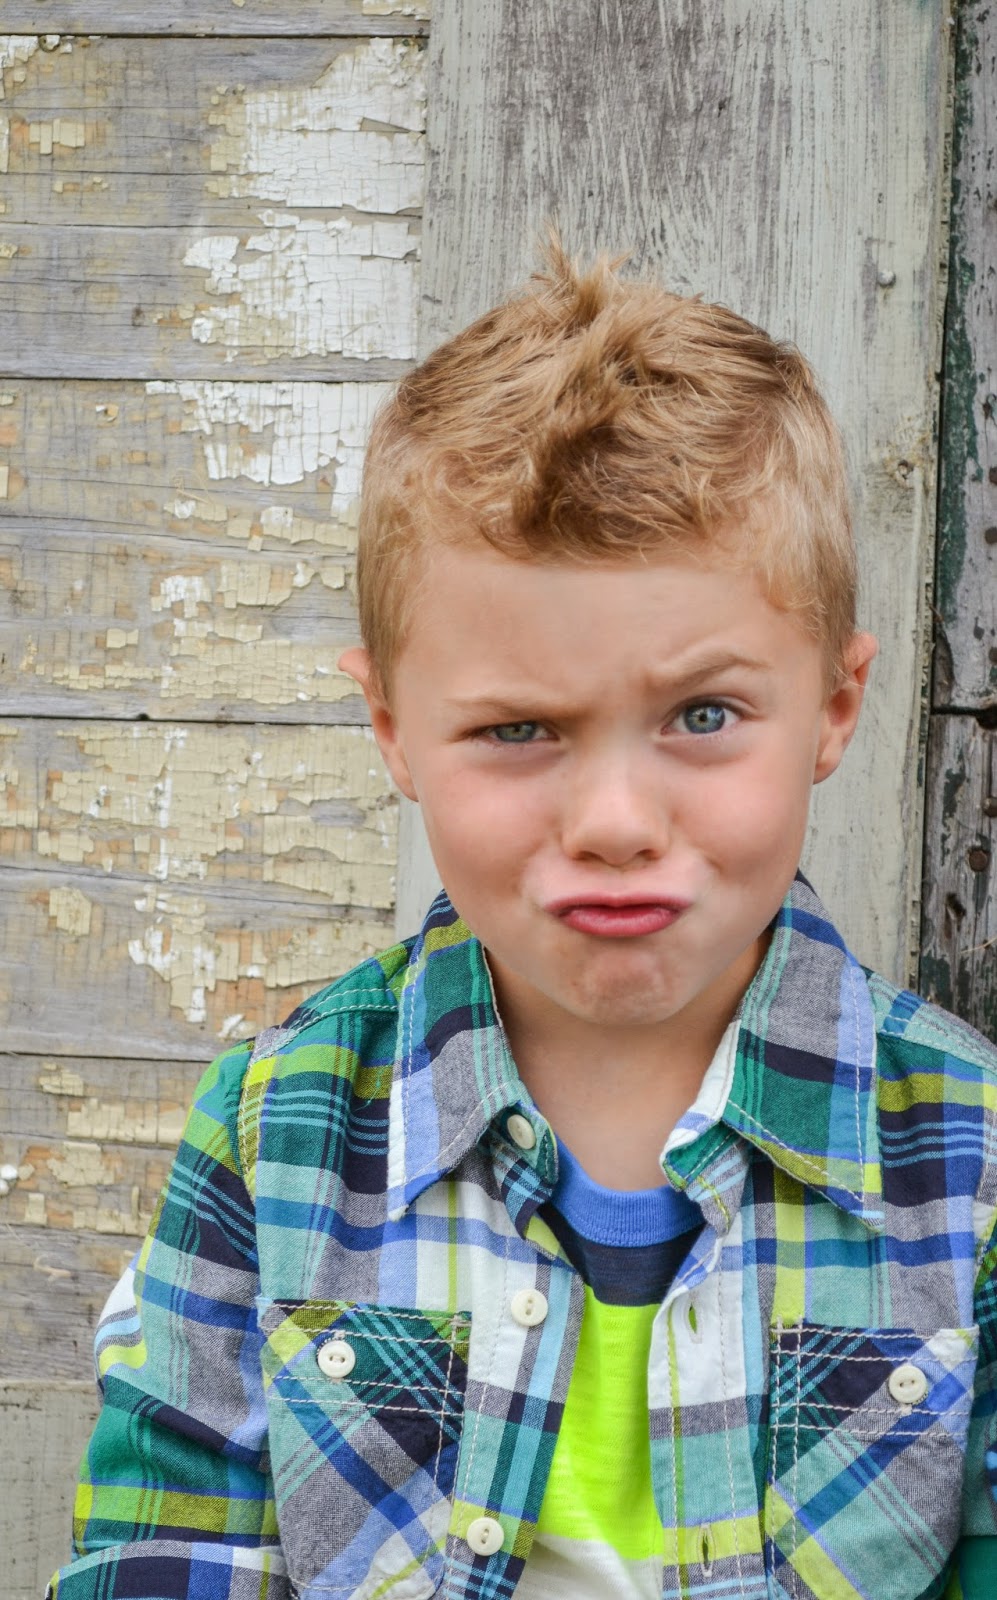
Do you know how difficult it is to coax a smile from this boy?

Nearly impossible, unless you count this goofy, toothy contortion.


But just in case you worry that he's much too serious for his own good,

I captured just enough of that quirky, silly side which emerges every so often to help you rest at ease.  

It appears he IS still a kid after all.  (and this is, by far, my favorite capture of the entire day.)

 For comparison sake, I've included a few pictures from previous years.

When he was, perhaps, a little more quick with his smile.

There's no denying the twinge of sadness I feel when I think of how fleeting and fickle time is.  When you start your family, everyone warns you that "it goes too fast." And you smile in that smug, knowing way, thinking you know it.  

But you don't know it.  Not really.


*Be sure to check below for all the fun parties I link to!*

Monday, November 3, 2014

Let me be perfectly clear.

yummy monday title button photo c41588db-8f15-4de5-90e0-d0ada37b9cd6_zpsf029cce8.jpg

Oooo, am I excited for this yummy monday!  This is the first time in a while I'm sharing an actual meal.  PLUS it's one I really, really, REALLY like.  I mean, I don't usually share recipes I don't like with you, but sometimes there's food that stands out miles beyond the rest, you know?
This meal is one of those.
And, to totally shake things up like crazypants, it's a ground beef recipe, which is fairly uncommon for me. 


You guys.  You will never need another meatball recipe again.  I'm serious.  If I could marry a recipe, this would be it.  It should actually be called

But that didn't seem pin worthy, so I fancied it up.  Would you like to know how good this recipe is?  My kids eat it.
I know - mind blown.

I adapted this recipe from one I found here.
So, here's the printable recipe card for your cookbook:
hawaiian meatballs photo recipecard_zps13117486.jpg


Would you like to hear a little story about the first time I made these meatballs?  Once upon a time there was a lady who made some delicious meatballs to serve over a bed of rice and then realized she had no rice.  So she had to make plain noodles instead and was convinced her dinner would be ruined.

But it wasn't.  It was scrumptious.  The end.

I have since made this recipe two more times (which is when you know you have a real winner) and I DID use rice.  I like it both ways - truly I'm not sure I could pick which I prefer. 

This one's a new family favorite that's already in the regular rotation. But don't just take my word for it.  Really.  Seriously.  In case I've been too cryptic with this post, imagine bright neon lights with starbursts erupting and fancy arrows blinking all pointing to MAKE THIS ONE.

Also, how is it that when I need rice for a special meal I have none, but just now I was looking for a can of tomato soup and noticed I had two GIANT boxes of rice?  Apparently I stocked up without realizing it so the aforementioned travesty would never happen again.


*Be sure to check below for all the fun parties I link to!*

Thursday, October 30, 2014

Domo Arigato: finale


(Robot Costume Part 1: The body)
(Robot Costume Part 2: The helmet and limbs)
(Robot Costume Part 3: The Feet)
(Robot Costume Part 4: Girl Version)


Phew! I thought maybe this tutorial/costume would sit in my to do folder FOREVER.  But today's our last Robot Costume post!  We made it!  

Today I'm showing you how to make just a slightly different version of the robot.  I'll call it:


Girl-ified.  It has all the important elements of the first version - the blinking lights for buttons, the glowing sticks for fuel gauges, the light up ball on top.  But there are a few distinct features... not the least of which is the appearance of several pink buttons because pink is my daughter's favorite.

Now, I'd like to make this disclaimer upfront - yes.  Of course the first version can be for a girl OR boy.  Just like the daughter can be Han Solo and the Dad Princess Leia (did you see that article on Facebook?  So cute.)  BUT my daughter can be sort of a girly girl, and requested a specific girl robot with a TUTU of all things... so, you know, I had to accommodate, right?

If you're daughter is anything like mine, you might find this robot tutu helpful.  SO.

Let me start by saying I first tried to construct a tutu out of strips of duct tape folded together and trimmed in half dangling downward - kind of like the tulle strip tutus you see everywhere but with duct tape.  Fail.  BIG BIG FAIL.  People.  I hate duct tape.  I can not use it.  I am duct tape deficient.  I don't know why.  I like it when other people make stuff with it.  But that tape hates me and has a personal vendetta I will never understand. It was a hot mess, let me tell you, getting stuck to everything, folding in on itself in weird places, taping my fingers together so tightly I almost lost circulation and became fingerless... anyway.  I very quickly scrapped it and moved to plan B.  Which I am glad of, because it looks way cuter.
I did NOT want to spend anymore money - especially after ruining the first costumes.  I needed to use something I had on hand...
I realized I had some screening in the garage that I had purchased for a different project loooooong ago.  It's the same stuff in your windows - very flexible, almost like a thick fabric, but still metal looking.  

So for the robot tutu you'll need:
Window Screening (comes in a roll)
Silver duct tape (grumble, grumble)
Silver or gray embroidery floss
Needle
Silver ribbon
A scissors

Start by cutting three pieces of screen.  You can use more if you'd like, but I used three and it worked well.  If there are too many layers it'll be so thick it won't lay right.  
Measure around your girl's waist.  Now add 1/2 that or double it (depending on how "ruffly" you want it).
Cut your first screen piece that width and the entire length you want it to be - I made mine knee length on my 2 year old.
Cut the second piece the same width and about 2-3 inches shorter.
Cut the third piece the same width and about 2-3 inches short than the second.

Now, lay them all together, flat, and line up top edge.
(again, sorry for these old crappy photos.)

1. Using your needle and your embroidery floss, hand sew a basting stitch across the top edge of the tutu.  Be sure to go through every layer of screen.  Make your stitches nice and long and you can leave about 2 inches between them.
2. When you've gone across the whole width, leave a long tail on both sides and pull your needle free.  Hold tightly to one end of the embroidery floss and pull the other end, gathering the screen.
3. Gather the screen to the waist measurement and tie some quadruple knots in both ends of the floss so it doesn't come ungathered.
4. Lay a long strip of duct tape flat with the sticky side up.  It needs to be the same width as the tutu plus about 4 inches.
5. Lay your tutu with the gathered top edge on the duct tape strip.  Make sure it is centered with about 2 inches of duct tape extending on either side.
6. Cut two pieces of silver ribbon no shorter than 12 inches each.  It needs to be long enough to tie in a bow with a double knot, so keep that in mind when cutting them.  Lay one ribbon piece on the duct tape ends that extend past the tutu.
7. Cut another strip of duct tape the same length as the first strip and lay it sticky side down over the screen tutu, sandwiching the gathered edge of the tutu between.
8. Make sure to press the two strips of tape tightly together at the ends, sandwiching the ribbon between.

And that's it!  Now all you have to do is wrap it around the girly robot and tie in a bow!

Here are some awful photos that give you an idea:

I loved it.  mini thought it was awesome.  We liked it so much I made two mini ruffles for her wrists using the same method.  You can see them in this photo:

Here are the rest of the details:
1. I bought a bit of silver spandex fabric online to make her some tights.  They were cute, but not super stretchy and she was FREEZING and ended up having to wear leggings OVER them, so you can't even tell they are there.  Shame.  I think the idea is still cute.  You can use the baby tights tutorial from Made By Rae.  
2. I got this... I don't know... alien headband maybe?  Somewhere... I think the party store? It was a buck.  I loved the shiny silver balls on top.  But the headband was green - weird.  So I covered it with the shiny silver duct tape.  Then I used the same method to attach a ping pong ball over a battery operated tea light as I did for bug's helmet so that the ping pong ball would glow.  I used velcro once again so I could turn it on and off.
3. I wanted the girl robot to have hair instead of a helmet head, so when I saw the silver tinsel wig at the party store for 1.50 I snatched it!  It was adult size so I simply took some elastic and sewed it around the back half of the cap while stretching it so it cinched up the cap that fits over the head.  It worked fairly well, though mini was NOT excited about the itchy wig.

Also, she had shiny silver dress shoes already, so she just wore those.

And that's that!


The robots were a hit everywhere they went.  I was excited that I was able to pull it off.

As a side note, we try to dress up as a family for our church party, usually.  So mr. and I wracked our brains to come up with a scientist duo that would have created robots.  And this is what we came up with:

Can you tell who we are?  People usually couldn't until Justin started saying, "me me me me me me me." In a really high voice...

Our inspiration photo:
via
So maybe I couldn't pull out two awesome muppet costumes in 2 hours, but at least he's got the green shirt, brown tie, and orange hair and I've got the red tie, glasses, and skull cap for the bald head.  And the lab coats - which are admittedly the wrong colors but were the closest we could come on no budget or time.  I think we did alright.

Besides.  The robots are the important part, amiright?


*Be sure to check below for all the fun parties I link to!*

Wednesday, October 29, 2014

Domo Arigato, Part 3

I fully intended but neglected to give a how-to for the robot shoes mentioned in the first tutorial for the robot costume.  Remember this?

"Middle picture: These pieces are for "robot shoes".  Two rectangles with a small curve for the ankle, 4 skinny rectangles for the sides of the shoes, 4 small rectangles for the fronts and backs."

You can see the shoes here:

and here:


Here are the measurements I provided in part 1:  (Ignore the top and bottom pictures as we've already covered that)
FOR 4-6 USE A SHOE to measure, NOT A FOOT.  These are made to wear OVER SHOES.
Piece 4. G - from left side of shoe to right side - straight, not curved. Add a half inch.
              H - from heel to toe. Add a half inch.  For the curve - center it and cut enough for
                    ankle to comfortably fit through.
Piece 5. I - from top of shoe to bottom of sole.  Add 1/4 inch - 1/2 inch.
              J - from heel to toe. Add a half inch.
Piece 6. K - from top of heel to bottom of sole.  Add 1/4 inch - 1/2 inch.  (should be the 
                    same as I)
              L - from left side of shoe to right side - as with G above - then Add AN INCH.

Remember to use a shoe for your measurements as these will be slipcovers for your kid's normal tennis shoes.

I don't have a photo tutorial for this, but it works basically like this graphic I created:


1. Take your back piece (piece 6 above) and cut it in half the short way.
2. Sew the piece you just cut and the other piece 6 (the front) to the top piece, or piece 4 above.  Sew the cut piece 6 to the edge with the curve cut out of it (one half on either side of the curve) and the whole piece 6 to the opposite side.  Make sure you sew them with right sides together, and when you open it flat, it will look like the picture to the right of the arrow.
3. Now take your two piece 5's and sew them to the long sides of piece 4, right sides together.  When you open it flat, it will look as it does to the right of the arrow.
4. NOW.  Line up the corners to sew them.  Line up the yellow edge of piece 5 to the yellow edge of piece 6 and sew, the red edge of 5 to the red edge of 6 and sew, the purple edge of 5 to the purple edge of 6 and the orange edge of 5 to the orange edge of 6.  Make sure that you line the edges RIGHT SIDES TOGETHER.  Trim the corners and flip it the right way.  You will have a flat box shape with no bottom.
5. Hot glue velcro to the back - put the rough side on the right side of the fabric on one half and the fuzzy side on the wrong side of the fabric on the other half.  This way, you can easily open and close them around the tennis shoe.  

And that's that!


After you sew them you'll want to spray paint them the same silver as the rest of the costume.  And remember my word of warning about spray paint!  NOT ENAMEL!

I've got one more robot-related post and then we're done!


*Be sure to check below for all the fun parties I link to!*

Tuesday, October 28, 2014

Domo Arigato Part 2: helmet and limbs

(Robot Costume Part 1: the robot body)
(Robot Costume Part 2: the helmet & limbs)
(Robot Costume Part 3: the Feet)
(Robot Costume Part 4: Girl Version)


Last week I let you in on my best kept secret - i.e. the tutorial I never wrote.  This robot costume of mine was a hit with the kids and furthermore, I made it so large on them they actually still fit.  We busted it out this year (two years later...) for bug's school dance since this year's costume wasn't done at the time. All the lights still worked and he was still just as psyched about it.

So today, I'm going to share how to make a very easy robot helmet to go with your robot costume.  Plus, I'll talk a little about a few other details as well.

For the helmet you need:
A large plastic container
A serrated or electric knife
batting
silver fabric
ping pong balls in a few colors
a battery operated tea light
velcro
a mason jar ring and lid
hot glue gun

Step 1 (not pictured): buy a large container of gross cheese balls - much larger than you would ever buy (especially since you never buy gross cheese balls anyway) - just for the circular plastic container.  Put all the cheese balls in ziploc bags - it will likely take 3 extra large ones.  Wash the cheese ball container so your kid doesn't get fake cheese powder in his hair.  


2. Use a knife to cut the top off of the container.
3. Place it on your child's head and measure about how tall it needs to be.  Chop off a few more inches to the right measurement.
4.  Cut a window (rounded rectangle) out of the front of the helmet.  Fortunately, this gets rid of the label so you don't have to worry about that.
5. Use hot glue to cover the inside and outside with batting.  Make sure to glue it over the cut edges. This will make the helmet look bulkier and also protect the head and face from the jagged plastic.

Note: I should add that using a serrated knife did work, but it was a pain in the patootie.  A think an electric knife would work better.


6. Use your glue gun to "upholster" the entire helmet with silver fabric.  I cut a circle for the top and glue that on first, making sure it extended over the edge.  Then I glued a large rectangle around the bucket overlapping the edge of the top circle fabric, cut out the window and glued the fabric around the edges.  I didn't have enough fabric to line the inside of the helmet, but that's a good idea too.
7. Glue two ping pong balls to the sides of the head.
8.  To add some height and some layering/texture, I glued a mason jar ring and lid to the top center.
9. Take a ping pong ball and cut or poke a hole in it (I used a screw driver).  Slide this over the tea light.  To make the tea light removable so you can turn it on and off or change the batteries, hot glue velcro to the bottom of the tea light and to the middle of the jar lid so it velcros on and off.
10. Eat a gazillion gross cheese balls until you just.can't.  Then make your kids eat them.  When there's still an entire large ziploc bag left 9 months later (because these thing NEVER DIE) toss em.  

Note: To make the tea light silver instead of white, you could spray paint it first.  I tried craft paint which was a fail, so I hot glue some fabric around the sides, leaving the top and bottom free and that worked well too.

Now, just slide it over the head!  It simply rests on the shoulders, and though it's much larger than needed and slides a bit when he moves, it stays on well enough for trick or treating and such!  Just remember to turn the light on so the ping pong ball on top will light up!

About the arms and legs:
We used dryer vents for the arms and legs and they looked awesome (though they did take a beating and would need to be replaced if you use this costume for multiple years.)

In a home improvement store, you'll find the dryer vents near the appliances (duh).  They are quite long and you'll likely need to only buy one for all four limbs.  They come in different diameters, and I selected the largest available in order for bugs feet to fit through well.  Even though we got them bigger then technically needed, they were still a bit of a struggle to pull on over a bulky sweatsuit - though not too bad - and they were snug enough to simply cover the arm and leg without needing to be sewn, pinned or glued which was really fortunate since I'm not sure how well that would have worked!

Just hold them next to the limb in question and cut about two inches longer (for human error while cutting).  Cut them to size with a tin snips or a heavy duty shears will probably work as well.  Once you've cut them, fold the jagged edge over and cover just the edge with duct tape to protect from cuts.


Few more how-to's and the costume will be complete!


*Be sure to check below for all the fun parties I link to!*
Related Posts Plugin for WordPress, Blogger...