Don't forget to link to the ATW snapshot linky party!
Well, you may have missed it (though I don't know how!) but I guest tutorialed (Yeah, I just use tutorial as a verb AND conjugated it to past tense...) at Kitty Cats and Airplanes lsat Monday while she was on vacation.
And considering I am now currently on vacation (and speaking to you from the distant past... ooooo....) I thought it would be the perfect time to re-post it here, for those of you who didn't click over. And this post, like the others of recent times, has to do with travel.
I present:
Now, before we begin our tutorial, in the interest of full disclosure, I admit to purchasing my little wooden desk-like object at a thrift store many moons ago. I did not construct it. I know what you're thinking. Did she just use the phrase "many moons ago"? I did.
Also, you are probably thinking you won't be able to find a little desk-y thing like this. I encourage you to try. Hunt the thrift stores, look behind the good stuff, raid your grandparents' attic, check the dumpsters, whatever it takes. But, in the off-chance you aren't able to locate a beauty of this nature, I have provided you with the measurements for every board along with a plethora of pictures. My hope is that you will be able to use the information to piece together a blueprint and screw together (or nail, but I don't trust those, for obvious reasons) your own wooden structure. Much like this one:
Which I got for only $1! Not to rub it in or anything...
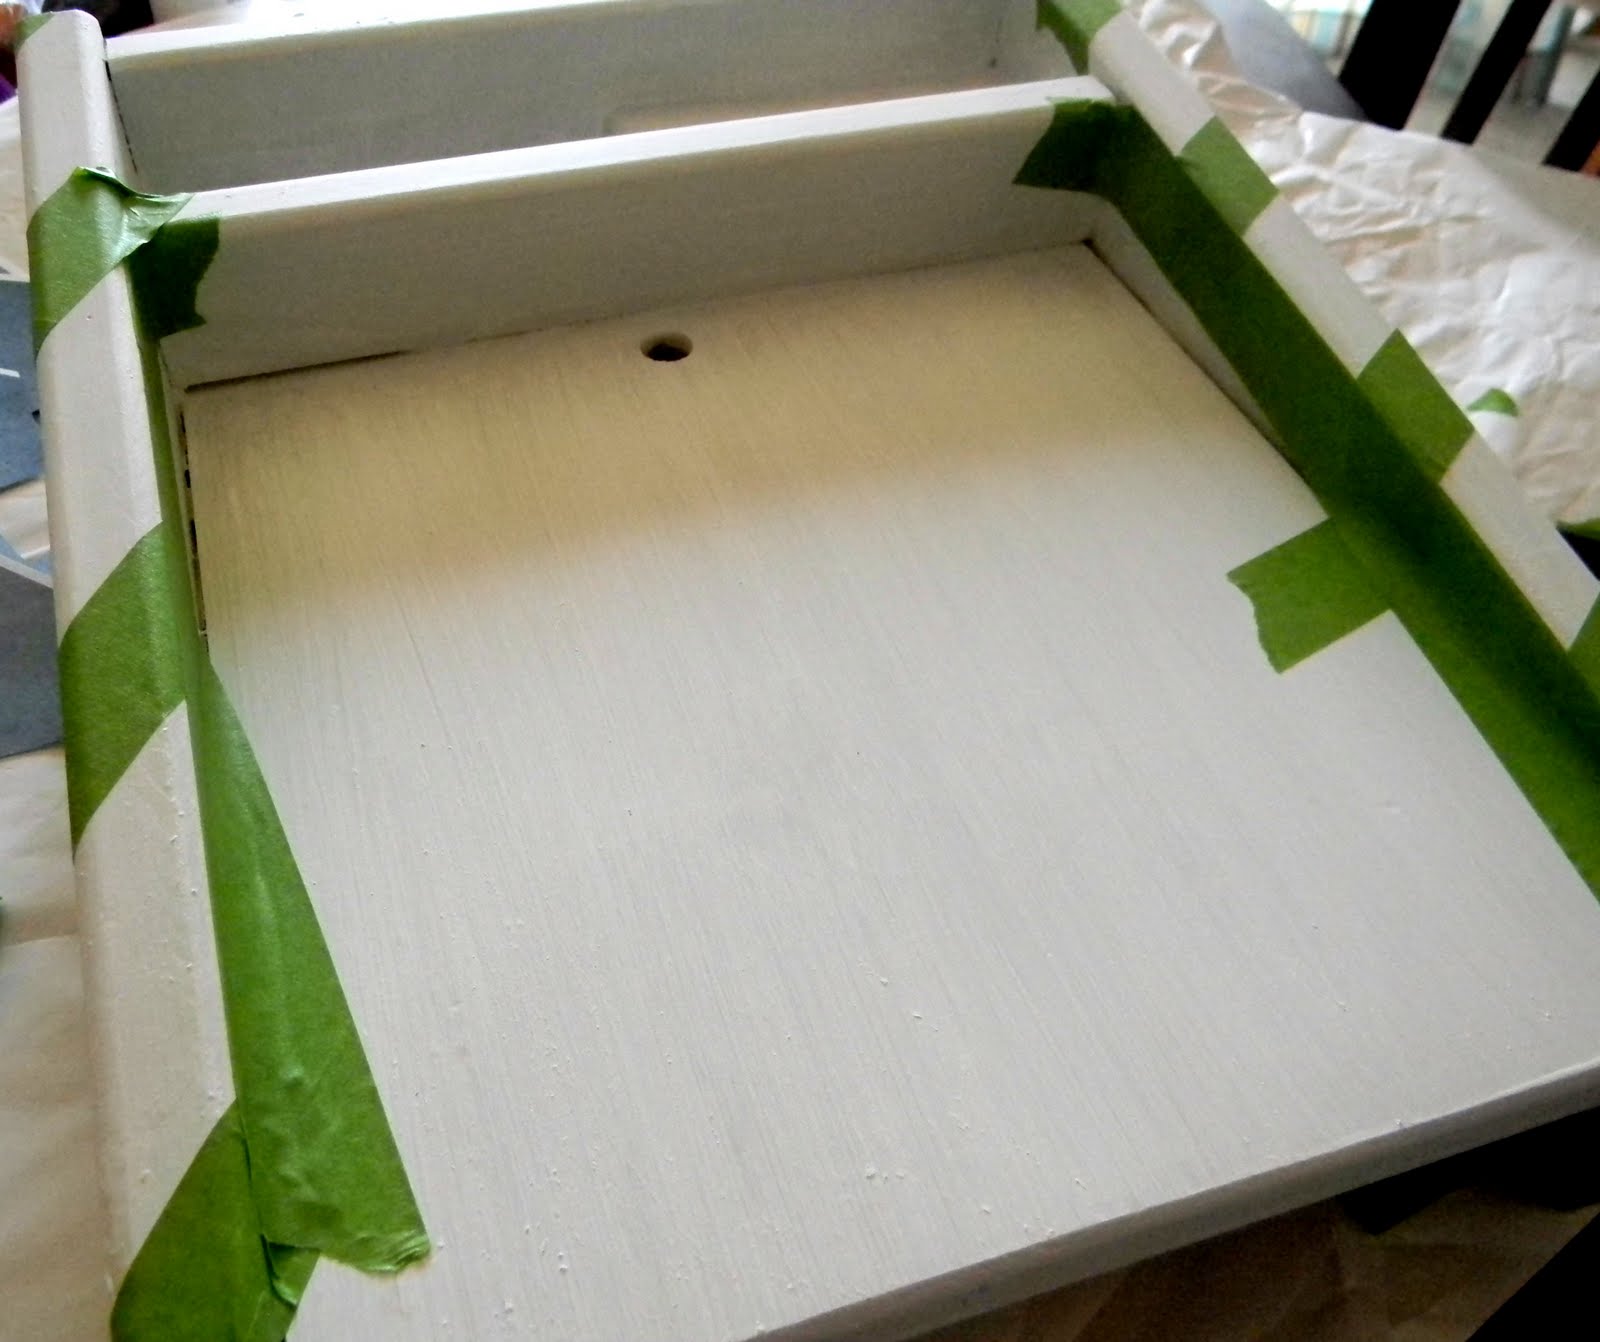
Ok. The two side pieces are trapezoidal. They are both 12.5 inches long on TOP, 12 inches long on BOTTOM, 5 inches long on BACK, and 3 inches long on FRONT.
The large rectangle that provides the desk like surface was measured from the underside to get the correct dimensions (it looks like a square when right side up). This piece is 9 inches by 11 inches.
The back piece is 9 inches long by 5 inches high.
There is a skinny piece on top of the writing surface which separates the surface from the storage compartments. This skinny rectangle is 1.5 inches by 9 inches.
And the final piece is a small rectangular block in the corner of the storage compartment area. It is 4.5 inches by 1 and 3/4 inches. It also has three holes drilled into it at an angle.
The hole you see in the writing surface is not important. But to follow the tutorial, you will need to drill the hole in the back piece. It's directly in the center.
Hopefully that's enough info to help you make your wooden desk.
Now we're going to make it REALLY cool.
Start off by spraying it with a spray primer.
When it's dry, paint it with white paint - either acrylic or spray. I used acrylic because I was pretty positive my skills as a spray paint artist do not include all those weird angles and pockets.
When I was done with the first coat, I noticed all these little staple holes where it was put together.
So I filled them with spackle. Wood putty would also work. You'll want to do this to your nail or screw holes.
Then slather on two more coats of white paint, letting it dry in between.
Now, decide on a cool design. I decided to try out my first ever chevron. Because I wanted to jump on that bandwagon. I just cut out a wide zig zag from card stock,
and used Frog Tape to outline it.
The Frog Tape is very important. We will never use blue painters' tape in our house again - it's Frog Tape or nothing. This stuff has what I call a "super seal" but it comes off remarkably easily. Now, as you'll see in a moment, my painting skills really don't do this tape justice. (Yes, Frog Tape, I'll take my 50 cents now. Just kidding. Not compensated. Just love it.)
Moving on. You'll tape the outline of the card stock zig zag, just moving the zigzag stencil and lining it up with the previous tape marks.
Tape off any area you don't want painted with your contrasting paint color,
and paint away!
Remove the tape while the paint is still tacky. Or you'll be sorry. Here're the front and side:
And the back and underside:
So, back to the problematic smudging that occured on my project. I want to stress the need to REALLY press into those intersections - the areas two places of tape meet to create a corner. Push! Push!
When all the tape is off, and all areas are touched up, use some kind of sealer or polyurethane all over it. Notice this is from the makers of my true love. That was a happy discovery.
Now, while that's drying, take a large piece of foam. This stuff has seen better days, but it was free.
Measure the size of the bottom, or underside, of the desk. Actually, I've done that for you. It's 9x11, remember? So cut that out of foam.
And cut a large enough piece of heavy-ish weight fabric to cover the foam.
Spray the front side of the foam with spray adhesive.
Push down in the middle of the fabric, smoothing out any wrinkles.
And wrap that foam up just like a present.
Fold the fabric, spraying adhesive on the foam bit by bit as you go.
See the ends, all present-like?
Set that aside for now.
Break out that old chalkboard paint you bought for a project like two years ago before it was even cool - I know I'm not the only one, come on...
And give the writing surface a good coat.
While you're waiting for that to dry, cut three long strips out of your fabric.
Holding them all by one end, stuff them through the little hole in the back of the desk.
I had to use a screwdriver.
Once they're through, tie a knot.
Then, cut each strip into three skinny pieces, and braid each one. Tie a small strip of fabric around the end of the braid to secure it. You'll end up with three cute little frayed braids. This braiding bit is totally optional, by the way. You could use ribbon or yarn or something.
Attach three pencils - one to each braid. I just used spray adhesive and wrapped the braid ends around the metal part of the pencils.
Once your chalkboard paint is dry, you can attach your clip. I used this large metal magnetized clip. It was the only heavy duty clip I could find with a flat bottom.
Spread E6000 on the bottom.
And smoosh it right down at the top of the writing surface, in the middle.
Ooooo, I totally just had a great idea. If you used magnetic paint UNDER the chalkboard paint, you could not only remove the clip if you wanted to, but you could play with letter and shape magnets and stuff on the desk as well! Too bad I didn't think of that a few weeks ago.
So, dress it up with a sticker, or like I did, some gray houndstooth paper punched out in a circle and spray-adhesived on.
Now, flip your desk over and spray the underside with spray adhesive.
Press your foam down, hard. Smoosh down all over that thing. Smooth out the wrinkles.
And you all know this little trick right? When you use chalkboard paint, you are supposed to color all over it in different directions with chalk, then erase and repeat. This is supposed to keep the paint from having chalk memory. (You know, your initial marks won't be permanent.)
Add your chalk to the little storage compartment,
then cut a little piece of foam and tuck it in for an eraser.
Stick your pencils in the little angled holes.
And you're done!
A pint-sized desk that's ready to travel with you! Complete with a foamy bottom for ultimate comfort.
And if you drop those pencils, don't worry! They aren't lost forever!
What's that clip for, you ask? Why, paper, of course!
Everything little hands need to doodle their day away within easy reach.
Kid tested,
kid approved.
*Be sure to check just below for all the fun parties I link to!