Showing posts with label a*chemist*in*the*kitchen. Show all posts

Monday, August 19, 2013

Big Rock Candy... er, kit...


I wracked my brain trying to think of some fun food gifts that hadn't been done to death - no sense kicking a dead horse, right? - and had a bit of trouble.  There are your typical home baked cookies wrapped in a jar.  There are your average pinata cakes.  And lots of freezer meal gifts for new moms or bad turns or recovery times.  It didn't help that for some reason I'm really on a "kid gift" kick right now and couldn't seem to turn it off... and what kind of food could you make for a gift for a kid??  I mean, what kid wants FOOD instead of a toy...

UNLESS...

Unless it's candy!  And what if it was DIY candy the kid could make himself?  Well, then the wheels started turning... 

I wish I'd thought of this in time for my nephew's birthday, I think he would have loved it.  As it is, I'm going to have to hope a birthday invitation comes soon!

So, you want to throw together a DIY Rock Candy Kit?  It's pretty easy!


Let's start the whole shebang by making the cute little sticks, shall we?


I got the skewers and beads at Walmart.  (I have to say I LOVE these wooden beads!  I think I need to buy some more and do some kind of cool jewelry...)  The Skewers fit really snugly in the beads, so the glue is mostly just formality.


I made sure to color the sticks to match the 6 cups.

You could tie them together with twine, too.  I just liked the bags, since it seemed the easiest way to keep all the elements separate... (I mean, you can't really tie the tiny food coloring tubes with twine, right?)

Next, just grab some clothespins - I kept mine plain, but you could paint yours or fancy them up with matching washi tape or something. 

And though I missed taking a picture of this, you also want to put the food coloring in a bag, too.  I picked out three colors to match, put some tape around the lids to make sure they didn't accidentally pop off (THAT would be a mess...) and put all three in the same transparent bag, tucking and taping as above.

NOW.  Let's start putting it all together!  Start with the little instruction card.  The ribbon in the corner is obviously optional, but I couldn't resist.  I'm adding ribbon to everything lately. I highly recommend printing this out on cardstock, not plain paper.
Once you're done with that, all that's left to make is the tag.  I created a tag to match my kit on the computer and printed it on cardstock.  Since it was a little circle, I decided to make a front and back.  Here's how I put it together:

And then I just looped it around the handle of the bucket and pulled tight.  Ta-da!

Now, just pack everything in nicely.  (Another cool idea would be to buy a jar or bucket large enough to fit EVERYTHING inside of it, including an entire bag of sugar.  Like a giant glass cookie jar or something.  Then it's all totally contained with a lid and everything.)

Here are the instructions for the rock candy, all in a nice little printable so you don't have to make one yourself.  The first matches the kit I made and the second is gray and black, since I have no idea what color kit YOU'LL be making.  You can click and print right from the internet OR, if you need to resize them, save them to your computer with a right click.  Might I also suggest covering them with contact paper or laminating them?  Then they won't get gross and sticky with all the sugar water around.


Now you're wondering if I made you some printable tags aren't you?  Just to make it super easy on you, right?  Well, of course I did!  (And it was fun, too!  I think the chalkboard-esque ones are my favorite).

You can use the circle ones as two different tags, or a front and a back.  Just right click to download, use the program of your choice to resize to your liking, then print!

I would like to point out that YES, I have used this "recipe"? "technique"? before and it worked!  This was for mini's birthday party last year:

Perfect for the budding scientist (you could even include a little scientific explanation on the back of the How To page) OR the little sweet tooth (I mean, what kid DOESN'T love sugar water?)

Plus, since this is for someone else's child, you won't have to deal with the rush OR the crash.  Phew!


ALSO:


There's another kid gift idea for you tomorrow!  And it's another easy one!  We love easy!


*Be sure to check the right sidebar for all the fun parties I link to!

Thursday, March 10, 2011

A Chemist in the Kitchen: What is Basic?

Well, we've just had all kinds of exciting things going on here at bugaboo, mini, mr & me!  First, there's the whole SYTYC thing (eeeek!).  And I hit 300.  Then I had my blogiversary... and later this month I've got something super duper fun coming!  

And today?  Today I have for you, the very first installment of:

That's right!  Back at the beginning of the year, I had a little preview of things to come.  I mentioned I wanted to start an ongoing series called "A Chemist in the Kitchen" where mr takes you on all kinds of experimental adventures with items you can find around the house (or easily located at a normal store).  My purpose in this is two-fold.  First, I love that it combines mr's passion - chemistry - and my passion - creativity.  Plus it draws him into my blog, and it's always cool to share the same interests.  SECONDLY - I want to share fun, easy to accomplish, LEARNING activities that you can do with your kiddos.  

And so, I present to you:  The feet on the ground to my head in the clouds... the cerebral to my visceral... the logic to my illogic... the chemical to my theatrical:

mr!  Take it away, mr:


This is a fun and accessible science experiment for all members of the family.  It uses fun color changes to learn about all kinds of every-day substances.  All you need is a red cabbage and whatever you'd like to test.

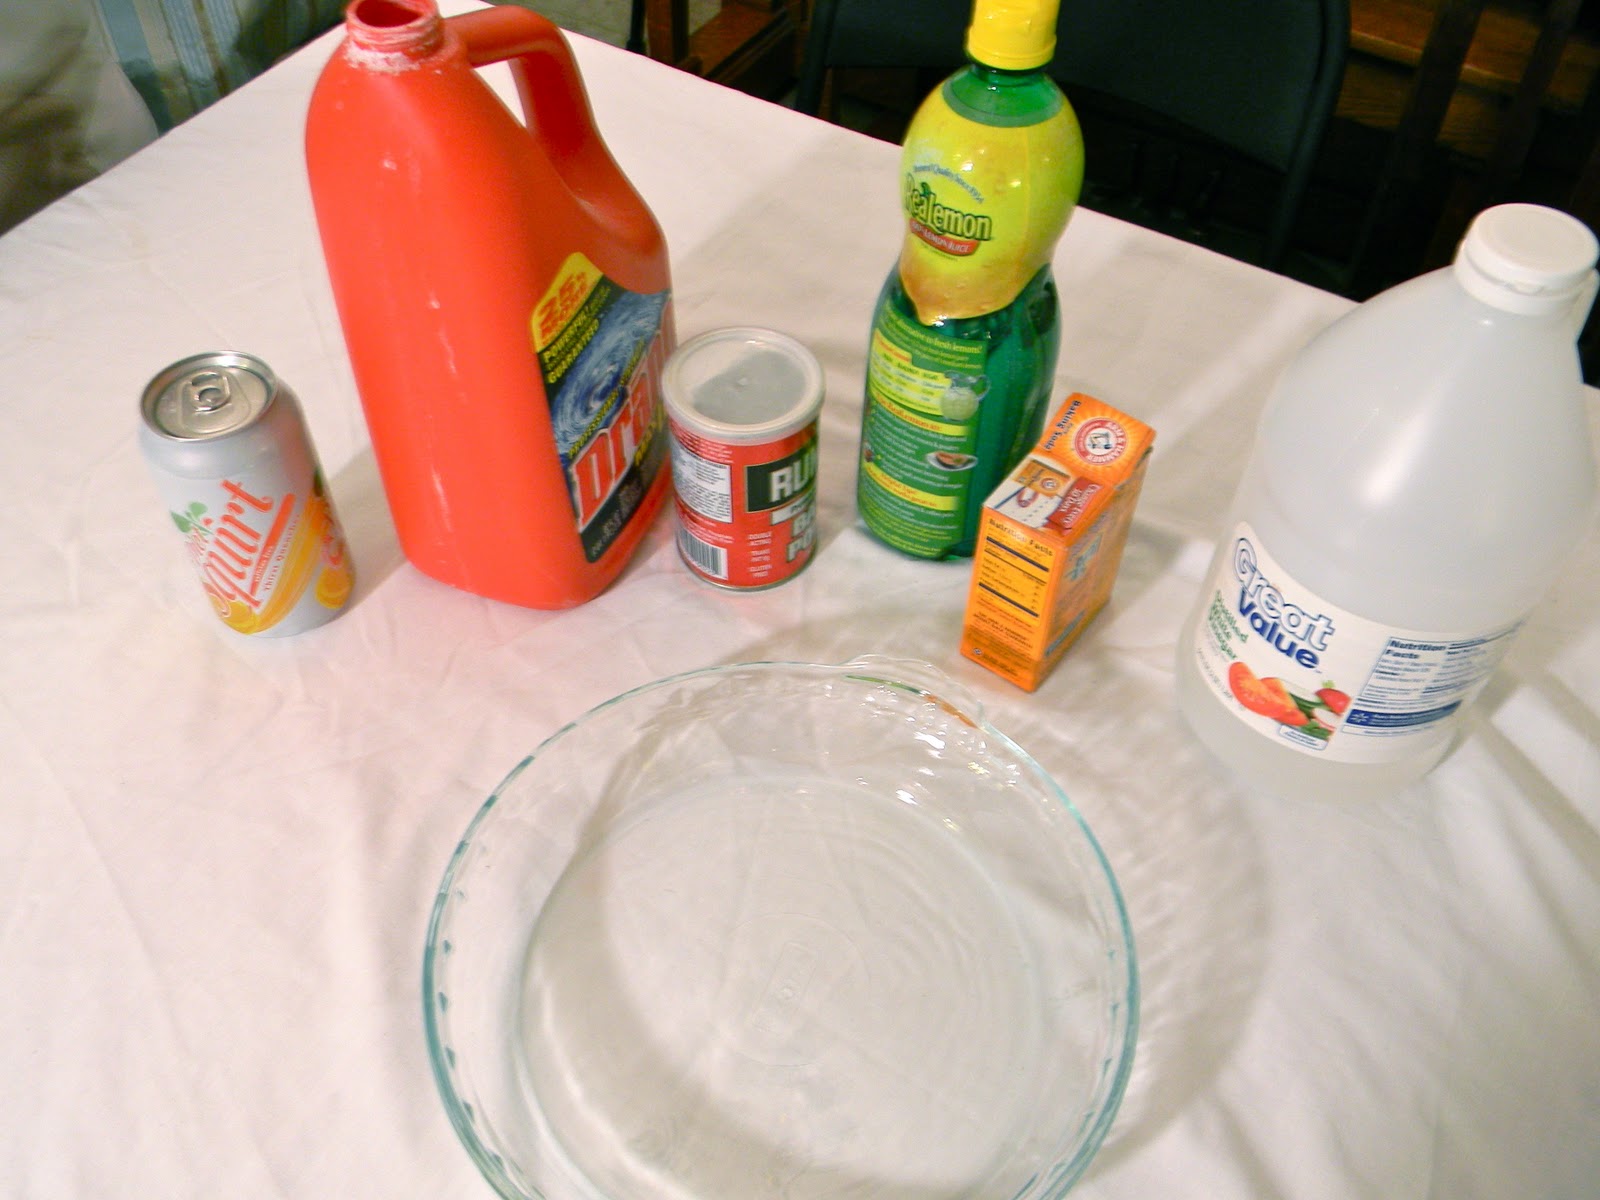
We gathered a nice range of liquids and powders: soda, drano, baking powder, lemon juice, baking soda, and vinegar.

We had red cabbage for dinner, so we saved the cabbage juice that was left over after cooking.  If you don't plan on having a meal with cabbage, you can simply chop up a head of  cabbage and boil it until the water is dark red/purple.  One thing to keep in mind is that if you add anything like vinegar when cooking the cabbage (like we did) it can have an effect on the experiment (it will still work, but the colors will be somewhat different).

You'll need a dish to perform the experiment in.  We used this transparent pie dish to make it easy to photograph, but an empty ice cube tray may work better.  Whatever you use, make several puddles of the cabbage juice to test with.

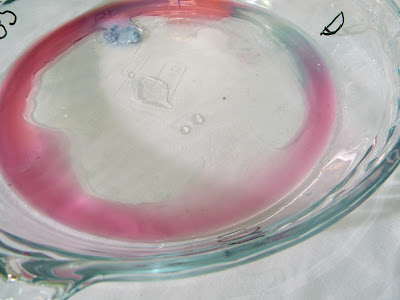
We used a dry-erase marker to show which puddle we'll use to test each substance.

First up was baking powder.  Simply spoon or pour each substance in or near the cabbage juice and mix.  Note any color changes.

Baking powder turned a blue/purple color.

The lemon juice turned the cabbage juice into a lighter orange/pink color.

Drano turned into a blue/green color.  Parts of the liquid actually turned colorless, which is probably because drano contains bleach and is unrelated to the other color changes in the experiment.

Its hard to see in this picture, but in the bottom right of the dish is where we mixed soda and cabbage juice.  The color change was slight, but it did make the liquid lighter.


The vinegar turned the cabbage juice into a lighter pink.


Finally, the baking soda mixture turned a dark purple color.

Can you guess what was happening in the experiment?  Lets recap.  Three substances turned the juice a lighter color: lemon juice, soda, and vinegar.  The other three turned the mixture darker: baking powder, drano, and baking soda.  If you guessed that this experiment tests for acids and bases, you're right!  

Acids and bases are common chemicals that we use every day.  Acids and bases are essentially chemical opposites, but they can both be very useful or very dangerous depending on how concentrated they are.  These chemicals are measured on the pH scale where low numbers are very acidic (our stomachs have a pH of 2), 7 is neutral, and higher numbers are basic.

There are a number of chemicals that change color when they react with acids and basis.  These chemicals are called indicators and cabbage juice has a naturally occurring indicator.  Litmus strips are small strips of paper treated with an indicator.  We just happen to have some litmus strips, so we tested our chemicals with them too.

The litmus strips gave similar results to the cabbage juice.  In order of most acidic to most basic: lemon juice, vinegar, soda, baking powder, baking soda, drano.

Although some chemicals need to be treated with caution (drano), this is a great hands-on experiment for kids.  They can mix the powders and liquids and see what happens.  Its fun and colorful and easy to do.  You really don't need to know much about the chemistry behind it, although learning about that can be fun too (check out this link for more info about the experiment).


*Be sure to check just below for all the fun parties I link to!
Related Posts Plugin for WordPress, Blogger...