Monday, December 26, 2011


Hope you had a wonderful Christmas, all!  (Or are still having... if you tend to drag the celebration out as we do around here...)  I love Christmas time.  I only wish it had been white like this.
I admit I like the snow on Christmas much more than in late April, which is when this photo was taken.
Just a quick note to let you know I'll be taking a brief break from this blogging gig - not by choice, mind you, but the specialist I saw (kind of)  (ha ha)  is "strongly discouraging" computer use for a while...


And since I'd like my eyes to get back to normal as quickly as possible, I think I'll have to listen to him.  I decided this while trying - unsuccessfully - to thread my sewing machine.


Plus, the major downside to blogging while temporarily vision impaired is that I can't for the life of me tell if I'm showing you blurry pictures or not.  That's crummy.


I'll see you in a week or so.  ("See you"... fingers crossed...)


*Be sure to check just below for all the fun parties I link to!

Saturday, December 24, 2011

It's a(n easy) wrap.


I know this idea is nothing new to you, but don't you love that whole "paper bag/twine" wrapping craze going on?  How easy can you get, right?  (And let's face it, the cheapness factor really helps, too.)  


So even though you're aware of it, and have probably pinned it, like I have (here, for instance), I'm going to show you how we wrapped bug's teacher gifts.


But not step by step.  That's just redundant and insulting to you, right?


Anyway, we shoved the gift in the little lunch bag, folded the top over once, than folded it down a lot more, laid the tag over it, punched two holes, threaded the twine through (twice), added the tag through one hole, and tied in a bow.  Done.


His teachers were all impressed by how cute they were.  I had started to feel a little self-conscious when bug was giving them his little bags, because the other kids were giving their offerings of store bought goody bags full of candy and yummies or expensive-looking, amazing smelling decorative candles... and then there's this little lunch bag.  But as the other kids and parents filtered out, the teachers turned their attentions to our small offering and raved about the cleverness of the wrapping.


And what was inside?  These.  In all different colors.  Five of them for five teachers.  I think they liked that even more than the wrapping.


Oh, and do you like the tags?  I did that all in pages on my mac.  I was pretty excited that they looked cute even without a cool program like photoshop.  So, here you go!  If you want to use them tomorrow.  Or next year.  (It's a jpeg.  Just download and you can resize if you need to.)


Merry Christmas!  I do wish you all love, fun, family, friends, and a wonderful holiday in general, to everyone!  If you, like me, celebrate this Christmas with a reverence and love for Christ, you might be interested in this video.


Or this one.


*Be sure to check just below for all the fun parties I link to!

Friday, December 23, 2011

More Easy Shmeezy Ideas for Procrastinators.


Need a few more easy ideas that don't take much time?  Really waiting until the last possible second here, aren't you??  Well, here are a few oldies but goodies for you, all in one place.


(Or you could make it in bookmark form, as the Stay-Put Bookmarks shown here)


The only stipulation is that you are SOOOO not allowed to comment on the horrible photography from my past.  Come on, obviously I feel silly enough already.


Good luck.  And Merry Christmas.


*Be sure to check just below for all the fun parties I link to!

Thursday, December 22, 2011

Easy Shmeezy Last Minute Gifts (for PROcrastinators and forgetors alike)


I know it seems like everyone in the craft blog world has been ready for Christmas since September.  And maybe that really is the case, but I have to say I sincerely hope not.  Not that there's anything wrong with that, I'd just hate to be the only one who is STILL not finished.  And by not finished I mean: not finished making gifts, not finished baking, not even finished decorating...


Although I have been playing Christmas music since November, so that counts, right?


Anyway, if you, like me are a professional procrastinator (remember this?) OR if you, like me, always remember that one last someone that your brain somehow filtered out of the gift giving list, I've got some easy shmeezy gifts for you.  Really.  Easy shmeezy.  We're talking like an hour or less here.  Want to see them?


We'll start out with the easiest of the easy.  It takes very little time, effort, materials or skill - that's always nice.  I present to you:


You need: 
a tile
acrylic craft paint
paint pen
clear enamel sealer
felt
picture hanger
hot glue gun


1.  Take a tile.  It can be any style, any size (as long as your kid's hand fit on it), any color, anything you want.  These tiles came from my stash I got over a year ago at the thrift store - a big old box that boiled down to about 5 cents a tile.  Couldn't pass it up.  I like the natural colors and the little bit of texture on the tiles.  
Now, let your child pick out his/her favorite color.  Pour out the acrylic craft paint and smoosh his/her hand around in it.  
Then print the hand on the tile - fingers close together, but not touching, thumb to the inside, fingers pointing out at a slight angle.  If you are doing only one child per tile, you can print both hands on one heart - I used one of bug's hands and one of mini's hands to make one heart per tile.  
Then you'll have to take a break to give the kids a bath.  Hey, I said it was EASY, not CLEAN.  Next, you'll take your paint pens - the kind that's for fabric (NOT puffy paint.  Paint PENS.)  Write your child's name across the handprint heart.  Finish off with a message.  
Let it all dry.  Once it's dry, spray it down with a clear enamel sealer.
2.  Flip the tile over and put a double layer of felt on the back.  Cut it to fit, edge to edge.  Just hot glue it down.
3.  Take a picture hanger triangle thing and glue it on the back.  I tried super glue, Gorilla Glue, and hot glue and in a humongous surprise to me the hot glue worked best.  That stuff just sticks like magic to felt.  
4.  Admire your handy work!  You now have a trivet to gift!  You can hang it on the wall with the picture hanger, you could place it on an easel, you can put it under your hot pots, sky's the limit!
5.  Huh.  Look at that.  The mystery is revealed...


I think these are perfect for aunts, uncles, grandparents, godparents, you name it!  I don't want to spoil anything for anyone, so I won't tell you who these are for.


NEXT UP, easy shmeezy gifts for the girly girl.  TWO different types of bows!  


We'll start with the easier of the two.


(I looked that up on some French Teaching blog thing and apparently it means "little girlfriend" bow.  I think.  Correct me if they were wrong.)


You'll need this:


a smallish rectangle of felt
a slightly smaller rectangle of felt in a different color
a very small, skinny rectangle of felt in the first color
an alligator clip
hot glue
scissors
a tiny scrap of felt in matching color


1.  First, you'll take the two bigger rectangles and round the corners, so they are more like ovals.
2.  Take the larger of the two and squish it at the center so the edges are squished to the back and the middle part is also squished to the back.
3.  This is what that rectangle looks like from the back.
4.  Now, take the smaller one and squish it so the edges are pinched up to the front.  Put this smaller rectangle in the squished in middle part of the bigger one.
5.  Wrap the small, skinny rectangle around the two ovals in the middle, making sure they stay pinched the right way.  Make sure the ends of the skinny rectangle are both wrapped to the back of the ovals.
6.  Put some hot glue on the ends of the skinny strip and glue them down in the back.


You're done with the actual bow, so let's put it on the clip!


7.  Cut a tiny scrap of  felt that's the same length as the flat straight part of the clip and just a little wider.
8.  While squeezing the clip open, hot glue the top of it to the back of the bow.
9.  Place the scrap piece of felt on top of this, so you are sandwiching the top of the clip between the scrap and the bow.  Hot glue around the edges of the scrap.
10.  They are so easy and pretty addicting... so make about 5 more.  


Or you could change it up and put three ovals together!

And here's the last one for the night.  Still easy, and you have your choice of two different methods of construction.
You'll need this:

A bit of knit (I used part of a sleeve from a cut up shirt.  That seam in the middle?  Totally doesn't matter.  It just needs to be a rectangle.)
A yo-yo.  (Don't know how to make a yo-yo?  See here.)
A button (covered, patterned, whatever.  It needs to go in the center of the yo-yo so keep that in mind when choosing a size.)
needle and thread
alligator clip
hot glue

And I bring you the:

1.  Start by threading your rectangle of knit onto the needle and thread.  You can choose to use the rectangle the long way or short way (we'll discuss this at the end).  Just start at the bottom in the middle and squinch your knit onto the needle kind of accordion fold style.
2.  So this all the way through the rectangle and pull your thread tight.  (Make sure it's knotted at the end).
3.  Now, take your needle and go back down into the middle of the fabric from the top, right next to where you came out of the top the first time.  
4.  Thread your needle through the fabric in the same manner as before all the way to the bottom.  Pull your needle out and pull the thread tight.  
Then repeat this going from the bottom to the top, and then from the top to the bottom at least one more time.
5.  Finish this off and keep it tightly cinched up by knotting the thread into the fabric.


6.  Knot the end of your thread again.  Place your yo-yo in the middle of the bow on the front side.  Come up through the back of the bow, through the yo-yo and pull the thread tight.
7.  Go back through the middle of the bow, from front to back and pull the thread tight.
Repeat this a few times. 
8.  Add your button on top of the yo-yo, centered.  Pull your needle from back to front, making sure to come through one of the button holes.
9.  Go back through the second buttonhole from front to back.  
Repeat this a few times until the button and the yo-yo are both secure on the bow.
10.  flatten each side of your "accordion fold" bow down and trim the very edges - if necessary.
Attach the alligator clip as you did with the above "petite Amie" bow.  Just hot glue the top of the clip to the back and then put a little piece of knit over that, sandwiching the clip top.
11. These are kind of addictive as well.


Wait, wait.  That's not all.  Do you want to see the even easier version of this project?  It's the version I usually use, but for all you bow purists out there, I thought I'd show the "correct" version first.  


Squinch up your rectangle in the middle, accordion fold style.  Hot glue a small strip of knit around this to hold the bow in it's shape.  
Hot glue the yo-yo in the middle.
Hot glue the button in the middle of that.
Hot glue the clip to the back.
Trim.
Done.


See?  Easy.


Now.  If you don't have girls to craft for, or relative of the persuasion who would like little itty bitty handprints (come on, who doesn't like little handprints??) don't worry.  I've got two more easy "only takes a few minutes" ideas coming up tomorrow.  Yea!


*Be sure to check just below for all the fun parties I link to!

Wednesday, December 21, 2011


I've got a tasty dinner recipe that will warm you up - perfect for this time of year!  PLUS I'm going to share some delicious cupcakes that I pinned on pinterest that are really easy to make.  Just a little plug here, if you're looking for more recipe ideas, you can follow my pinterest board "To EAT".  A lot of the recipes I share on my blog are from that board.

Alright, enough talk.  Let's show you the goods.

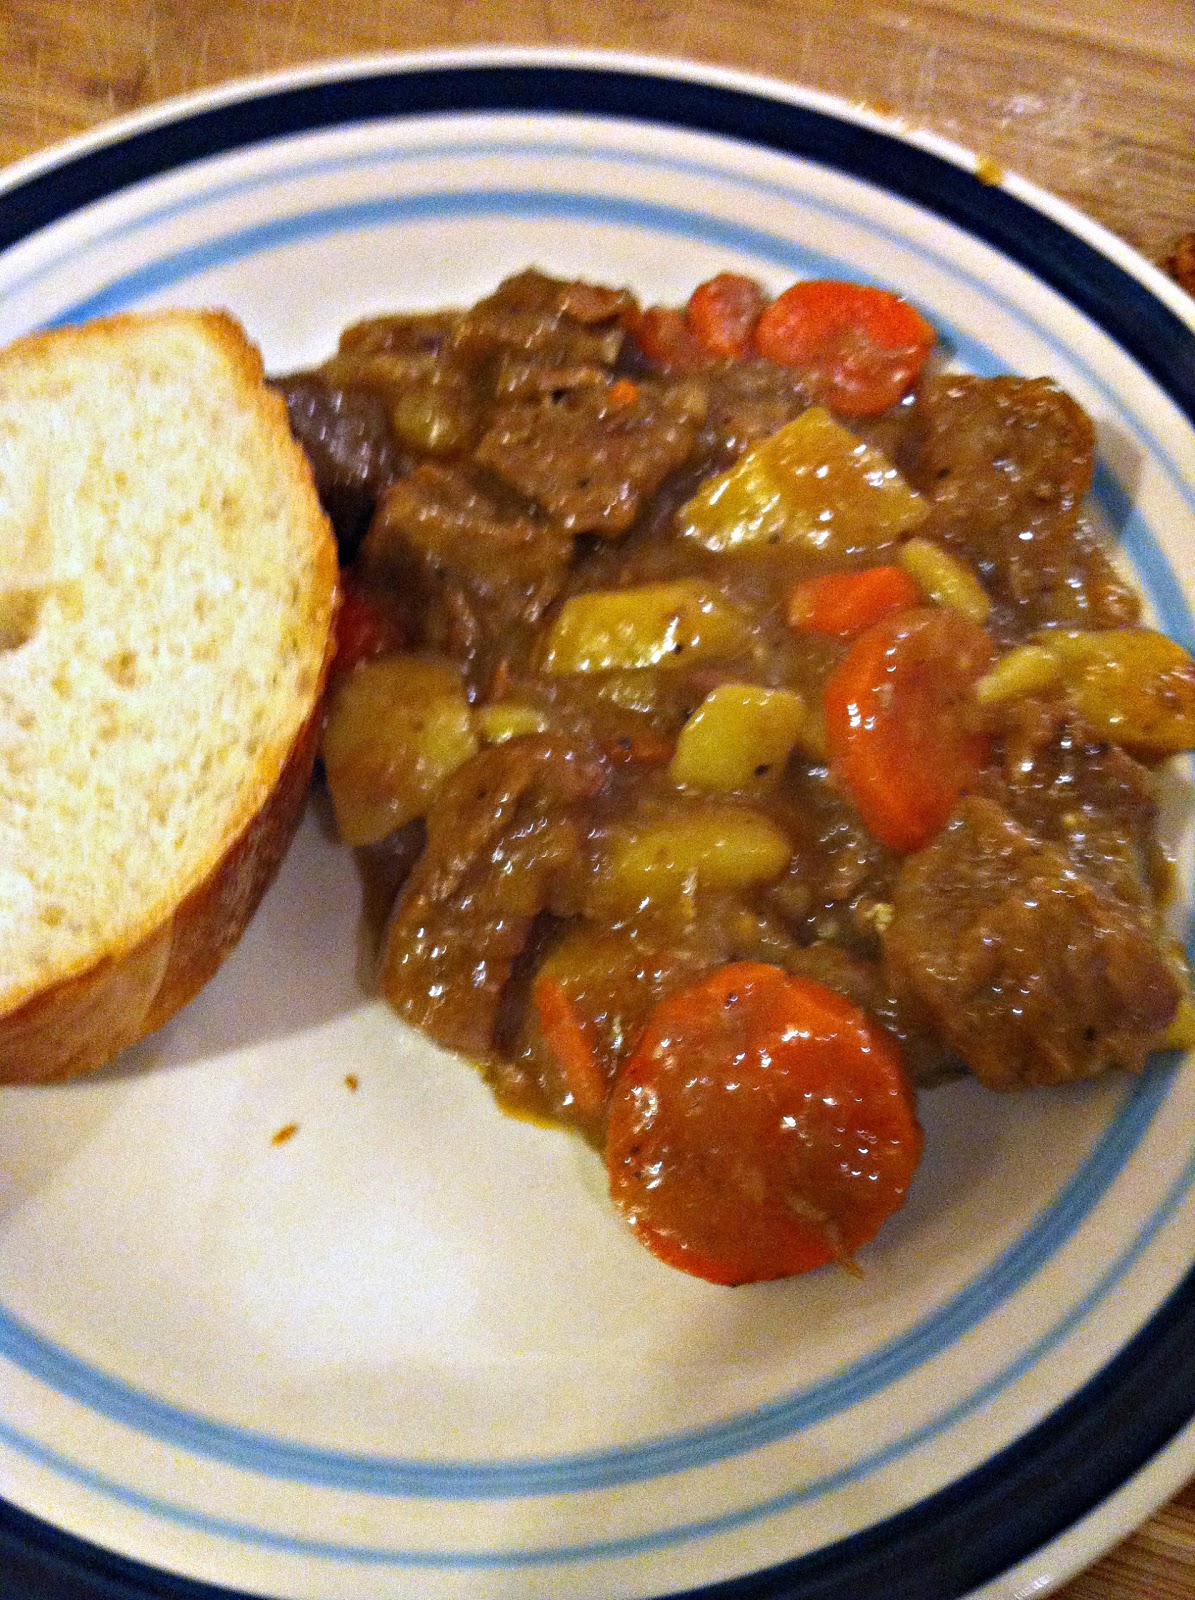
How about some warm and hearty beef stew?  That's what I thought.  Perfect.  Unless you live in Wisconsin, where it has decided that snowing is unnecessary.  This is honestly the first December since I was BORN (and maybe before) that it has NOT SNOWED.  Not an inch.  No accumulation.  This winter, it has snowed once.  And it melted the next day.  And it was before Thanksgiving.  If I don't have a white Christmas this year, I won't know what to do with myself.  What was I talking about?  Oh, yeah.  Stew.  See, I'm stewing... har, har.

Anyway, I used the same stew recipe I've tried before, and I couldn't find my camera, so I had to use my phone.  Fortunately, these pictures are better than the first post about stew.  What the heck is wrong with those photos??

My stew ended up a little thicker than I prefer, like you could eat it with a fork.  BUT, it was tasty.  I found another stew recipe that I am totally going to try next time - you can see it here.  Yum.  But for now, here's the recipe I've used for the past 2 ish years.

Beef Stew (food.com)

2 lbs stew meat


1/4 cup flour


2 tablespoons oil


4 cups water


1 tablespoon Worcestershire sauce


2 teaspoons garlic


3/4 teaspoon pepper


2 bay leaves


4 carrots


2 stalks celery


4 medium red potatoes


3 small onions


3 tablespoons flour


3 tablespoons water

Place beef and flour in a plastic baggie, Shake.  Pour oil into a large dutch oven, heat.  Add beef cook until brown, stirring occasionally.  Add water and next 4 ingredients.  Bring to a boil.  Cover.  Reduce heat and simmer 2 hours or until beef is tender.  Discard bay leaves.  Cut carrots, celery, potatoes, onion, and bell pepper, add to stew.  Cover and simmer 30 minutes, or until tender.  Combine water and flour, stirring well.  Pour into stew.  Boil, stirring constantly till thick and bubbly.

I omit the celery because mr and I hate celery.  Although he did admit to me this time that he doesn't mind celery in stews and soups.  Huh.  You think you know someone...
Now, I know this next item doesn't SEEM like a side.  And you're right.  It's really not.  If you think it's odd that there are two desserts with this meal, well, you don't know me very well.
I saw these on Apple Rings on pinterest this fall and couldn't resist trying them out.  I didn't have a tiny circle cookie cutter, but I did have a small star circle cutter, and I have to admit, making apple rings with star shaped centers was pretty fun.  

I think I might do that more often for snack, my kids thought it was so cool.  It was also kind of hard.  I kept breaking my apple slices trying to get the cookie cutter back out of the apple.  Apparently I needed to slice them much thinner...  I'd give it a try, though.  They were fun and tasty and not overly sweet.  This will take you right to How To: Simplify and the apple ring recipe.  

And this will take you right to my caramel sauce recipe and tips.  Wait, no.  Not MINE.  The one I always use so it kind of feels like mine, but actually it's Simply Recipe's.
And finally, the moment you've all been waiting for, those yummy cupcakes that are actually easy to make.  Wait for it...


Those aren't your ordinary cupcakes.  They are Boston Cream Cupcakes.  Mmmmmm.... too bad they're all gone.  I want one right now....

Ok.  You'll find them pinned here.


The only thing I changed from the recipe thought up over on My Ocean of Notions was that I used yellow cake mix instead of white.  I use yellow for the actual boston cream pies I make, so I thought why not for this too?


 So.  In summation, if you're cold try the stew.  It'll warm you up.  I'll let you know how that other stew is as soon as we make it.  Next, make the apples if you want some fun, but definitely use some kind of crazy awesome cookie cutter with a handle or something or you'll want to throw in the towel.  Or slice your apples paper thin.  And finally, definitely make the Boston Cream Cupcakes.  They are easy and tasty.  You can't beat that.

And, yes, I will be posting something Christmas-y tomorrow.  Glad you asked.


*Be sure to check just below for all the fun parties I link to!

You can skip the complaining and get right to the winner if you want.


Whoa.  Things have been crazy around here!  CRAZY, I tell ya!  On top of, you know, all that stuff I keep complaining about, mr was gone for a week in China for work, my phone service was "accidentally suspended" (their words, not ours, I HATE our phone service provider, not naming names but it's initials and they start with an A) and mini got horribly sick during which time we discovered she's allergic to both amoxicillin and azithromycin.  Now, to top it off, I'm dealing with corneal inflammation, which apparently I let go for too long before treatment so I'm suffering the consequences - mostly seeing nothing but blurry blobs of color out of my left eye for who knows how long.  Crap.  Not to complain - at least it's treatable.  But it sure does make you appreciate normal sight... staring at a computer is hard.  Driving is hard.  Headaches are hard... BUT, I totally meant to post not only a recipe on Monday, but the winner of the Shabby Apple giveaway!!  And I dropped the ball.  SO.  Here's the winner.  And the recipe will come later.


Ready?


Random.org says the winner of the Baciami! Dress from Shabby Apple is...


Number 20!


Who is...


Aubrey!


aubrey said...

ditto on bugaboominimr&me :)
Is it wrong to be jealous of my readers even though I did this giveaway on purpose to thank you for being readers?  Hm.  Stay tuned for a recipe or two.


*Be sure to check just below for all the fun parties I link to!

Thursday, December 15, 2011

I steal all my good ideas.


Do you all read Craftiness Is Not Optional?  What???  Well, you totally should.  (Uh, unless you answered "yes" to that question.  In which case - good!  You should!)  I've pinned a number of her tutorials for later use... and we all know what that means.  Most of them have never been used.  But I have every intention.


However, when bug needed something yellow to wear for "Yellow Day" at school, I spotted an old yellow sweatshirt of mine that had kind of shrunk.  It was sitting in my stash waiting for new life and I knew I had the perfect tutorial from Jess.  It's this super adorable toddler sweatshirt tutorial.


Now, my sweatshirt ended up a little different because my beginning sweatshirt was a little smaller than I would have liked and it also had a big kangaroo pocket on the front.


It was not at all because I didn't print out the tutorial and take it down to my sewing machine for easy reference.  No, no.  That wasn't the issue at all.


Ok, perhaps it was a little of that one.


But I still love the way it turned out!


I'm actually surprised that I like it so much.  And that it really did turn out well.  Well, pretty well.


We're going to ignore the fact that I accidentally made the front the back by cutting the back neckline lower and slicing up the middle due to not paying any attention at all to what piece the large pocket was located on.  Whoops.  I then made a huge "E" in a huge circle out of knit scraps and sewed that on over the pocket on the back.  Now it covers up most of the goof.


We'll just ask him to stop raising his arms.


I had to do something.  I didn't want his teachers thinking I dressed him backwards.  Although the other day he DID walk around Walmart with his pants on backwards and I didn't realize it until we got home - and these weren't sweatpants, they actually had pockets and a fly and stuff.  I swear I'm not really a space case.


Anyway, he really loves "E's".  I'm going to assume it's because it's his first initial and not because he has an abnormal obsession.  Is it insane that I still think it turned out cute despite that??  Because I do!


So I laid out a sweatshirt that fit him and drew around it on the big sweatshirt.  I folded the arms to the inside of the sweatshirt and used the curve of the armhole to trace the outward curvature of the top of the sleeve.  I used the existing sleeves and just shortened and took them in - using the armhole curve and the sleeve of bug's sweatshirt to trace around.  I used the cuffs of the arms and the bottom band on the sweatshirt that were already there so I didn't have to worry about finishing edges on those two spots.


I also used the existing hood, which is a little big for bug, but I admit I think it's cute that way.


I just cut it off the sweatshirt directly above the seam, pinned it around the collar of the new sweatshirt I was making and sewed it on.  Easy shmeezy.  Oh, and it's lined!


I don't know what I did with the buttons/elastics.  Probably something very similar to Jess, but by that point it was getting late and I was pretty anxious to be done, so I have no particulars.


The next morning he was so excited to see what I'd made him.  Apparently he walked around class all morning telling everyone "Look what my mommy made me!  And there's an E!"


And THAT was enough to tempt me to make him an entire wardrobe.  That cutie patootie stinker.


PS.  Don't miss the Shabby Apple dress giveaway right here on this old blog!  It's the baciami! dress and it's darn cute.


*Be sure to check just below for all the fun parties I link to!
Related Posts Plugin for WordPress, Blogger...