


Folks, you are in for a treat. I am doing my very first ever BLOG SWAP! Today you get to hear (see?) from the lovely Jill, of Envirocraftiness. She has a blog full of fun ideas! And she is a greenie! (Not greenie like NEW, greenie like environmentally friendly) One of my favorite things she does on her blog is “What the heck Wednesday?” where she pulls something totally random from her stash and asks everyone what she should create with it. She’s done some fun things with phone cords! I’m pretty excited to have her here today. So, without further ado, here she is, with a very fun "scrappy" project!
Do you have a lot of cds kicking around either from old software/those free AOL cds you used to get in the mail or cds you tried to burn and messed them up in the process like I do?
Excellent! You can make a mini scrapbook album out of them! This is a great project because not only is it repurposing, but mini albums are great for people who are experienced scrapbookers, or those who just want to try it out for the first time! It's very little commitment, so if it's not your thing you don't have to worry about investing a lot of time or money into it!
Here's how I did it.
Step 1: PLAN
Decide what you're going to put in your album and figure out how many pages/cds you'll need.
Step 2: PREPARE your cds
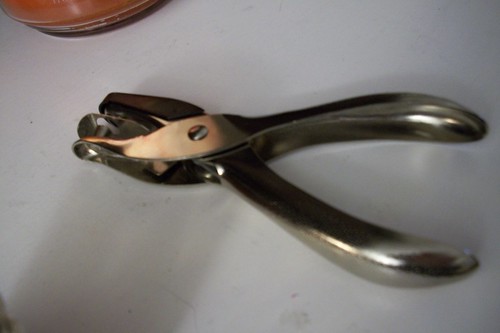
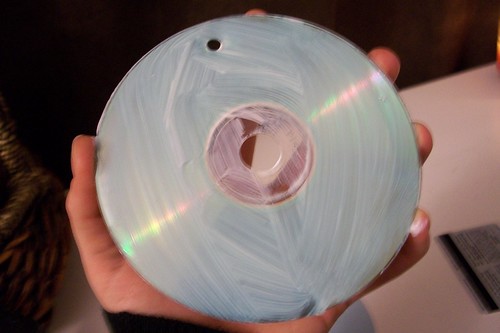
Before anything else, you're going to need to put holes in your cds. If you have easy access to a drill, find a drill bit that's the right size and carefully drill holes into your cds (I'd suggest marking the first one, and then lining the rest up with that one and then marking them from the first one that's drilled)
If you're like me and don't have a drill, you can do this with a hole punch.
First, heat your cd up over a candle
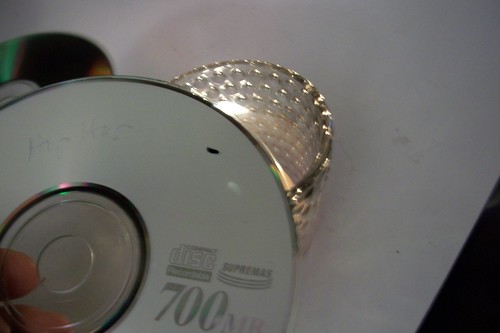
(notice that I've marked where I want the hole)
Then when it's warmed up, use your hole punch to make a hole!
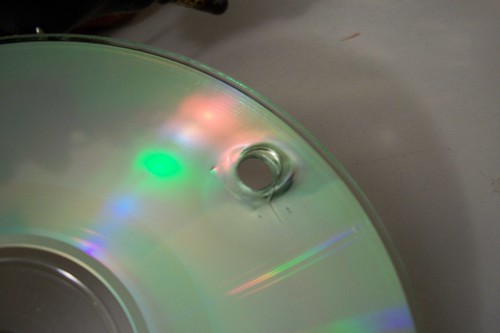
Warming up the cd makes it easier to punch through AND helps to prevent cracking!
Next, cut out whatever colors of scrapbooking paper you like to cover the cds with. Make sure to pre-punch a hole in them too!
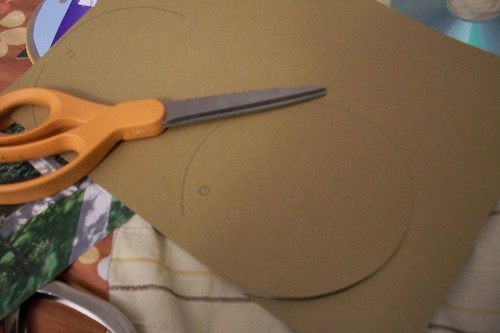
Spread a thin layer of mod podge over the cd and glue your circle of paper on. Do both sides and let them dry completely.
Trim any overhanging paper, and use some fine grit sand paper to get what you can't trim neatly with scissors!
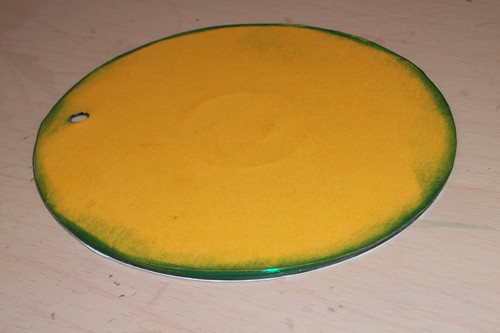
Step 3: DECORATE
One thing I did on almost all the pages was ink the edges. The green really stands out on the yellow here, but take a look at some of the other pages for more of a subtle tone-on-tone effect!
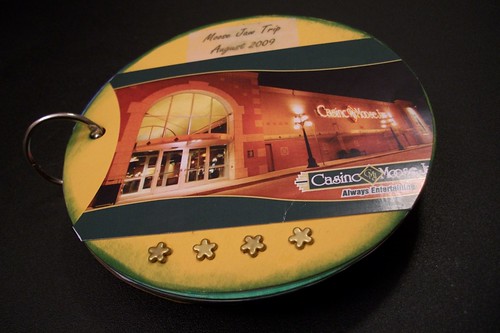
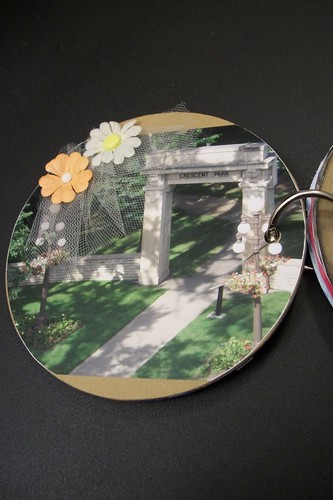
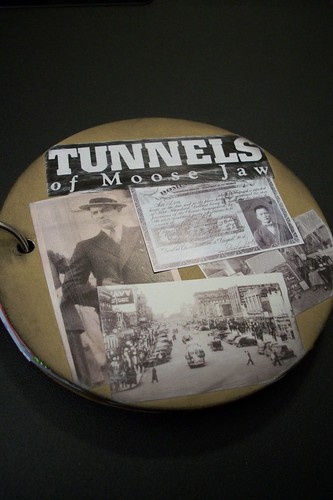
Here's my finished front cover:
First page:

This was the view from our room at the spa!
We went on both underground tunnel tours - it's rumored Al Capone used to have dealings in the area!
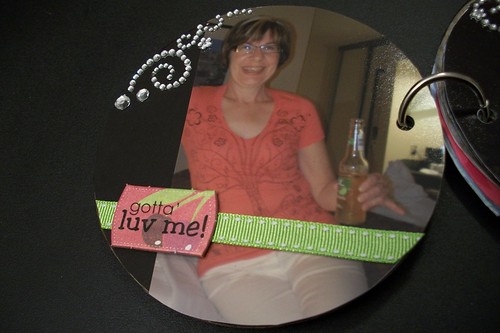
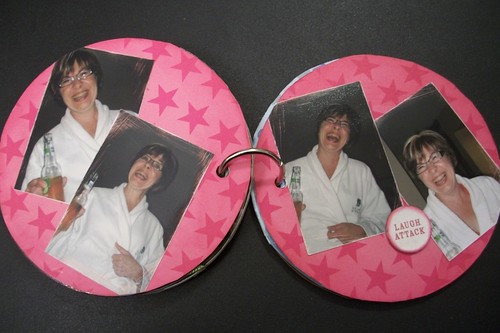
My mommy!
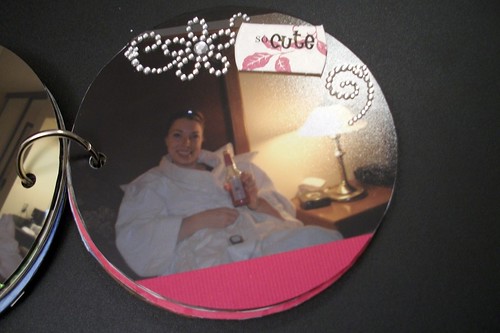
Me!
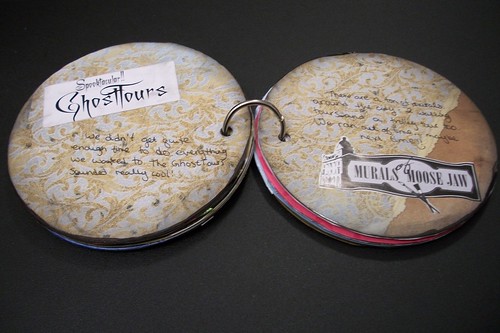
Journaling about the things we didn't have time to do.
I don't remember what I did that started my mom laughing, but she just kept laughing and I kept snapping! (I'd like to point out that the drink in my mom's hand is the same one from the picture above...we really didn't spend that much time drinking!)
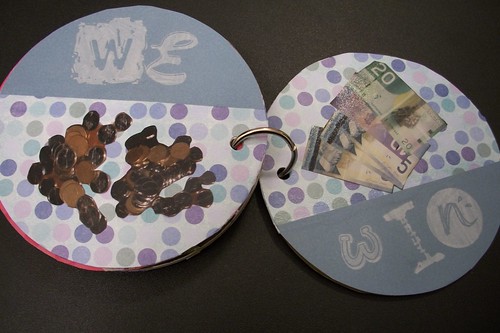
In the end we did leave the casino with more than we went in with! Whoooo!
There you have it. My mini album of my trip to the spa with my mom.
In this album I used a double sided tape runner to attach pictures and paper to the paper on the cds. For things like ribbons and chipboard (it's kinda like cardboard) I used glue dots. These things are amazing for sticking down ribbon, buttons, and other 3D things!
I just used one of those binder rings to put it all together. These little books are great if you have something to scrapbook, but want to keep adding to it (like a child's school years, book of firsts, seasons, etc.)
Like I said earlier, these books are great for beginners or seasoned vets because you can be as fancy or simple as you like. If you really wanted to make it easy, you could even pick up one of those pre-made scrapbook kits full of coordinating papers and embellishments!
Thanks so much to Kimberly for having me! This was a lot of fun! I'd love if you stopped by Envirocraftiness to check out some of the other things I've gotten up to lately!
Thanks Jill! Now go on over and check her out on her blog. Don't be shy. And while your there you can see what I made with this:


*Be sure to check below for all the fun parties I link to!


1 comment:
Hi there! What a cool project- it is officially on my obnoxiously long "project list."
Your blog is so charming- love the scrawling pictures/fonts/ vibe.
Cheers!
Meri
merigoesround.blogspot.com
Post a Comment