


Showing posts with label craft. Show all posts

Tuesday, May 5, 2015

canvaspop Review! And giveaway! Woo-hoo!


This is the best post ever.

Not to toot my horn.  Actually, this post has very minimal parts me and many more parts something SPECTACULAR - so I'm not really tooting my own horn.

Really I'm tooting canvaspop's horn.  

Have you been to CanvasPop before?  I admit it, I had not.  I'd often thought of getting a photo printed on canvas, but the prices scared me.  And I didn't know where to go, there are so many options out there.  And what if I spent all that money and hated it?  The unknowns were just too much.

So I'm going to help you out: go to canvas pop.  And not just because I've got a nice little discount code for you (which you can find at the bottom of this post, you're welcome).  Let me tell you a little somethin' somethin' about canvaspop.


You can do so much!  Honestly.  It's crazy.  So, first of all, you can upload a photo from your computer OR straight from instagram or Facebook.  It doesn't matter the size or resolution, they work with nearly anything and they'll let you know if it's not going to work out.  Then, there's the customization.  You can order canvas prints with or without text, collages, mosaics, triptych canvas's... the possibilities are pretty much up to you and your creative mind.  You can add shapes as well as text.  Or filters!  And they've also got different border options.  You can choose to have it printed on paper or canvas and have it framed or unframed.  Nextly, they've got deals going on often, which is super nice if you're afraid of a canvas price tag as I used to be.  They've also got an option to chat live with a rep if you need customer service - which I didn't - but if you do, how easy is that?!  Oh, also, they have a 100% "love it" guarantee.  


I'd also like to point out how user-friendly their site is.  They walk you through all the steps so you can create exactly what you want.  Everything's laid out perfectly, with no guess work.

And by now you're like, so what?  Show us the money!!  So I will.  Remember the other day when I shared my foray into taking my own family photos (which I will never do again)?  I alluded to being on a deadline for getting them done and this is why.  I really wanted an updated photo where Pip isn't a tiny newborn.  So I weeded through all the outtakes, got the mr's opinion and chose this guy:


And I got this awesome 16x20 canvas:

And it's pretty much perfect.

I was so excited to open it up when it arrived... here it is all specially bubble wrapped.


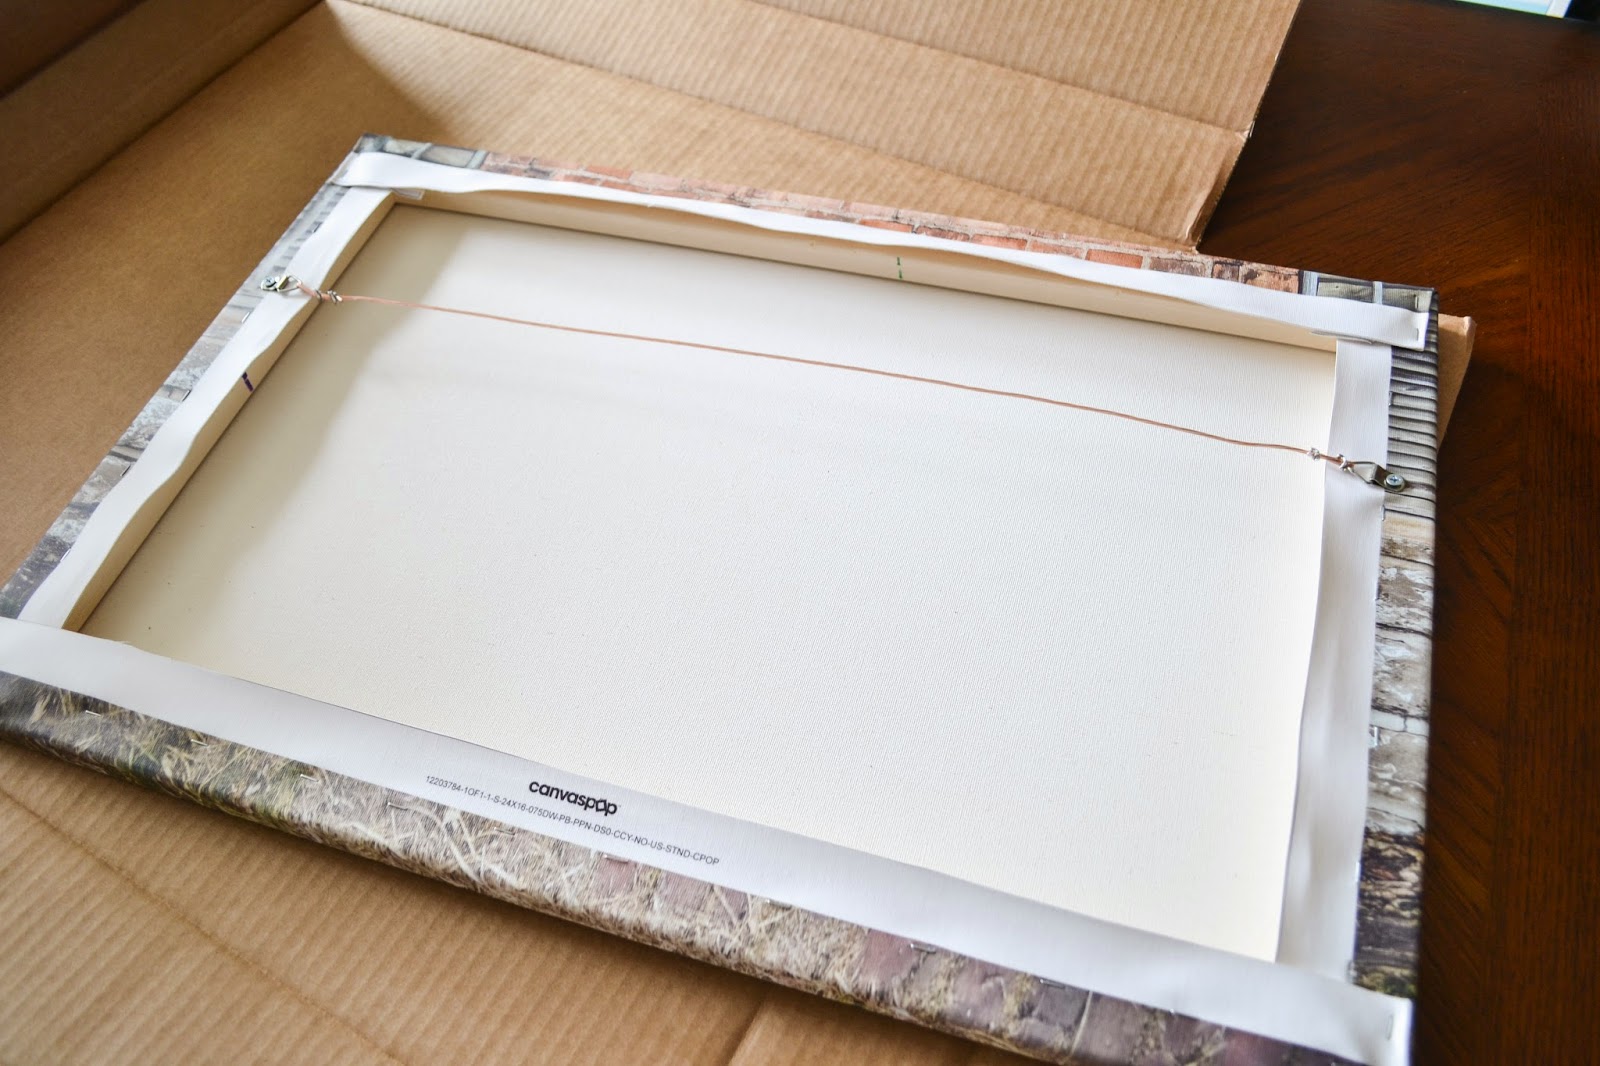
One awesome thing I wasn't aware of is that the canvas's all come ready to hang.  Did you know you're not technically supposed to hang a canvas from the actual canvas frame?  Yeah, I did not.  Fortunately they had this totally official hanging hardware already on there


AND they included a nail/hanger thingy.  So I didn't have to go get anything - except my hammer and that was just in the garage.  Woo hoo!


They also have these soft rubbery circles on the corners of the canvas to protect your wall.  Or the canvas.  Or... huh... well, they're cool.


And look at how nicely these corners are wrapped.  I've tried those DIY wrapped canvas's.  They don't look like this.  (At least mine don't).


I opted for the photo wrapped edges, but you could get black or white if you prefer.


Then I just hammered the hardware into the Giant Green Wall, and voila!


Here is my awesome family canvas above my piano.  (admittedly, it probably won't stay there, since we have big plans for the Giant Green Wall - teaser, teaser! Project coming! - but it will get a place of honor, for sure.)  


So.  Now that you've seen how great canvaspop is, you want a canvas, don't you?  I don't blame you.  I'm already planning black and white canvas's of the kids for our upstairs hall.

Guess what.  GIVEAWAY!!  Yea!  You can win a 16x20 canvas from canvaspop!  You really can!  Enter below!


So, here's the deal:  The giveaway runs for a week, to give you plenty of time to enter.  It opens RIGHT NOW (May 5 2015) and closes next Tuesday (May 12 2015).  Enter using as many of the options as you want, one entry per option.  You must live in the US or Canada to win.  I will announce and email the winner on Wednesday May 13th, 2015.  The winner will receive one 16x20 canvas with a 0.75 inch frame and free shipping.

a Rafflecopter giveaway

And for those who just can't wait to hear if you've won or not, use this code and get 35% off!  It's good until July 30th.  Go on!  Go do it!  (this can't be combined with any other discounts and is only available to orders shipped in the US and Canada)
BUGABOO35


You can find canvaspop on Facebook, instagram, pinterest and twitter


**Yes, you are correct.  I DID receive the 16x20 canvas from canvaspop in exchange for doing a review.  BUT all of the opinions expressed above are mine, mine, mine.  Yep, for real.  Mine alone.  I really do like canvaspop that much.  It's true.**

PS.  And since we sort of missed my blog's birthday in late February, we'll just consider THIS the party, mmmkay? 



Wednesday, April 29, 2015

It's Spring! Here's some Flower Bookmarks!


It's Spring!  It's Spring!  It's finally here!  Though I thought that a few weeks ago and then it snowed, so I may be wrong.  But it sure feels like Spring!  It's sunny.  I've gone out without a winter coat.  The grass is actually more green than brown.  The trees are starting to bud with "baby leaves" as mini calls them.  The kids are riding their bikes.  AND I'm officially done paying attention to my child's homework, signing papers, initialing agendas and packing lunches.  And by officially done I mean mentally done, because school does not actually end until May, but let me tell you I AM DONE.

So.  It's Spring.  And in honor of Spring, here are some Spring-inspired bookmarks for you to make - and they're so easy!

You need: 
big-ish paperclips - any kind, really.  I used green so they'd represent the stem of the flower, but you can use any color.  They are the big kind, but not giant. (I got them at the dollar store)
fabric yo-yo's
buttons, needle and thread
White (or light colored) felt
Scissors
E6000
Clothespin

You can get fabric yo-yo's pre-made at fabric and craft stores - check in the notions or by the scrapbook embellishments.  BUT, although you CAN go this route, I highly recommend making your own!  Why?  Because you can use up all your scraps!  Plus you can personalize your yo-yo's and use your favorite fabric.  AND they are easy and super fun to make.  Seriously.  Sometimes I sit in front of the TV at night and just make a bunch of yo-yo's to be used at future times for various projects.  Does that make me weird?  Probably.  If you'd like to know how to make a fabric yo-yo, (and trust me, they are SO easy) check out this tutorial.

So.  You've got your yo-yo's.  Now find some coordinating buttons and use a needle and thread to sew them to the front (AKA gathered portion) of the yo-yo.  It's ok if you go all the way through as no one will see the back.

Now, cut out a felt circle, just smaller than your yo-yo flower.

Put some E6000 (not too much) on the back of your flower, and a little on the front of your felt circle.  Place the flower on the top of the paperclip (the end that is only a single wire layer, not the end the separates with the two layers of wires) and press the felt circle to the back of the flower - sandwiching the paperclip between.

Use a clothespin to clamp the flower and felt circle together until the adhesive dries.

Unclamp, and voila!  Adorable little flower bookmark!

These guys come together really quickly and are so adorable, they make awesome gifts for the avid readers you know!  How about an end of the year teacher gift??  

Make a whole set and package them up on a cute card.

You can also use this exact same method with covered buttons instead of yo-yo's, and they're pretty darn cute as well!


*Be sure to check below for all the fun parties I link to!*

Thursday, February 19, 2015

(Understated) Glam Pinecone Wreath


I made a wreath!  I've shocked you all, I know.  They're almost my favorite thing to make.  Besides chocolate cake.  Nothing beats chocolate cake.  
But door decor is pretty much the homey-est thing you slap up on your house.  Want your house to say "welcome!  We like it here!  We hope you do too!"  Make a wreath.  Put it on your door.  Done.
If you'd rather your house say "Go away, I'm taking a nap." well, I can totally understand that.  But a wreath won't help.


I started by gathering a bazillion pinecones.  I actually used them for a different project first, and kept the nicest ones for the wreath.  I don't actually have any pinecones like this in my yard, and because it seemed absolutely ridiculous to pay for them at Joann's, though I knew I could, I drove out to my church building and ran around all the pine trees with a huge bucket.  
I did this during the day, and my church building is on a fairly busy highway, so I'm a little surprised no one called the police with my suspicious activity.  Surprised, but grateful.

 After collecting the pinecones, I sprayed them a bright metallic silver.  Nice and shiny!

For the wreath form base, I used a flat chipboard circle I got at Hobby Lobby.  It wasn't very pricey, and though I usually use foam forms I get at the thrift store for like 25 cents, I "splurged" this time because the flat, sturdy, light and NEW chipboard form was beckoning me.

First, I wrapped the whole thing in gray yarn for a nice cozy coverage.  You can sort of kind of see it in this picture if you tilt your head to the right and squint really hard.

I started with the outside ring of cones.  I used the largest ones on the outside layer, and tried to space the extra largest ones evenly around the circumference.  I used hot glue and just held each cone in place for a couple of seconds until it was grippy.  Then I worked on the inner ring of cones, which I had saved the smaller sizes for.  I used hot glue, and placed each cone in between two of the larger cones, kind of smooshing it in there.  It worked really well, the uh, what are those?  The petal things slid in between each other really nicely and added even more gripping power.  

Those pinecones aren't going anywhere.

So there you have it.  My Understated Glam Pinecone Wreath.  It's all silvery and wintery.  Which was nice and elegant-ish in like December.  Even January.  Now??

Now it's just depressing.

Come on, excruciating cold!  Give it up already!


*Be sure to check below for all the fun parties I link to!*

Tuesday, February 17, 2015

Wrap 'em up and Round 'em up!


So, we have come to the end of our little valentines series.  If you aren't aware of the nature of the series, I shared some DIY valentines you can create (with very little effort, I might add) from dollar store materials.


Here's a quick wrap-up of all the projects:

Hoppy Frogs
Tattoos
Bubbles


Stretchy Dinosaurs
Helicopters
Butterflies 
Cute Erasers - 3 Ways
Cars
Crazy Straws 
Sunglasses
Airplanes
Marbles


Yo-Yos 


Slinkies
Pens


Well, you've no doubt 
had enough of Valentines for the year.  Maybe too much.  Maybe you're so sick of Valentines you're gonna boke (the word we have to use for throw up because my daughter will have a panic attack if she even hears "throw up." Apparently it's Irish?) 
But I just couldn't resist finishing up this little series with a good old fashioned round up!  You know how much I love those!  Here are several MORE valentines you can make after a trip to the dollar store.  

Watercolors by Smart Schoolhouse
Wooly Sheep by Hello, Wonderful
"Tu tu" Scrunchie by The Nature of Grace
Google Eye Cards by Raeann Kelly
Candy Robots by Lisa Storms
Rulers by Re:Located Living
Play Doh by Grace and Good Eats
Colorful Gluesticks by Re:Located Living
Pack of Gum by Mommy Musings
Cute Pencils by Or So She Says
Nail Polish by Simply Kierste
Sea Creatures by Haley's Daily
Big Dinos by Simmworks Family Daily Blog
Clothespins by DIY Inspired
Yoda Glow Sticks by design. wash. rinse. repeat.
Socks by 30 Handmade Days
Bouncy Balls by Paging Super Mom
Crayons by Simply PChee
Balloons by Willowday
Erasers by Re:Located Living
Army Men by Love and Marriage


So you can get a jump on next year.  Ha!  


*Be sure to check below for all the fun parties I link to!*
Related Posts Plugin for WordPress, Blogger...