


I love topiaries. It's unexplainable, really. I love the well-groomed look as they greet you at someone’s front door. They say: “welcome! These people are nice. They like plants, especially ones that are aesthetically pleasing.” mr doesn’t really agree. AND we don’t really have the topiary kind of house going right now. But that doesn’t mean I can’t make an itsy bitsy fall topiary (or two... or three) for the table top. And so I did.
I found some fall colored cupcake liners at the dollar store long ago and knew I could use them for something - although I wasn’t sure exactly what. The best thing about these topiaries, I think, is that it used up a lot of stash. Which was the whole point of September, wasn’t it? I bet you have pretty much everything you need to make this lying around, too. What do you say, $20 bucks? You’re on. (I'd shake on it, but, well... you see the issue.)
Have you got:
small vases/flower pots/empty food canisters
sculpy
wooden skewers
twine/jute
burlap/other fall-ish scrap fabric
a small styrofoam ball
cupcake liners (or you could even use little scalloped circles, like I did for this wreath)
hot glue gun
scissors
spanish moss

I lost you at the spanish moss, didn’t I? I have no idea why that’s in my stash, but it is. And it turned out to be very useful, too!
First off, I spray painted my clear vases. I really didn’t want clear. I also didn’t want them to only be used for fall. I figured I could spray them a color I like and use them for all different things all throughout the year. So anything that directly affects the vases themselves (except the spray paint, of course) is meant to be temporary.

I sprayed the inside of the vases only, and I’m so glad I did. The inside looks matte and not super great. And that is what the outside WOULD have looked like had I just sprayed the whole thing. But by only spraying the inside, you can see the outer layer of clear glass and I really like that effect.

Well, I think I’ve sufficiently bored you with spray painting vases, so let’s move on.
First, we need to “fall-ify” our vases. The bright yellow (while my favorite color) was a little too summer. So I cut three strips of burlap all the same size

and wrapped one around each vase.

I secured them to the vase with an itty bitty dot of hot glue on the front,

and a dot on the back, and a good amount on the overlapping ends of burlap to hold them together. (temporary, remember?)


Now, take a handful of sculpy and roll it around to soften it up. Once it’s pliable, smoosh it down into the bottom of the vase, leaving it high and peaked in the middle and really pressed down on the sides.

Stick your skewer in the sculpy, pointy end up.

Mark with a pen or marker where the sculpy stops on the skewer.
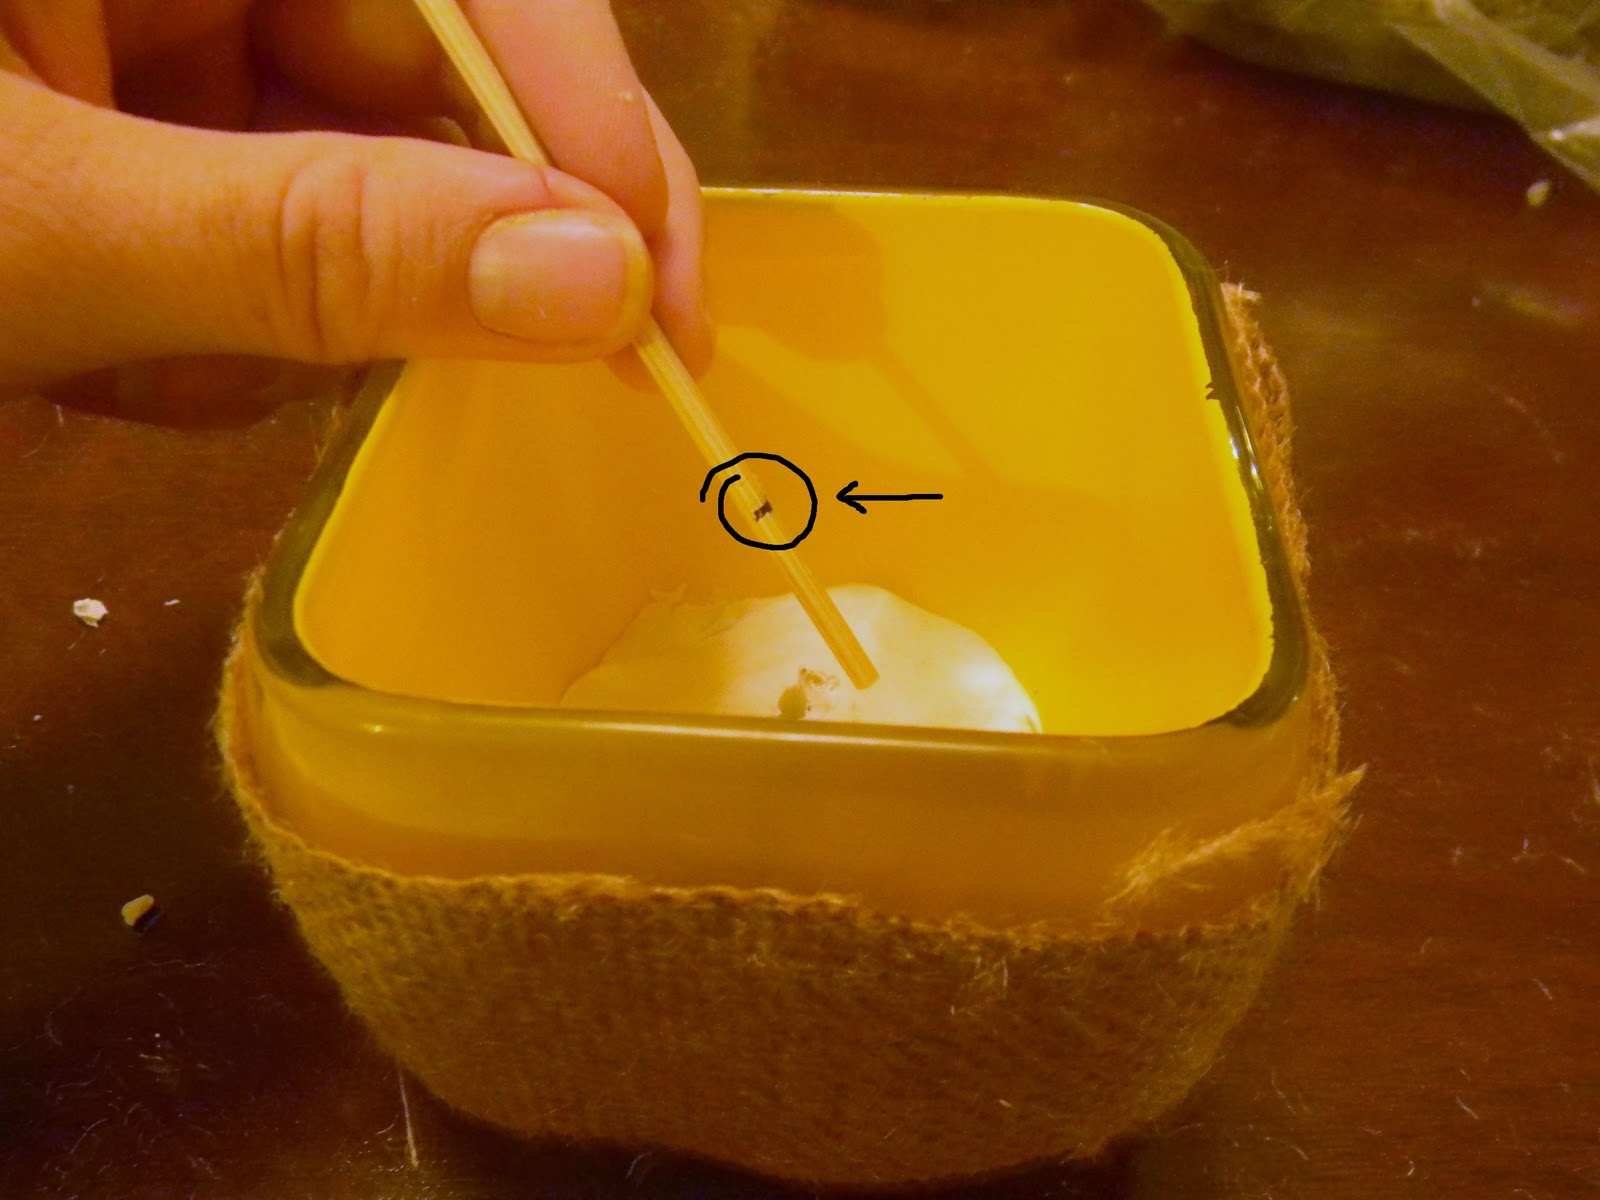
Push your styrofoam ball onto the skewer. Make sure it is all the way on, and the tip of the skewer is just BARELY visible.

Mark with a pen or marker where the ball ends on the skewer.

Take the ball off the skewer and the skewer out of the sculpy. You now have two marks on your skewer and know how much of the skewer will actually be showing.
Cut a section of jute.
Dab a little hot glue on the skewer right ABOVE the pen mark from the sculpy end. Place your jute right on the hot glue and start winding.

Continue winding and winding, holding the jute tightly.

Dab some hot glue on the skewer and wind over it every so often to make sure the jute stays nice and tight.
Continue doing this until you’ve wound all the way up to the second mark near the pointy end. Hot glue the jute down and cut off any excess.

Take your ball and begin gluing cupcake liners down with the hot glue.


I considered scrunching all the cupcake liners into a little “t” shape, then gluing them down very close together, so it all looked very uniform and decided against it. I’m much more prone to randomness in my crafts. If you want uniform, go for it. I promise I won’t be offended.
But here’s what I did:

I glued randomly. Shapes and colors. I scrunched, I rolled, I overlapped, I layered, I underlapped (just kidding, that’s not even a thing, is it?). I basically just did whatever struck my fancy, which feels really good when you’re crafting.

Here are some of the shapes I used so you get an idea close-up:


When the ball was entirely covered, it looked a little lopsided.

Well, a LOT lopsided. But I wasn’t worried. Every topiary needs pruning to make it perfect.
So, take your scissors and prune a bit. Not too much. You don’t want to snip away all the ruffles, that would be sad. And be careful or it might end up like that one time I cut mr’s hair (a little here... oh, too much. Ok, a little more off the other side... oh, too much. ok, a little more off the first side...) and he had to go have it professionally fixed. And it hurt my feelings. But I couldn't blame him.

When you’re done pruning, it looks more like this:

Cute. Now, just pick which angle you like best so this can be the front.
Stick your skewer in your sculpey

and carefully skewer your cupcake liner ball.


Unfortunately, the sculpey in the vase doesn't look very attractive. FORTUNATELY, you have spanish moss in your stash! (Or, at least I did.)
Take your spanish moss and cut just a bit out. Poke it in the vase around the skewer.

Done!
Repeat this as many times as desired.
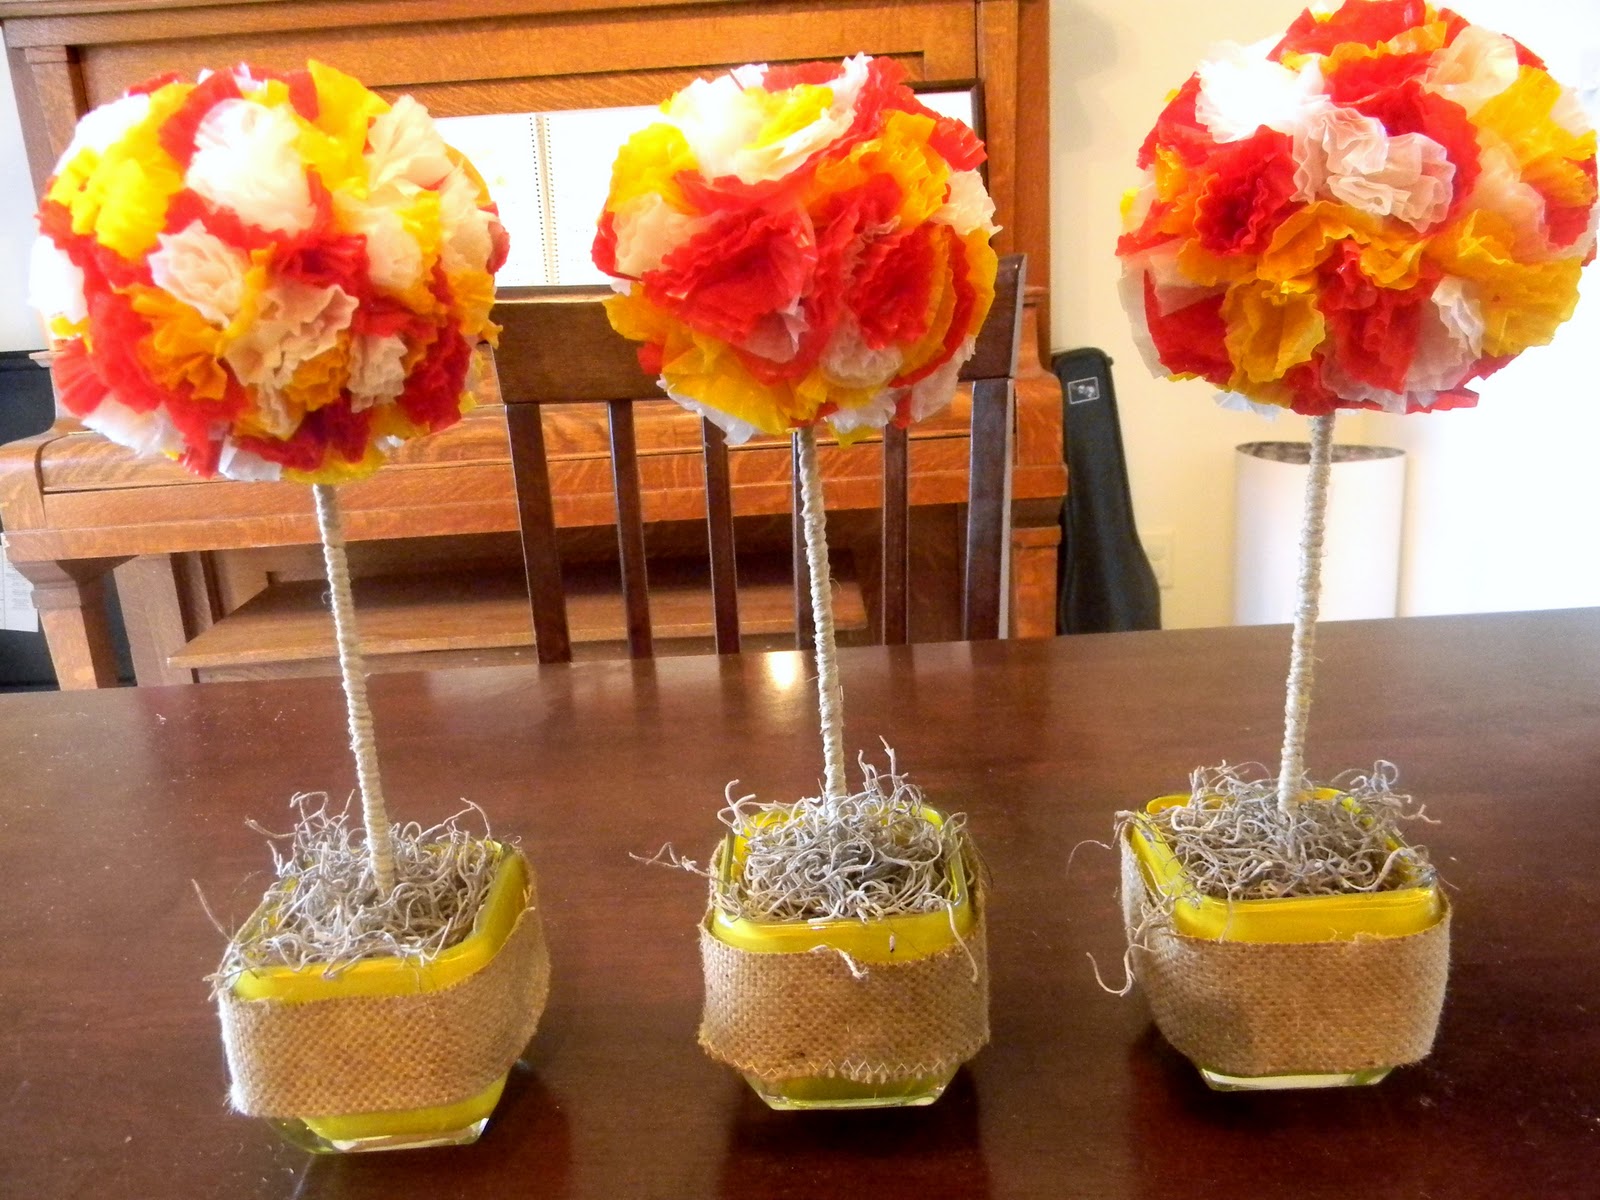
And you’ve got some itty bitty topiaries! (or “itsy bitsy, teeny, weeny, yellow bottomed topiaries... that she wore for the first time, today...”)

Although, I have to admit, the cupcake liners looked much more “fall” in the package. They were darker when all together. Any ideas on how to fall this up a little? I really wish there had been some brown liners.


Check out these other stashbusters!


Fall into Fall linky party at Envirocraftiness

Socialize with Me Monday Through Sunday Link Party at Simpsonized Crafts


12 comments:
Thanks for joining us over at our Sassy Sites blog party! It's fun to see everyone! Come on over tomorrow and sign up for our Spotlight Giveaway! We would love to have you!! xoxo
Marni @ Sassy Sites!
I'm your newest follower from the weekend blog hop!! Lovely blog! You can find me at www.bouffeebambini.blogspot.com
Super cute! I love them! :)
What a fun craft!!
They're super cute! Thanks so much for the great idea, I'll be linking.
Was thinking about the falling it up thing, and was wondering if you could just go around the outside with a distressing color stamp pad to darken it up? Great idea, am gonna do it (today, I hope!)
Well, these are just the cutest things ever! :)
Corinna
That's too cute! I love it!
I really like these. Spraying the inside of the vases is a great trick!
I'd love it if you stopped by and linked your projects to my Thursday Theme Party! :)
I featured this post on my Blog on Feature My Favorite Friday come by take a look!! What a Brilliant idea!!!
http://dragonflyfeathers.blogspot.com/2010/10/featuring-my-favorites-friday-no5_01.html
Another great tutorial! It is darling. Thanks for sharing it on Thrilling Thursday @ Paisley Passions :)
I love these, great tutorial and tip to spray paint the inside only. Love how your group of three looks on the table. Thanks for sharing with us at A Crafty Soiree! Hope you'll join us at the newest one, it begins tomorrow!
Post a Comment