


It’s my birthday. That means I can do two posts. As long as they are birthday related. And they are. The other one involves a present for YOU. (Did you see it?) This one involves... well, not really a present for me, but something almost as fun.
This is one of those projects (like so many others) that I really wish I could claim creative genius for. Alas, no. It wouldn’t be right. I first saw it here, on How Does She...
It is super cute. You should check out Amber’s version there. You’ll totally want to make it, just like I did.
The best thing about this wreathe? It allowed me to bust some stash! Woo-hoo! (You know about stashbusting September, right? I’ve only mentioned it a couple hundred times. Anyway, I can’t buy new craft stuff, I have to make do with old... and I’ve been planning on making this for a while.)
Oh, yes, I almost forgot. The second best thing? It’s double sided. What?!? you ask? Yes, that’s right. It’s a BOGO. Or wait. MOGO. Yes. Make One Get One. And who doesn’t love that??


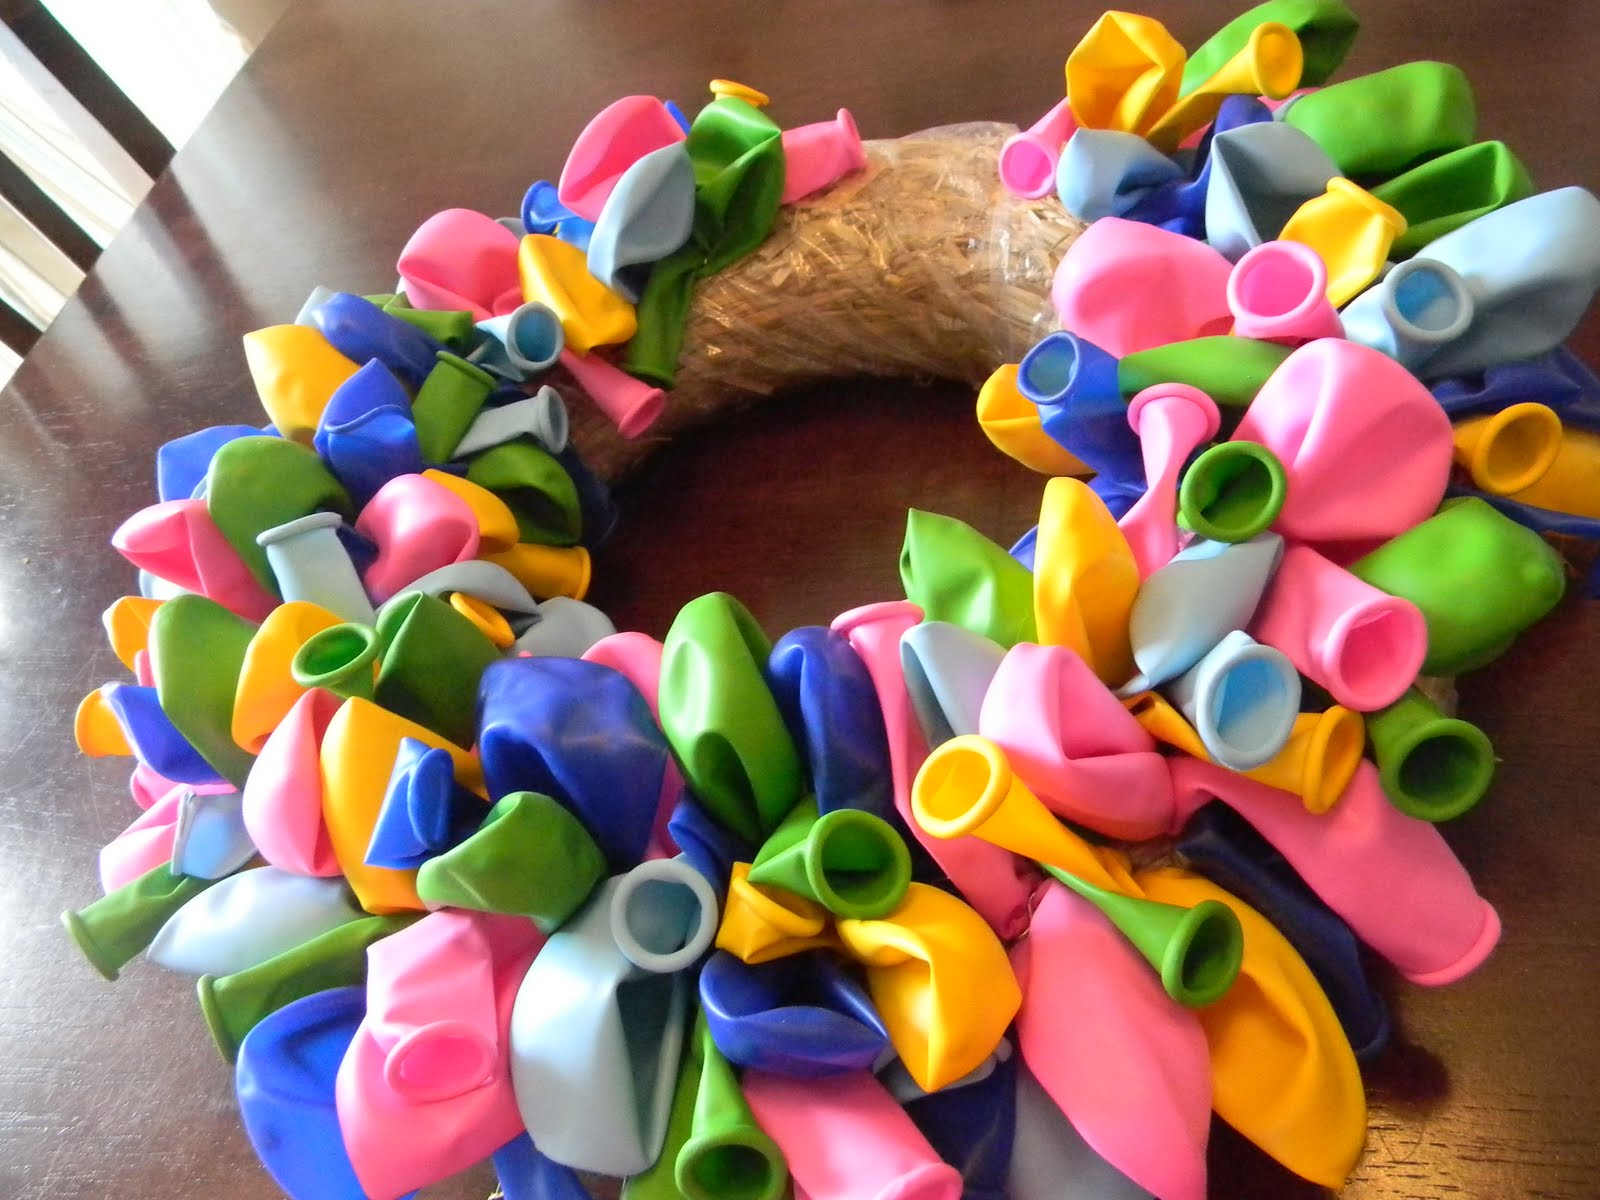
If you’ve got some balloons hanging around waiting for someone’s birthday and a straw wreathe you picked up for A WHOPPING 25 CENTS at the thrift store, you can make this too! Yea!
Along with:
balloons
straw wreathe
you’ll also need:
floral pins (the double ended kind)
some ribbon
some quick thinking. (We’ll get to that later)
Ready for fun and easy?
First, you will need to decide on two different color schemes, one for each side of the wreathe. The color schemes can contain as many colors each as you want, as long as the two different schemes include at least two of the same color. Make sense? I don’t know, I don’t think I even understand that. Here, let me clarify with an example:
for my wreathe, I was making one side for mini’s birthday and one side for bug’s birthday.
Side One: Pink, Yellow, Lime, Turquoise, Blue, White
Side Two: Red, Turquoise, Blue, White
One side obviously for a girl, one for a boy, with three colors in common between the two sides.
(Just a note of interest - I came up with this idea because I’d already decided on a color scheme for mini’s birthday and it involved pink. I realized it wouldn’t be fair to make a wreathe for mini and not for bug. But I also couldn’t really parade pink around bug’s car birthday... see the dilemma?)
Lay out your wreathe.
Now, starting with color scheme number one, pick a balloon and stick it on the wreathe using the floral pin. Easy.


Repeat.

Repeat.

Easy.
There really is no rhyme or reason here, at least not with mine. I just did what looked good. I tried to make sure that the pattern and the direction the balloons were pointing were both random. I wanted it to look crazy and fun, not orderly and planned.
So just keep plugging the balloons in. I also made sure to squish the balloons relatively close together at the base where the pin was pushed in, to make the balloons kind of fluff out and fold a bit, hiding the pin completely.

Be sure to leave the edges of the wreathe relatively balloon-free.
When you reach this point, start to worry about running out of balloons. If balloons aren’t normally used in crafts, it doesn’t count as buying craft items, does it?

When you get to this point, realize you’ll have enough and breathe a sigh of relief.
When this side is all done, flip it over.
Start pinning in the second color scheme.

And continue. For what seems like quite a while. Until you get to this point, when you run out of pins. Well, that’s ironic.

So... here’s where the quick thinking comes in. Ask yourself this: What do you have hanging around the house that looks and acts like these double pronged pins?
*Flash of brilliance*
Grab your trusty staple gun. Not that crafty little staple gun. The heavy duty one that lives in the garage. The one with the staples that are THIS LONG. (you know, pretty darn long.)

Now, staple the balloons right into the straw wreathe.

The staple are a little harder to hide than the pins, but once it is done, you shouldn’t be able to tell.

When you have the second side complete, you’ll notice that you can see the all the balloons from the first side sticking out all over. This totally ruins the color scheme, so now is when you’ll fix that.

Take the balloons that match both sides - for me turquoise, blue and white. Staple them to the INSIDE of the wreathe, just as you did the front and back. Alternate colors, make it look random.

When the inside has been ringed with the common colors, do the outside of the wreathe. Go all the way around, so there’s no straw visible anymore.

You may need to flip the wreathe and do this on the other side too, just to make sure that both sides have only the correct colors showing and everything looks exactly how you want it too.
Now, when you look from either side, all you see around the edges of the wreathe are the balloons with colors that match both sides. The shared colors mask the balloons that clash with the other color scheme.


Now, take your ribbon and singe the ends to prevent fraying.

Tie the ends in a gorgeous elegant bow. OR, if you’re like me, an adequate but certainly not great bow. I need bow lessons.

Now, slip the loop of ribbon under the wreathe, with the bow coming up through the middle.

Take the bow end of the loop and feed it through the loop; pull it up so that the other end of the loop slides down tight against the wreathe.

You will now need to adjust the balloons around the ribbon so that it sits straight and the balloons aren’t smooshed.


Adjust the balloons on the back side too.

And now, just hang it up and allow yourself to feel particularly good about completing one craft for both kids.


Once I finished, I plopped it on the counter until I could put it downstairs. Then my mom pointed out that it was MY birthday, so I hung it up on our closet to test it out. Pink and yellow side out, obviously.


21 comments:
Fan-freaking-tastic! It turned out so great! Happy Birthday by the way!
These are so cute. I like that you did them in two different color variations. I saw you had some fabric flowers in a previous post. I'd love if you'd link any fabric projects up with Fabric Fun Thurs. :).
O my word, you are amazing! This is too cool... and I love that it's reversible [since I change my mind about what I want like every 20 minutes, haha!]
Too stinking cute!!!
Nice work. I bet that was seriously time consuming but what a great stash bust. Good work!!
Super cute and I love that's it's reversible!!! Very clever!!!
www.makingmemorieswithyourkids.blogspot.com
Such a cute idea! Following you now!
What a fun idea! :) I haven't seen this done double-sided before! Thanks for the great explanation!
I LOVE this idea! I made a similar one earlier this year using curly ribbon, but this is even cuter! Thanks for the great tutorial.
Love your WREATH (no E)
Well, you probably know if you read my blog that spelling isn't exactly my strong point. But I've got some killer content! Thanks for the comment/correction :)
Happy Birthday! I love this wreath. Thanks so much, I'll be linking.
How cute is that! What a creative project. Thanks for sharing.
I love this! Going in my inspiration file FOR SURE!
When my daughters were growing up, I made birthday hairbows with balloons. This is perfect for a celebration wreath. Cute idea!
Oh my gosh, I love this wreath! What a darling welcome for a birthday party celebration :)
LOVE it!!! The color combo possibilities would be endless! Thanks so much for linking up (and linking back with my button) to Thrilling Thursday @ Paisley Passions :)
Too cute. I have never seen a balloon wreath before. Love it! Thats great for BirthdaHello there. I am a new follower via Blog Hopping.Please visit @ http://www.mommiesandbeyond.com
Have a great weekend!ys!!!
Hi, LOVE this! Thanks for joining us at A Crafty Soiree... I am featuring your project tomorrow!
www.yesterdayontuesday.com
Thanks for sharing with us at A Crafty Soiree! This is such a fun idea! I can't believe it's also BOGO, so clever! This is perfect for all the birthday parties and would be great to put out on the door as a family tradition. Hope you'll join us at the newest soiree too, it begins tomorrow!
This wreath is flipping fabulous & fun! I might make one for birthday notices in my classroom...I could add the birthday child's name in the middle! I'm thinking this is a super great idea...thanks!
Post a Comment