


***
Hi "Gift It" folks! I'm Susan and I blog with a friend, Adrianna, at crafterhours. With five girls between us, much of our crafting is accomplished after hours or during nap time.

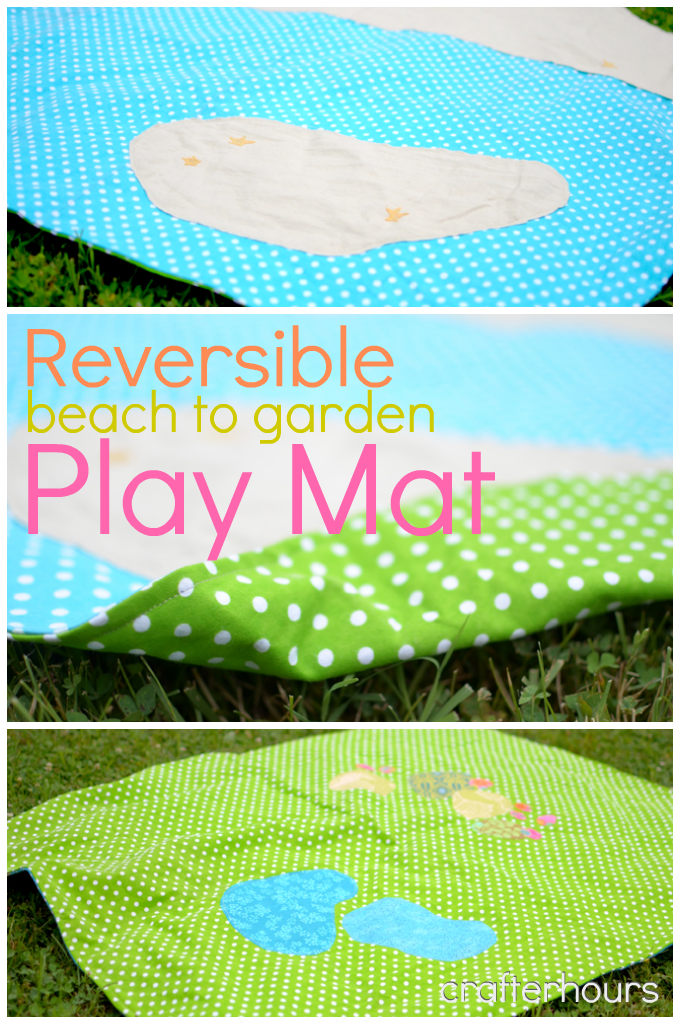
Today I'm sharing one of my handmade gift favorites- a reversible play mat. There are endless options for theme and style, and once it's in the recipient's hands there are endless options for imaginative play. It's a plain old blanket in a pinch, and a launch pad for creativity for a wide range of ages.
I made this one for a little friend's birthday.

It makes a nice, tidy little package for toting and giving.

The project requires only a few materials. Here's what I used to create a grassy knoll on one side and a sandy beach on the other:
- 1 yard of blue background flannel, prewashed
- 1 yard of green background flannel, prewashed
- Heat n' Bond or similar
- 1/2 yard or less of sandy-colored fabric (I used linen I had on hand from a remnant buy)
- Colorful scraps

I eyeballed the appliques for each side. A "beach" section on the blue side that's about 8" wide and a "sand bar" that's about 12" x 8" at its widest. I drew stars with disappearing ink onto a fabric I thought would work as sand dollars and ironed those onto the sand fabric before pinning the sand onto the flannel and stitching with a straight stitch around the edges. I didn't bother using any adhesive underneath the sandy sections-- I like the look of it rippling. It works for a beach scene.


The pool and shrub/garden areas are also eyeballed. With these I used an iron-on adhesive to hold them in place as I stitched around the edge of each shape.

Once I'd finished the appliques for each side I laid them on the floor right-sides together to match up the edges and pin-basted the two sides together. I cut around the perimeter to add some nice, curvy organic sides and corners.
I stitched all the way around the edge with a 1/2" seam allowance, leaving an opening of about 6" so that I'd have plenty of room to turn the piece right-side out. I clipped the corners a bit, did the turning and ironed around the edges so that I'd have a nice, smooth path to edge stitch the entire thing. That, then, closed up the 6" gap I'd left previously to turn it.

And now this one lives in Alexa land. For pretending to relax on the sand...

Or hosting a beach party. Or tea on the beach?

Inside, outside, wherever you like. With dolls or with real friends, if you're so lucky as to have a play date. Or siblings.

Thanks, Kimberly, for having me! I'm looking forward to following the rest of the series to get my gift to-do list together!

Thanks Susan! I can't get over what an easy project this seems to be but how adorable and useful it is! I can't wait to make a few for baby showers or birthdays! Go check out crafterhours - as if you haven't already!


No comments:
Post a Comment