


Ready to make the rest of our marching band instruments? If you missed it, refer to Tuesday's post for the first set of instruments, the wind instruments.
Today I'll show you the percussion instruments. The one's I made were:
drum set
xylophone
maracas (yeah, yeah...)
So, I loosely based the drums on something like what you see here:
 |
| Photo courtesy of Mike Ingalls for TheSabre.com. |
On further inspection of photos, I believe I should have done a bit more research first. Ah, well.
You'll need:
at least three different sized buckets
colored duct tape
plastic cutting board
craft knife
card stock
cardboard
paint
scissors
hole punch
hot glue gun or gorilla glue
ribbon
two skinny dowels
two wooden knobs
Take your differently sized buckets. I used the really cheap plastic ones. Different sizes change the pitch.

If they have handles, get rid of them. (The handles, not the buckets)
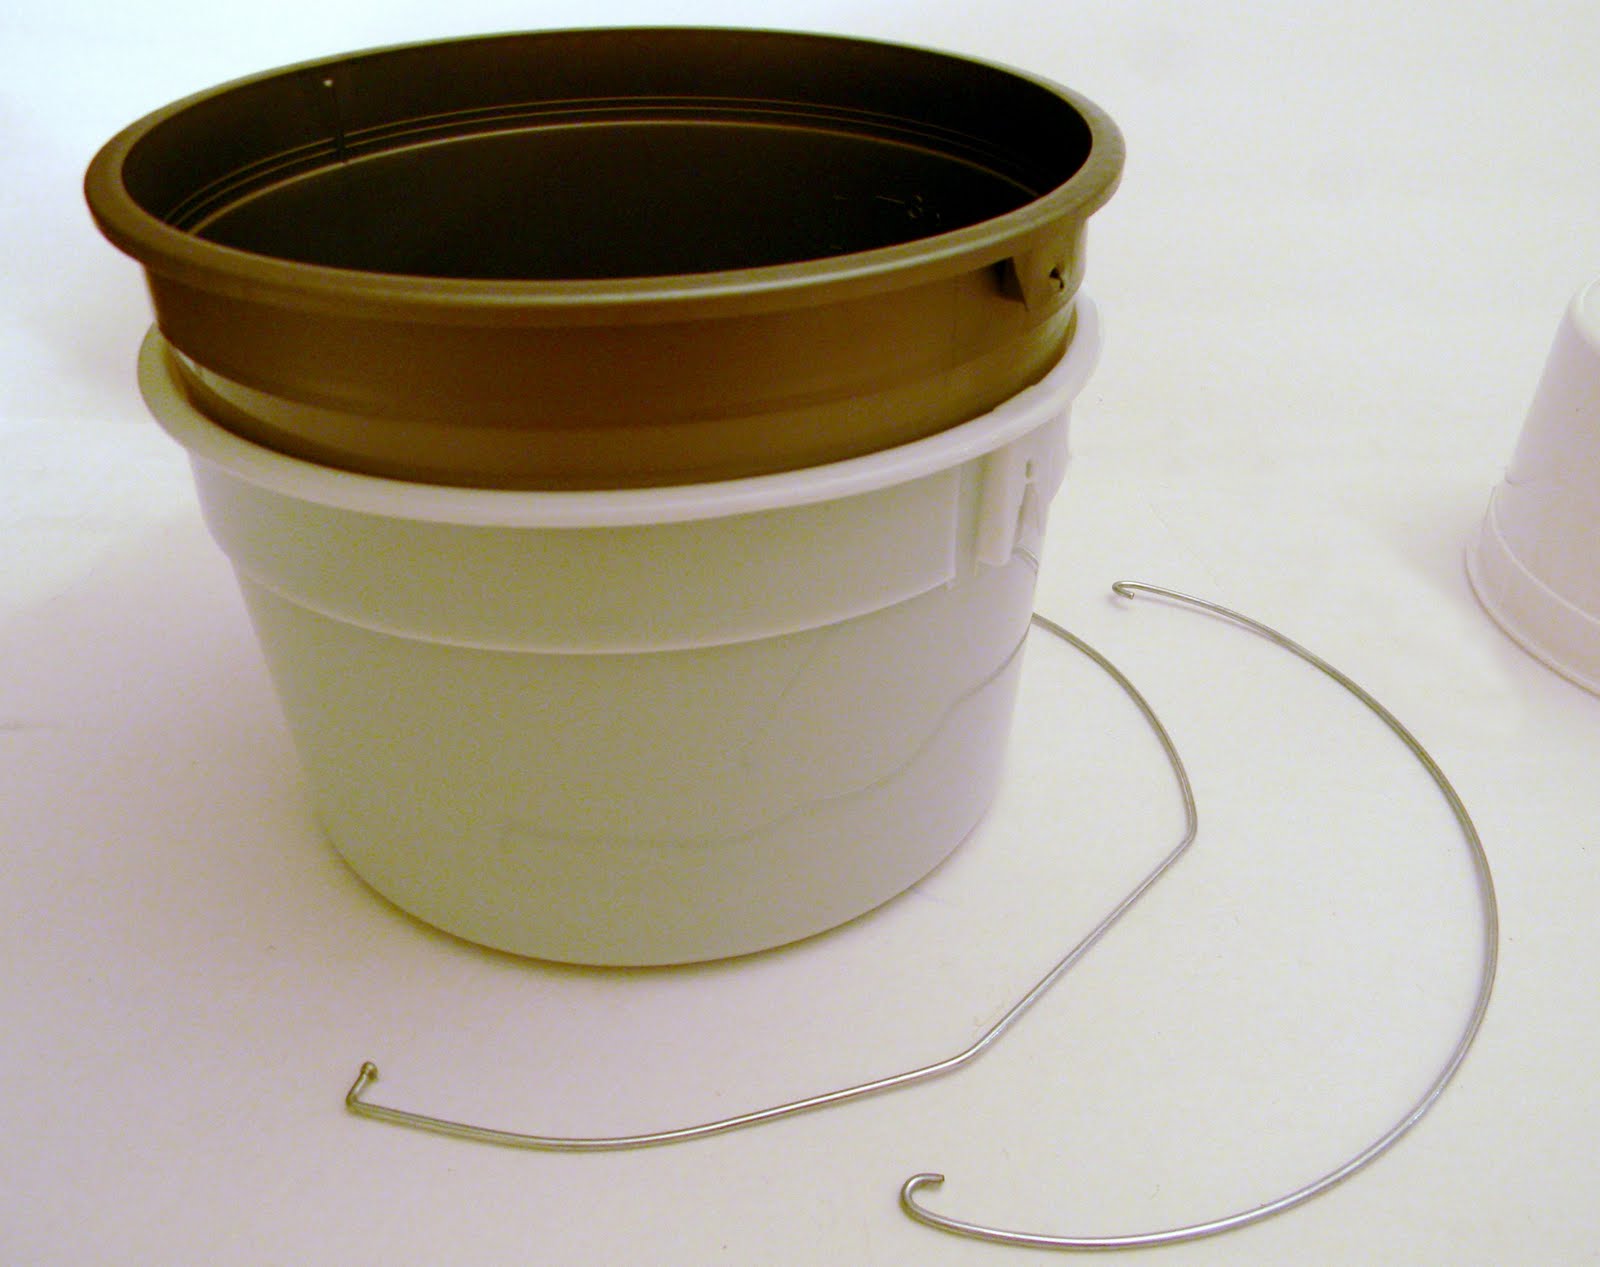
Now, we're going to decorate them. What's the easiest, most inexpensive way to decorate on plastic? Duct tape of course! Paint won't stick or last well, and vinyl would get pricey. So whip out the colored duct tape!
Lay your duct tape down in strips on a plastic cutting board. Cut shapes into the strips using a craft knife and peel the shapes up from the cutting board with the tip of the knife. Voila! Instant stickers for all your plastic decor needs!


Set your bucket right side up on a piece of colored card stock and trace around the bottom.

Cut out the circles.

Now, set it down again and use your craft knife to cut slits from the bucket to the outer edge of the circle, all the way around.

Turn your bucket upside down and lay your paper over the bottom. Duct tape the paper to the bottom of the bucket, folding the slits down as you go.

Do this with all of the buckets, and finish decorating them.

Now, sorry, here's where the pictures start to fail. Cut out a piece of cardboard large enough for all three buckets to sit across. I used the side of a diaper box. Trim the cardboard to just fit the buckets. Paint your cardboard to match. Use hot glue or gorilla glue to secure each bucket to the cardboard.

Punch holes in the two FRONT corners of the cardboard base. String ribbon through the a hole and tie a large double knot on the underside of the base. Cut the ribbon to a long enough length to fit around your child's neck. String the other end of the ribbon through the hole on the other side and tie a knot - as you did before. I used three different ribbons and just tied them as one.

You'll need drumsticks, of course. Take two skinny dowels. Dab gorilla glue on the ends and stick them into two wooden knobs (bought them at the craft store. You could use wooden beads, too). Let the glue set and spray paint.

Everyone will want in on the action!

Next up, the xylophone. I have even less photos of this tutorial, sorry. I don't know what happened. Lost my head, I guess. Luckily it's easy enough to explain.
You'll need:
a long skinny photo frame (got mine at the dollar store. Score.)
Card stock
Paint
drill
Ribbon
Nylon webbing
Gorilla glue
Colored duct tape
Straight Pipe connectors of different lengths
So. My dollar store frame was one of those with two sections. But I didn't need it sectioned off, so I broke that middle part off and took it out. Then I spray painted the frame to match the rest of the instruments.

I cut card stock to match and slid it into the frame without the glass.

Then I slide the back on.
NOW. You'll need to choose several pipes of different sizes. I went to my local hardware store and searched in the plumbing section. I found all different kinds of connectors. You will want pipes that are 1. metal, 2. the same diameter (since this affects tone), and 3. straight. I chose 8 different pieces so I would have an entire octave. Paint them to match your instruments. Then, use the gorilla glue to glue them to the frame, making sure to glue them in descending order of length.
Wait for the glue to set. Drill two holes in the frame - one on each short side. Cut strips of duct tape to decorate and also secure the pipe to the frame even more. When you lay the duct tape, you can fold it around onto the back of the frame.

Cut a piece of nylon webbing so the xylophone will fit around your child's neck. Lay a small length of ribbon across the ends perpendicular to the webbing. Hot glue the ends of the webbing up over the ribbon, sandwiching the ribbon in webbing. Stick the two ends of each piece of the ribbon through the holes you drilled. Tie the pieces in a large knot on the underside of the frame to keep the strap in place.
Make two mallets as you did for the drum set.

It's metal. It might be a little heavy. No worries, though. It's pretty resilient, even when dragged behind.

Lastly, I'll show you the maracas. As I've mentioned, these were bug's idea. And he's very stubborn. So I humored him.
You'll need:
two large plastic Easter eggs
craft knife
dried beans
two skinny dowels
gorilla glue or hot glue
duct tape of different colors
Fill the top half of your eggs with beans.

Use your craft knife to cut a LITTLE hole in the bottom of your eggs. Slide your dowels inside the holes and spread some gorilla or hot glue on the INSIDE of the egg around the dowel. Let the glue set, then pop the bottoms on to the tops.

Cover the crack with copious amounts of duct tape. You don't want any curious little hands breaking those eggs apart to see what's inside. Ahem. Not that I speak from experience or anything.

Cut out shapes from your duct tape using your craft knife as you did for the drums. Decorate your eggs with gusto. Then, take long skinny pieces of duct tape and decorate the dowels.

I'm pretty sure I'd use larger dowels next time, but this was what was on hand.

And if one hand is already occupied, don't worry! You can shake-a, shake-a with two in one! A one man band!

Hope you've enjoyed our percussion section! Stay tuned! More fun to come!

*Be sure to check just below for all the fun parties I link to!


3 comments:
Holy smoke, What fabulous ideas/tutorials!!! I am thinking new instruments for my classroom and trying to think what I could cover the drums in to make them more durable. I have very active boys & girls in my upcoming new class!
I have to look back on the wind instruments!
Thanks Kimberly!! You ROCK!
Oh my goodness, this is the cutest idea I have seen in a while! You have the luckiest kids, lady! :) So creative.
Thanks for sharing all these ideas! My kids love "singing" which is what they call any and all music play, so I'll have to try making them a few new instruments. Finally a use for that empty oxyclean bucket :)
Post a Comment