


I saw this button necklace on Martha’s site (yes, I’ve been on that site a lot lately, thanks to the CSI challenge!) and loved it. I decided to make something similar for myself. Yes, that’s right. FOR MYSELF. When does that happen??? Never. I figured since I was making my mom a necklace, why not me too?
You’ll use:

braiding cord (again, not sure here....)
buttons of various sizes and colors in a complimentary palate. (I used three LARGE decorative buttons as my focal point)
A closure of some sort (could use another button and do it THIS WAY, from yesterday’s post) (I decided to use the closure from this poor, sad broken necklace - also from yesterday’s post - so as to reuse the whole thing. Waste not, want not.)

Cut yourself some cord in the length you want your necklace, plus a bit more for knotting the closure on. Cut as many pieces as you want your necklace to consist of. I used 6 pieces.

Take a piece of cord, thread a button on going up through the hole from the back and down through the hole kitty-corner from the front. Thread a few buttons on this piece of cord and space them out UNevenly.

Do this to two more cords.
On the fourth cord, do the same thing, but thread one of the extra large decorative buttons on so that it is directly in the middle of the cord. Thread other sized and colored buttons around it.
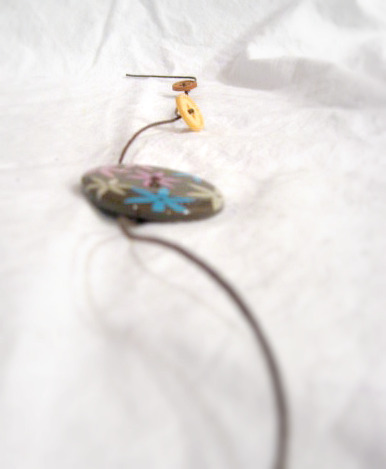
On the fifth cord, thread the large decorative button so that it is to the left of center.
On the sixth cord, thread the large decorative button so that it is to the right of center.

Now, holding all of your cords together, take one end and pull a single strand out so it’s longer than the rest. Loop it and tie ALL the ends together in one double knot. Use one of the ends that is sticking out to wrap around the knot to hide it and use dabs of hot glue to secure it into place.


For the other end, pull out a single strand and tie it around the closure (mine’s just a little crab claw thingy mabobber). Tie all the ends together in one double knot. Use one of the ends sticking out to wrap around the knot to hide it, in the same fashion as above.


Voila! You’re very own necklace, all buttoned up! Aren’t you stylin’? (Too easy, right?)


(ok, last button post, I promise.)

Linked to:


4 comments:
Very cute! I love all the fun buttons you used!
Hi Kim - thanks for your comment on my blog. To answer your question, I pretty much made them exactly as Martha Stewart describes except I used cheap old duct tape instead of fancy bookbinding tape. ( The frames came unfinished from Ikea in packs of three. I printed the vellum myself and put it all together. ) Hope that helps!
thanks! I think they're so pretty! I really want to do something similar for one of our parties sometime.
Thank you kelli! I'm glad you stopped by!
Your buttoned necklace is an awesome inspiration! Many thanks for sharing. I would like to feature it at
http://www.handmade-jewelry-club.com/
Contact me here if you have a concern.
Jane
http://diylessons.org/
Post a Comment