


I recently purchased this cute tote at Target in the dollar (which are really the 2 dollar 50 cent) bins. Come on, I know you bought one, too. They’re perfect for summer, I know it. It seemed a bit plain to me though. Enter, this inspiration from Make it and Love it. She used the fabric ruffle flower for wall art in her bathroom, and I LOVE the idea and the color palate. I wanted to copy it completely and put it up all over my house. (For the record, in looking over this inspiration just now, I realized that MY finished product looks nothing like it. I am definitely going to have to make some wall art using this technique. Maybe for my bedroom?)
I thought it would make a lovely accent on my plain straw bag! So I set off to make one.
Here is where I candidly and openly admit that “that's just the trouble with me. I give myself very good advice, but I very seldom follow it.” (Disney’s Alice in Wonderland.) Yes, sadly, it’s very true. I completely and totally ignored all advice and common sense when it came to sewing a gathering stitch and gathering the fabric. (Do you remember this post? The one where I learned just exactly why you DON’T gather three layers of fabric at once? Yes...) History is such that if we don’t learn from it, we are doomed to repeat it. And repeat it I did. But I’m getting WAY ahead of myself here and skipping to one of the best parts of the “tutorial” (or should I call them “untutorials”? Hmmm....).
In any case, if you’d like to add a pretty ruffled flower to your own Target straw bag, you’ll need some fabric scraps, a sewing machine, and a hot glue gun.
First, you will decide on the fabric. (I had some scraps of curtains left over from this project and decided the bright pink and orange would be great for a summer bag. And see how it matches the polka dots inside PERFECTLY??))

Cut it into strips - being very UNcareful to cut straight. (it would be ok if you decided to cut them straight right from the start. It would save some headache.) Cut about 8 strips.

Look it over and notice the horrible wrinkles. Decide that you’ll be good for once and actually iron the strips before you start sewing a small hem all the way around to finish the edges.
Once you begin ironing, decide that it will cut a lot of time off of the project if you iron the edges into the middle and simply run the gathering down the middle through the three layers. This way you won’t have to finish the edges. Aren’t you smart?

Iron.

Every.

Single.

Strip.

Of.

Fabric.

When this is done, you can sew a straight stitch down the middle with the longest length setting. Of course, if you want to do this exactly as I did, you will have to forget to keep track of your bobbin thread and run out half-way through.

You will also have to rethread your machine a total of 3 (yes, three) times because it keeps coming unthreaded.
Feeling thoroughly discouraged as this is taking much longer than you initially assumed it would, pile up your strips and begin the arduous task of gathering.

Gather a strip, and break the thread.
Stare at it for a full 2 seconds. Toss it aside.
Try another strip. Get almost completely done with this strip, but break the thread once again.
Feel the frustration build.
Toss it aside.
Take a break from ruffling to cool off a bit. Make about a billion of these - just because you can. (I'll show you more about this later...)


Gather yet another strip, and when the thread breaks, decide you can still salvage it. ALMOST succeed, then toss it aside when the thread breaks twice more.
After four strips, you have one ruffle. The odds aren’t in your favor, but persevere.

After 8 strips, you still have one ruffle. Steam and stew, throw the ruffles on the ground, turn off the light and take a long break.

Check out google reader and look up lots of lovely inspiration for future projects. Projects that do NOT include ruffles of any sort, grrrrrrr...
Get very distracted and don’t realize it until your two year old wakes up from his nap.
Decide to give the ruffles a rest until tomorrow.
Feeling new, return to the fabric strips the next day. You’ve already cursed your impatience, laziness and urgent need for immediate gratification, along with feeling like a doofus for not listening to past recommendations about gathering. So, get over and get on with it.
Rip each strip open, so it’s only one layer. It's actually a little cathartic.

Fold the strip up and trim the edges so they are straight.

Realize that you really like the unfinished, slightly unraveled look. You don’t want the entire strip to unravel, though, so you’ll have to run a straight stitch all the way around each strip to stop the ravel at a certain point.
Straight stitch around each strip. Now realize that instead of saving time, your little short cut added an entire day and one precious nap time to the “easy” project.


Trim off any excess or not straight fabric. (again, adding a step and time).

NOW, sew a gathering stitch down the middle of each strip.

Gather each strip.

Don’t they look pretty now?
Get out the trusty glue gun.
Fold an end over and glue it onto the back of the strip, then trim the thread.


Glue the ruffle in a spiral, beginning on the outside of the circular shape, gluing short sections at a time.

Continue this with each ruffle, lining each new one up with the old one that’s already glued down, until you end in the middle of the spiral.


When it’s finished you will definitely need a matching ruffle for your summer straw hat.

Cut out an oval of chipboard.

Glue on a ruffle spiral, as you did with the bag. (I used ribbon for part of mine for variety, but you can just use your fabric strips. Whatever you want.)


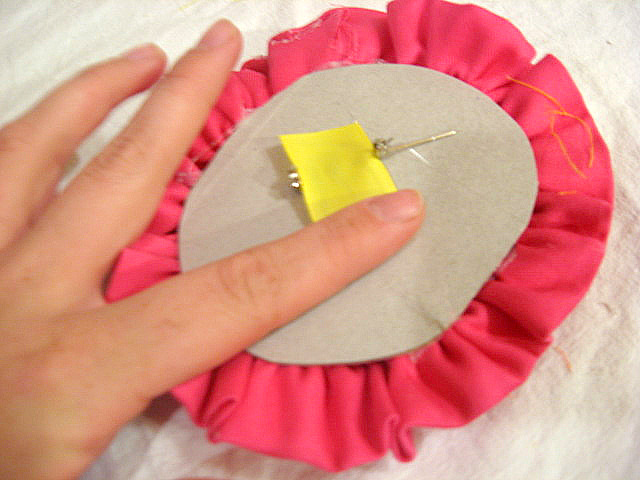
Add a button center.

Glue a pin on the back, and glue a small section of ribbon over it to hide any ugliness.

Pin it on the hat and strut about, wearing sunglasses on a very overcast day, feeling a lot like Jackie O (Oh, how I wish for that kind of class...)

The hat is great for keeping the rain out, as well as the sun...

And bug loves it too.

The bag is multi-functional as well.


Magazines, towels, and matchbox cars.
I’m happy with how it eventually turned out, although the circular shape on the bag is a bit lopsided. It’s still a cute idea.

I think it’s safe to say, EMPHATICALLY, that I have learned my gathering lesson. Finally.


Linked:


8 comments:
LOL!! You are hilarious, thank you for admitting your mistakes and making all the rest of us who do the same EXACT thing feel a little more normal:)
BTW, I totally love that you perserved and finished the bag, it looks Adorable!!
visiting from justsewsassy.com
So cute!! what a fun post!LOL!
Staci - do you all do stuff like that too?? Thank goodness... ;)
Thank you both! :)
Just incredibly lovely. I really think you did a good job here. The bag, fantastic. The hat, double fantastic.
i think the hat is particularly successful and i like that you choose straw for both.
how about a dash of yellow in the center of the bag's flower, just to tie it together even more???
just a thought.
you could use buttons or plastic flowers or whatever for, it so you don't need to ruffle it, haha!!
thx for commenting at FineCraftGuild!
hope to you soon again... maybe at the mclinky party this coming Wednesday??!
Thanks, Alisa! :)
Rose, I thought of that too. I may just have to add a yellow button to the bag! We're going out of town, but I will check out your linky party as soon as I can!
I love it! I also love the headbands! You are too funny!
Love your step by step countdown with the ruffles! I have thrown mine on the floor a time or two myself. It looks super cute!
Post a Comment