


The playroom is not complete. This is, I’m sure, simply shocking to all of you. I refuse to post pics until it’s really done. Here’s a teaser.

I only have a few more paint projects and the curtains to do, so it shouldn’t be long now (she says in hopeful anticipation, while crossing her fingers behind her back...)
I finally finished and sent the Mother’s Day presents I was working on out to Utah last Friday to be enjoyed by mr’s mom and sister. Yes, yes, I know. What’s the date? (No, seriously. What’s the date? I have no idea. I can’t seem to keep any better track of that than I can my phone or wallet.) I’ve never been punctual. No, that’s a lie. I AM punctual to things that involve food or theatre. Food because I like it, and theatre because I was trained that way. When it comes to sending things out to Utah I should be drawn and quartered. I considered just keeping the presents until we fly out there on June 16th, but that seemed REALLY lame.
ANYWAY, the point is, I’m going to show you some Mother’s Day presents finally! You can see what I made my own mom here. (She loved it.) Tomorrow I’ll show you what I made mr’s mom.
Tonight, I’ll show you what I made my sister and sister IL’s. Because they’re great moms too and deserve a little appreciation! (And I’m really sorry if you haven’t gotten the package yet and this ruins the surprise, A)
When I was looking around for some Mother’s Day inspiration, I found this post on MADE. She hosted a whole three weeks-ish of mom day ideas, and I loved this one for its simplicity. I think of it as un-fussy decor. It’s easy to make, it’s not complicated and busy when displayed and it’s just plain cute. I changed mine a little from her tutorial, but you go: The No-Sew Flower.

You’ll need:
dowels
spray paint
fabric scraps
Scissors
hot glue gun (I think you need this for EVERYthing I make. EVER.)
ribbon
Optional:
spongy/foamy block thing
tulle
other embellishments


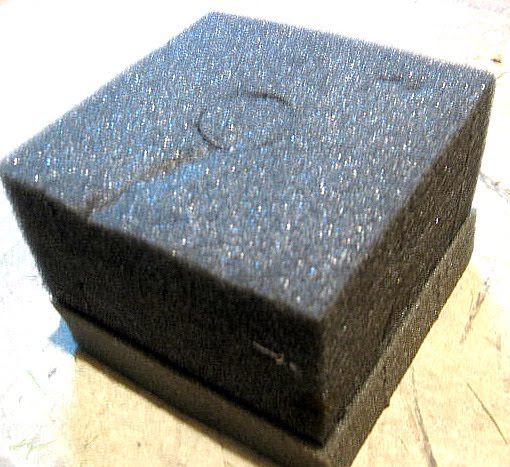
1. First things first. (obviously) Raid your Dad’s garage. He’s got the best stuff in there. I found some scrap wood I know will come in handy! But that’s beside the point, at least right now. What’s important at the present is that I found this foamy block thing. Perfect.
2. Gather some small dowels. Mine are 12 inches and super skinny. They came in a pack of like a gazillion. Or maybe 30 or something. You know. Around there.
3. Now, poke some holes in your foamy thing. If you don’t have a dad’s garage handy (or if your dad isn't a hoarder), and therefore, no random foamy block (honestly, I don’t know what this thing is or why he had it. I’m not sure HE even knew what he was going to use it for...) you can also use a thick sponge.

4. Insert your dowels into the foamy/spongey thing so they stick out all over.

5. If you are a fan of modern art, you can stop at this point, call it a sculpture, display it on your console table and impress all your friends.
6. I chose to continue on with the no-sew flowers, though.
7. Spray paint your dowels, making sure to cover from all angles. I decided to use a classic color palette - black, white and red, so I spray painted some dowels black and some white for variation. You can spray them whatever colors you want. The sky’s the limit.


9. Now, cut yourself some strips of fabric. This is where my flowers differ from Dana’s over at MADE. I made sure to cut my fabric strips wide enough so I could fold them in half - I liked the look of the folded edge on the outside. Vary the widths and the lengths a bit so your flowers aren’t all matchy-matchy. (according to Stacy and Clinton, matchy-matchy is so old school.) I used several different patterns of scrap fabric - all in reds whites and blacks.

10. Take a strip. Fold fold it over lengthwise and secure the open edges with some dabs of hot glue. This is just to keep them together as you roll them into a flower, it makes it easier. You could glue the fabric together wrong way out a few times, like I did, but only if you want to appear absentminded and slightly craft-klutzy.

11. With one end, fold the top corner down to the bottom of the strip at an angle and secure with hot glue. I found that this was the most attractive way to make the “bug” look in the center of the flower. Oh, make sure to burn your fingers multiple times in just this first step. That’s really important.

12. Now stick your dowel in there, kind of wedge it in so it’s sandwiched between the fabric where it makes an angle. Fold some of the angle around the dowel and glue.

13. Now it’s just a matter of rolling the end of the dowel up in the fabric strip, gluing in small sections and “gathering” the fabric as you roll. Just run a line of glue along the bottom of the strip, pinch it together a bit, roll it around the dowel, and adhere to the fabric that’s already been rolled on. Easy Shmeezy. Although I have to admit, it takes a while to hone the “pinch and roll” to perfection.


A tip: gathering is good. You really can’t have too much pinching. Well, with this craft that is. You may think the bottom of the flower looks a little funny and wide, but don’t worry you can fix that. You have a glue gun, remember? You can fix anything!
14. Okay, once you like the look of the flower, or you are at the end of your fabric strip (whichever one comes first), fold the end of the strip up and glue, to mask the unfinished edge. Glue the end to the fabric flower.

15. Now you can look it up and down, and either call it good or dot some hot glue around the base of the flower to hold it tighter together and adhere it to the dowel better. Just dab and pinch. (pinch and roll, dab and pinch... there’s a lot of pinching going on here...)


16. Repeat this process until you are either sick and tired of rolling fabric up and just need a break - for crying out loud! - or are out of dowels. Or you’re out of fabric, I guess. I just assume you’ll run out of dowels first.
17. If you would like to add tulle to your flowers there are a few ways to do this. My favorite looks were achieved with the following methods - but you can try your own too.
A. Make the flower exactly like normal. When you are done, cut a small square of tulle. Fold it into fourths and dab some hot glue on the fold. Press down into the middle of the rose to attach it through the fabric onto the dowel. Trim the edges if necessary. The look with this one should be jagged and asymmetrical, so you can cut the tulle to suit your needs.
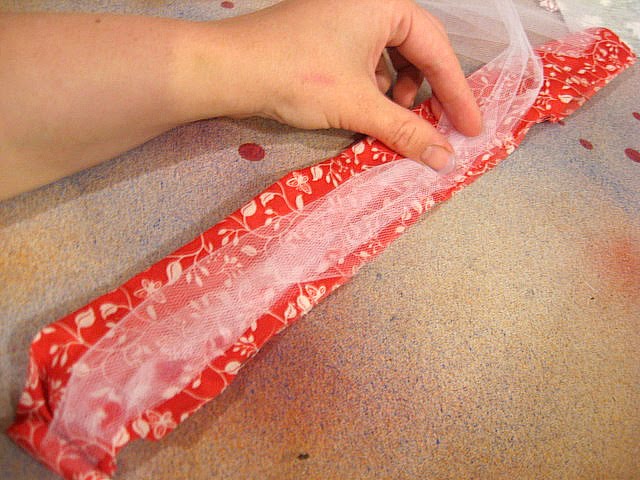
B. Lay your fabric strip out and glue the open edges together as per normal. Cut a strip of tulle the length of the fabric and run hot glue along the bottom of the fabric strip (you know, the ends you just glued together) to attach the tulle. Now just make the flower as normal and there will be a tulle layer stuck in there. We all know you can never have enough tulle.
18. Last step. Cut a small piece of ribbon. Attach one end of the ribbon to the flower where it meets the dowel. Wind the ribbon around the flower and the dowel a few times, gluing when necessary to keep the ribbon in place. Glue the end down and trim if needed. This way you mask the gluey bunchiness where the rose is attached to the stem.

Oh, yeah. You can add other embellishments now. Some ideas are little rhinestones or colored jewels on the inside of the flower, buttons, rick rack leaves, etc.
And there you have it. No sew, super gluey flowers! I love my hot glue gun, as you know, so this project was perfect for me.
Put them in a vase

plant them in the flower bed
smell them

admire them

flourish one in your teeth

wrap them up and send them off!

Even babies love them! (That’s right, A! Your Mother’s Day present comes complete with mini drool! It’s the best part, I know.)
Isn’t she the perfect model?

Linked to:


2 comments:
Your flowers are beautiful! Found them on oneprettything.com. Your blog is so cute, too!
Thanks, Lyndsay! I'm glad you came by to check it out :)
Post a Comment