Yesterday was my last day watching K for the whole summer! I think bug, mini and I will get a little bored. But as for today, I spent nap time crafting. It was wonderful. bug and mini both napped for about 3 hours, so I was able to squeeze some other things in there too (like eating lunch and taking a shower) (it felt like luxury).
My first project of the day was a necklace I’ve been wanting to make for my mother. It was inspired partially by this craft on Martha Stewart’s site, and partially by this tutorial on A Lemon Squeezy Home.
But it was mostly inspired by this:
One of my favorite chunky beaded necklaces that fell prey to two year old hands. Oh, the perils of being a cute adornment in the house of a toddler! Sigh. I’m not really all that great at beading or jewelry making - I don’t seem to have the patience. Plus my hands shake like a 90 year old woman (no offense to the 90 year old women out there reading this... I know it’s just a stereotype. My hands are probably worse than your anyway.)
But I thought I could repurpose this little number into something like this
and still feel good about an old friend.
So here’s what you will need:
broken large bead necklace (or just some large beads)
A length of fabric, approximately 10-12 inches long or so
“Braiding Cord” (I have no idea what that really means. It just seemed like some natural fiber cording for beading to me. Is “braiding cord” a beading industry term and I am showing my ignorance? If so, please disregard.)
one pretty button
hot glue gun (like usual)
sewing machine
Take your fabric and place your bead on it. This is your highly technical and accurate means of measuring a width for your fabric strip. Use a pencil to mark, OR just
Take your scissors and cut wide enough for the bead to fit through + a bit extra for seam allowance.
**Note: You’ll want to measure and cut on a FOLD so you only have to sew one side.
Fold your fabric in have lengthwise with the right sides together. Pat yourself on the back for remembering to do the “right sides together thing.” (That’s what you always forget).
Sew a straight stitch down the length of the strip. Stop when you are a bit away from the end with your needle down in the fabric. Lift your foot, pivot, lay foot, (grapevine, toe touch, LEAP! Sounds like I’m giving dance instructions...) and straight stitch the end.
Take out your trusty dowel. (I didn’t mention that in the “will need?” Well, don’t worry. You can use a knitting needle or a pencil or whatever is handy.)
Slip the casing down onto the dowel.
Keep pushing the dowel along the fabric, turning the fabric right side out.
Voila! Right side out casing!
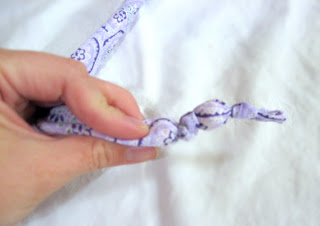
Tie a knot in the end of the casing that is already sewn shut.
Push a bead into the opening of the casing, all the way down to the end.
Tie a knot just after the bead.
Repeat.
And repeat.
And just keep doing this until you are out of casing.
Tie a knot after the last bead.
Take out your “braiding cord” (???) and notice in the corner it specifically tells you it’s for kid’s crafts. Huh. Well, they about have your skill level pegged.
Measure around your neck to see how long you need the cords in order for the necklace to be the length you want.
Cut 6 pieces of cord the needed length.
Take three pieces and tie them in a double knot around the end of the beaded/knotted casing thing just above the last knot. Leave the little tails of the knot kind of longish.
Take the other three pieces and do this to the other end.
Take one end of the cords and thread all three through a pretty button. Tie a double knot and trim the ends.
Take the other set of cords and tie a knot.
Now, braid the cord for a short section, make a loop and tie it off.
Take one strand of cord and wrap it around the others where the loop begins, to hide the knotted stuff.
While wrapping, dab hot glue to secure.
Now, dab some hot glue on one of the ends of the fabric casing.
Lay all the cords across this and pinch the fabric end up and around the cords.
Trim off any of the small cords.
Repeat on the other side.
Fasten it with the button closure and you’re done!
Phew! No mistakes! A relief, since this is a little appreciation gift for mom. Who says you need a day to show her your love?
Such a quick and easy way to make over a necklace!

linked to:


2 comments:
Now this is fabulous~ Well done!
thanks, Laura!
Post a Comment