


Be sure to enter my giveaway! Three winners! Open until April 4th. Go here.
Don't forget to link your yarn projects to our yarn-related linky party! (Link flickr and photobucket, too.)
Pop on over to SYTYC to vote for the Dollar Store Crafts!

Amid some yarn experiments (yes, I've conducted a few over the past weeks) I decided I liked the look of braided yarn. It's nothing new. (In fact, it's actually really old. I was researching braiding styles and found a bit of history involving Celts and Vikings...) Anyway. It's nothing new. But I found myself trying to recreate it in a new way.
And now you, too, can make your own braided belt.

Now, I know there are many websites out there that give instructions for braiding. Mostly for hair, but the concept is obviously the same. I didn't find exactly what I was looking for in a timely manner, though, so I figured the following 7 piece braid out on my own.
For the ease of this tutorial (which is actually very difficult to describe, what with all the strands hopping around all over the place) I've numbered the strands 1-7 from left to right. I will refer to the strands as their assigned numbers throughout the how to.
For the most basic braided belt all you would need is yarn and a scissors. As you will see later on, for this first version I also used some very faux leather... actually I think it's so faux it's really faux vinyl (as in not even real vinyl), a belt buckle from a discarded belt, and a very small hole punch.
So, first thing first. Measure around your waist, double that, and cut each strand of yarn to size, then tie them together at one end with a single piece of yarn. Now, I wanted my belt to be nice and thick, so I used multiple strands of yarn to create each piece of the braid. So for each of the seven pieces, there are four strands of yarn - for a total of 28 yarn strands cut.

Divide your strands into seven pieces. I divided mine by color.

Take 1,

and pull it over 2.

Then pull it under 3.

And then over 4.

Now, take 7.

Pull it over 6,

under 5,

and over 1.

Now take 2. Pull it over 3, under 4, over 7.

And take 6, pull it over 5, under 1, and over 2.

Do you see that you're really just weaving the yarn - first the left side, then the right, overlapping the middle strands?
Take 3 and pull it over 4, under 7, over 6. Then take 5 and pull it over 1, under 2, and over 3.

And so on and so forth until the whole length of yarn is braided.

You could use this weaving method for any ODD number of pieces.
Once your belt is braided, we move on to the fake vinyl,

and the belt buckle.

Lay out your vinyl, folded in half, and on the back, draw out a similar shape to this:

Cut it out and use it as a pattern to cut the other side - lay it down and trace, then extend the skinny part about 5-6 inches or so.

Take one of the pieces with the SHORTER skinny piece, fold it down, and cut a notch in the middle, about an inch away from the end.

Lay it down flat, spread some hot glue on the end,
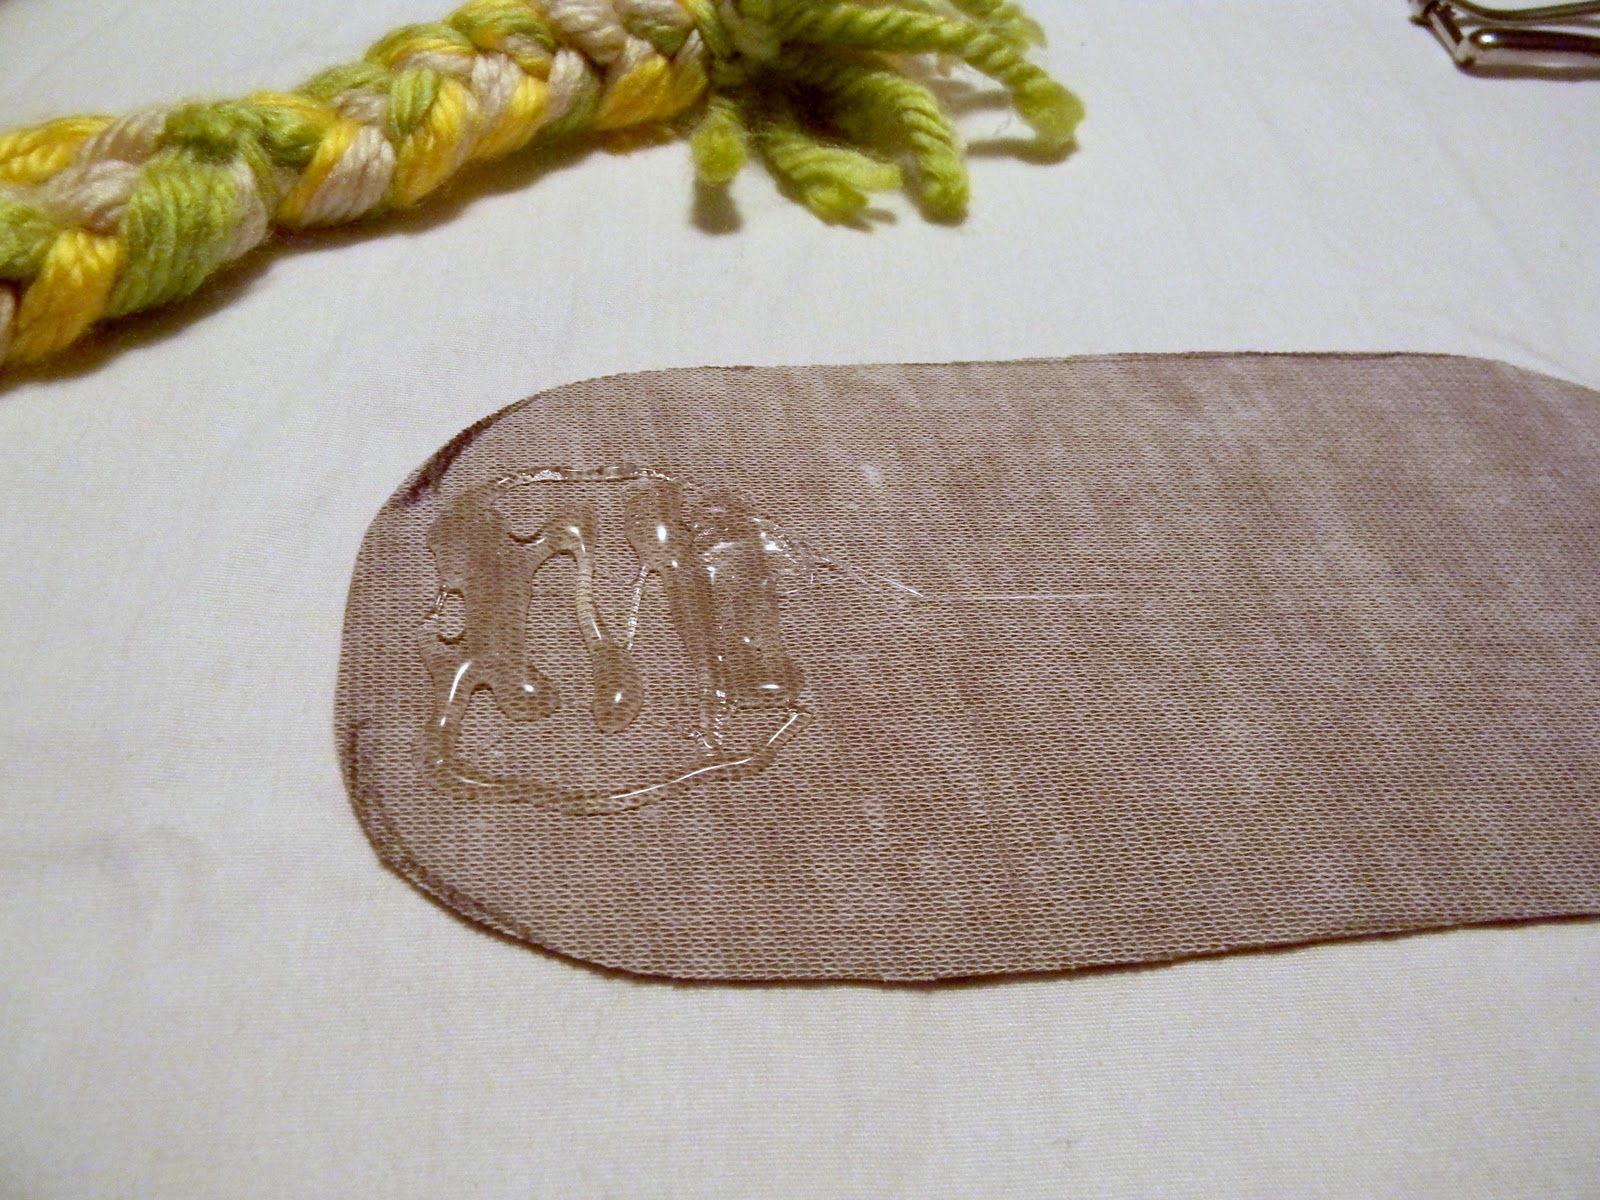
And lay your braid down.

Trim the end of the braid.

Slide your belt buckle into that notch you cut.

Hot glue the matching vinyl piece over the top, sandwiching the braid between.

Hot glue the skinny parts together, by the buckle.

Dab some hot glue on the above the notch,

And fold it down over the buckle, pressing firmly onto the other vinyl piece.

Hot glue the pieces together all along the edge.

Take your other vinyl pieces - with the longer skinny part - and lay one out. Hot glue the other end of the braid to it,

and trim.

Lay your final vinyl piece on top, sandwiching the braid. Hot glue all along the edges, even the skinny part.
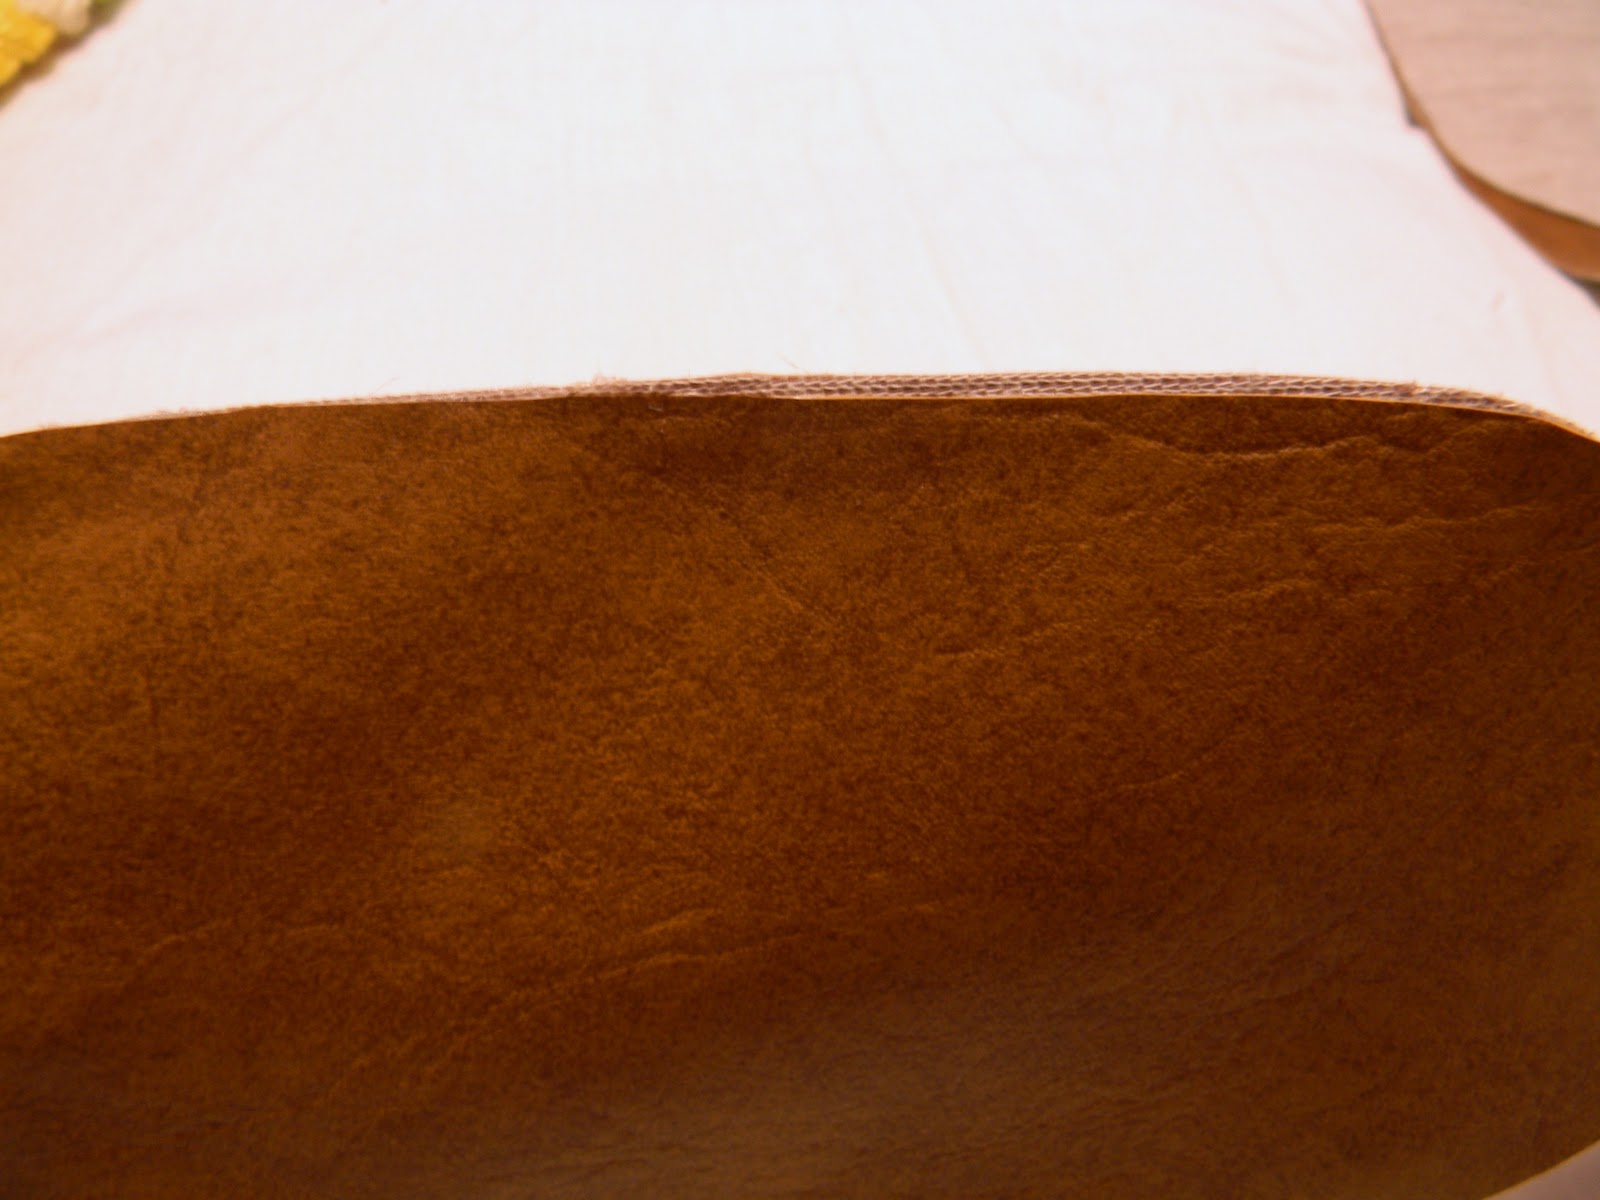
You may need to trim around to make sure there isn't any overhang.
Now, cut the end of the long skinny piece into a rounded curve. Use a small hole punch to make holes for the buckle.

Finished!

For an easier version of this braided belt, all you'll need is the braided yarn, an elastic hair tie, a button, and a hot glue gun.
For this braid, I used 5 pieces.

and at the end I simply tied it off.

I used bits of yarn to make a covered button by weaving them together and then pushing the back on over the ends of the yarn.

Slide the hair elastic onto one end.


Fold the end down over the hair elastic, so it is sandwiched by the braid.

Like so:

Thread a strand of yarn through the button.

Put a bit of hot glue on the back of the button for extra hold,

and tie the strand of yarn around the other end of the braid.

Now you can simply pull the elastic over the button. I left some yarn strands hanging for some fun interest.

And that's that!

Two ways to braid yourself a belt. But again, the possibilities never end. How about some braided yarn headbands? Or incorporating a fabric backing? Maybe you could weave/braid some jewelry, or a camera strap. Or a skirt. Ok, just kidding. Even I wouldn't do that...
hmmm....
Have you gone over to Mandy's yet? Do it!

*Be sure to check just below for all the fun parties I link to!


