I discovered pillow case dresses a few months ago. I know, I know, where have I been, under a rock? Well, when it comes to sewing, yeah. Kind of. So, I discovered these dresses and thought, “where have you been all my life??” HERE was a sewing project I knew I could handle. Maybe even excel at. Maybe even alter a little tiny bit to add something extra. Hmmmmm....
And when I finished making the leg warmers from the sleeves, the leggings from the sides and the bloomers from the shoulders of the shirt, I had just a bit of torso left over. Probably not enough there for a dress, but it’s perfect for a pillowcase top! So I set to work on project 4.
You’ll need:
Your thrifted shirt remnants
a sewing machine
grosgrain ribbon to coordinate
a safety pin
a lighter (no, I haven’t taken up smoking as stress relief. But I did feel kind of weird buying lighters at the grocery store for the first time, regardless.)
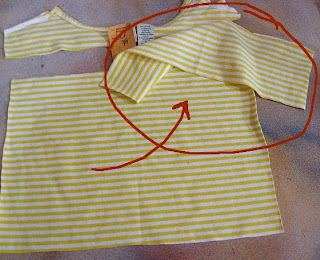
Lay your shirt out.
Cut off the rectangular portion just under the neckline.
(Here is a close up of the price tag, just in case you didn't believe me. That's not dollars, people! Holla! (yeah, you're right. I'll never try that slang again.))
Measure and cut how long you need the rectangle to be in order to fit the desired baby.
Cut a strip off the top of this rectangle that is about 4 inches wide or so.
Cut the large rectangle and the strip in half, width-wise.

Put your two large rectangle pieces together and fold them in half.
Cut a curve out of the corner of the rectangle. This will be the arm hole. I didn’t measure the arm hole in any way, just guesstimated it and it worked out fine. If you have a decent idea of how big the baby is, you can use the guess method like I did.
Now take both strips and sew a straight stitch on the longest setting down the length of each about 1/4 to 1/2 inch in from one edge.
Gather the strips. (a note. If you want the ruffle bottom to be more pronounced, you will need to cut at least one more strip from the remnant shirt so you can gather each strip in more.)
Line them up along the bottom of the shirt, one strip for the front and one for the back. Overlap the strip on FRONT of the bodice piece. Pin into place.
Attach it by sewing a straight stitch all around.
Sew up the sides of the shirt from the ruffle bottom to the bottom of the curved arm holes.
It looks like this:
Measure the width of the ribbon you’re going to use. Mine was two inches.
Turn your shirt inside out.
Fold down the top of the front a little over two inches (or just slightly more than the width of your ribbon).
Sew a straight stitch across.
Repeat this on the back.
Measure and cut two lengths of ribbon. I made mine about 16 inches. This is totally up to you though.
Using your lighter, singe the ends of the ribbon to prevent fraying.
Now use your safety pin and thread one ribbon through the casing on the front and one ribbon through the casing on the back.

Tie the ends in cute bows,
admire your work,
and place it on the desired baby.
Who makes a darling model.
But really wants to untie those bows.
Distract her with a flower.
Which she will want to eat.
I have to say, I think this may be one of my favorite sewing projects I’ve completed. Well, I don’t have to say it, but I will say it. Because A, it was easy. B, it’s yellow. C, no hemming!! and D, it looks like something that’s actually an article of clothing, unlike the pancake hat. mr even said, “huh, you made that? I just assumed you bought it.” Woot! (What’s that you say? I can’t pull that one off either? Well, fine.)
And, upon request of my sister, more mini commentary:
“No more, no more...”
“Well, ok. Just one more...”
“What? We’re done with the photo shoot? Already?”
“I knew you couldn’t stop.”
"I don't blame you."
“I mean, look at this smile.”
(Oh, and here's some good shots of the shirt, you know, if you like that kind of thing...)


Kimberly
*check below for all the parties I link to!


5 comments:
This one is my favorite so far! And look at that sweet baby. I could take her home, she is so darling.
But I don't. You can keep her :)
So so cute! I love how darling this turned out! Thanks for linking up to Hoo's got talent! Cute model too!
I seriously wish I would have taken sewing instead of woodshop. My mom was right. Dang it.
I think this one was my favorite yet. I love it! Thanks so much, I'll be linking.
Super, super, super cute! Great job. I can't wait to find the rest of the projects you did with this shirt!!! How awesome is that?!? Thanks for the inspiration.
Found you from BCD. Come check out LBT when you get a chance. Thx!
Angelene
http://littlebuggietutu.blogspot.com
Post a Comment