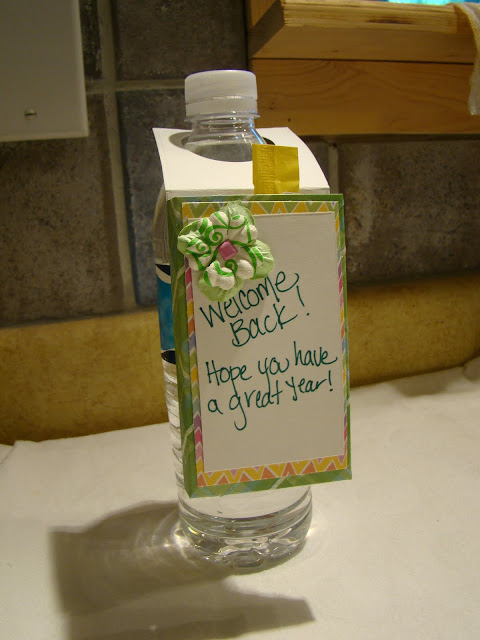
Today you get to see a super cute little gift from a favorite blogger of mine, Fawnda from Fireflies and Jellybeans. Her blog is a great place to get some crafty inspiration - from her own tutorials AND from the weekly link party she hosts!
***
Hello Bugaboo, Mini, Mr and me readers! I am so excited to be
her sharing a fun teacher gift with you!Let me introduce myself to you!
I am Fawnda and you can find me at Fireflies and Jellybeans! I am a
thirty-something mom of a son (4 years old) and a daughter (2 year
old)! My Husband is my best friend and biggest supporter {I am
every lucky}!
We have all sorts of fun over at Fireflies and Jellybeans! I share crafty tutorials with you, and we have a fun Show Off Your Stuff linky party on Thursdays.
Today I am going to show you a super easy back-to-school teacher gift.
Anyone can make this and it is super cheap too!
 Here is a cute simple gift you can make for your
child's teacher. I was a middle school teacher for 10 years and I
would have loved to get one of these!

1.) On your 4.25 X 11 piece of card stock make score lines parallel to the LONG side at .5, 1, 3.25, 3.75 inches (I outlined mine in pencil so you could see them)

2.) Now make score lines parallel to the SHORT side at 4, 4.5 and 8.75 inches.

3.) Cut off the part that I have shaded below (click on the picture to make it bigger)


4.) Make a cut on the score line to make a little tab on the little square that is formed. ( do to both sides)
Thanks for having me today! :)

Today I am going to show you a super easy back-to-school teacher gift.
Anyone can make this and it is super cheap too!
 Here is a cute simple gift you can make for your
child's teacher. I was a middle school teacher for 10 years and I
would have loved to get one of these!
Materials:
- 4.25 X11 inch piece of card stock for box
- 2 X 3.75 inch coordinating card stock for mat
- 1/75 X 3.5 inch white paper or card stock for welcome back message.
- ruler
- Scoring tool (I use a rule and a skewer)
- scissors
- paper cutter
- adhesive (I use double sided tape)
- .5 inch hole punch
- Embellishments
- Water bottle

1.) On your 4.25 X 11 piece of card stock make score lines parallel to the LONG side at .5, 1, 3.25, 3.75 inches (I outlined mine in pencil so you could see them)

2.) Now make score lines parallel to the SHORT side at 4, 4.5 and 8.75 inches.

3.) Cut off the part that I have shaded below (click on the picture to make it bigger)


4.) Make a cut on the score line to make a little tab on the little square that is formed. ( do to both sides)

Thanks, Fawnda! What an adorable way to show some appreciation and start the school year off right!

*Be sure to check the right sidebar for all the fun parties I link to!


No comments:
Post a Comment