Showing posts with label mantel. Show all posts

Tuesday, June 24, 2014

I may be getting TOO confident...


Am I getting overconfident?  The herb garden jars were so nice, and I loved the green and turquoise together so much, and it matched where we're going with decor for the main floor so well, that I couldn't help it.  I got sucked in.  Sucked right in... to succulent mania.
As I've mentioned, I have a black thumb.  As is evidenced by the very brown, very dead, large shrubbery outside my front door - I don't even know HOW that happened.  I was pretty sure that kind of EVERGREEN bush thing was called such because it was EVER GREEN.  I didn't think it COULD die.  But I digress...

I just heard so many great things about succulents... about how easy they are to care for.  How easy they are to plant.  How easy they are to manage.  How easy they are to KEEP ALIVE.  It sounded like my kind of plant.

Because, you know, generally speaking things that can't scream at me to feed them don't fare well around here.

So because these guys are professed to add greenery by being very difficult to kill, I decided to try my hand at them.  But I needed something clever and whimsical to sport these cute little plants.


It just so happened that I had some wooden birdhouses in my craft stash where they sat for about 3 years waiting for the kids and I to paint them and hang them in some darling little decor vignette.  Perfect. 


Want to make some succulent birdhouses??  Here's how!


It's a piece of cake.

1. First, tape off all the areas you want to remain raw wood.  (I am loving the touches of raw wood combined with paint in decor lately, though I don't think I could do it in large furniture pieces.)
2. Break out the spray paint and spray, spray, spray.
3. Do multiple thin coats.  Since it's raw wood it'll soak up the paint, so working with a primer/paint in one is a good idea.

4. Hook your saw bit into your drill. 
I used three different methods, since the birdhouses were all different shapes:
5. For the steep peaked roof, I sawed a large hole into both sides of the roof at the top,
6. so the holes met at the peak and created one large hole that dipped down on the sides.
7. The tiny house was so little, sawing into the roof was too much for it.  I ended up taking the whole roof off with the drill, a pliers and a screw driver.  Even though it wasn't my original plan, it was the best choice, since a hole in a house that small wouldn't have allowed any room for a plant.
8. For the pagoda style house I drilled three holes in the roof, then one hole in the inner "ceiling" - it wasn't QUITE as large as I wanted, so I enlarged it with the help of pliers and sand paper, as you'll see in the following photos.

** Once the holes are all drilled, take some medium grit sand paper and sand all drilled/cut/pried edges to make them nice and smooth.  I think this gives a more organic look instead of "manmade."

9. Cut some parchment paper to approximate size of the birdhouse.
10. Round the edges of the parchment paper to make it easier to work with.
11. Stuff the parchment paper inside the birdhouse, with the edges meeting the top of the hole.  It will overlap and layer, that's ok.  Just make sure you're covering the wood inside the house.
12. Staple around the top edge of the parchment paper.  (My pergola shaped one was such a weird shape I had to staple from the outside in.  I'm ok with that.  It's not super obvious.)

** The parchment paper serves two purposes.  First, it covers the little bird hole in the front so that soil doesn't go spilling out all over.  Second, it keeps the water from soaking into the birdhouse, thus rotting the wood in no time flat.  In a few of the DIY succulent planter tutorials I read, this was the method used, so I'm trusting to the experts.
Succulents don't take much water so usually I just wet the soil with a spray bottle.  Works great.

13. Now put in your potting soil.  Fill 'er up.
14. Place your succulents.  You may need to fill in with a bit more soil, or but some rocks around.

 And that's it!  You're done!

 Ah, what whimsical little planters you have there!


That little one in on the side is planted in a tuna fish can I had painted for something else.  I think the succulent I used may be a bit to big for it, and I'm not sure it'll survive since Zoe picked it out of it's little pot and brushed all of the "gross hairs" off of it, then cleaned it thoroughly and proceeded to give it rides in the tricycle and sing to it before I noticed that anything was amiss.  Soooo, it's basically hanging by a thread.

I do hope I don't kill them immediately.  They now live on my piano.  Which, since none of us actually play right now, currently serves as a birdhouse succulent planter holder.


*Be sure to check below for all the fun parties I link to!*

Wednesday, December 11, 2013

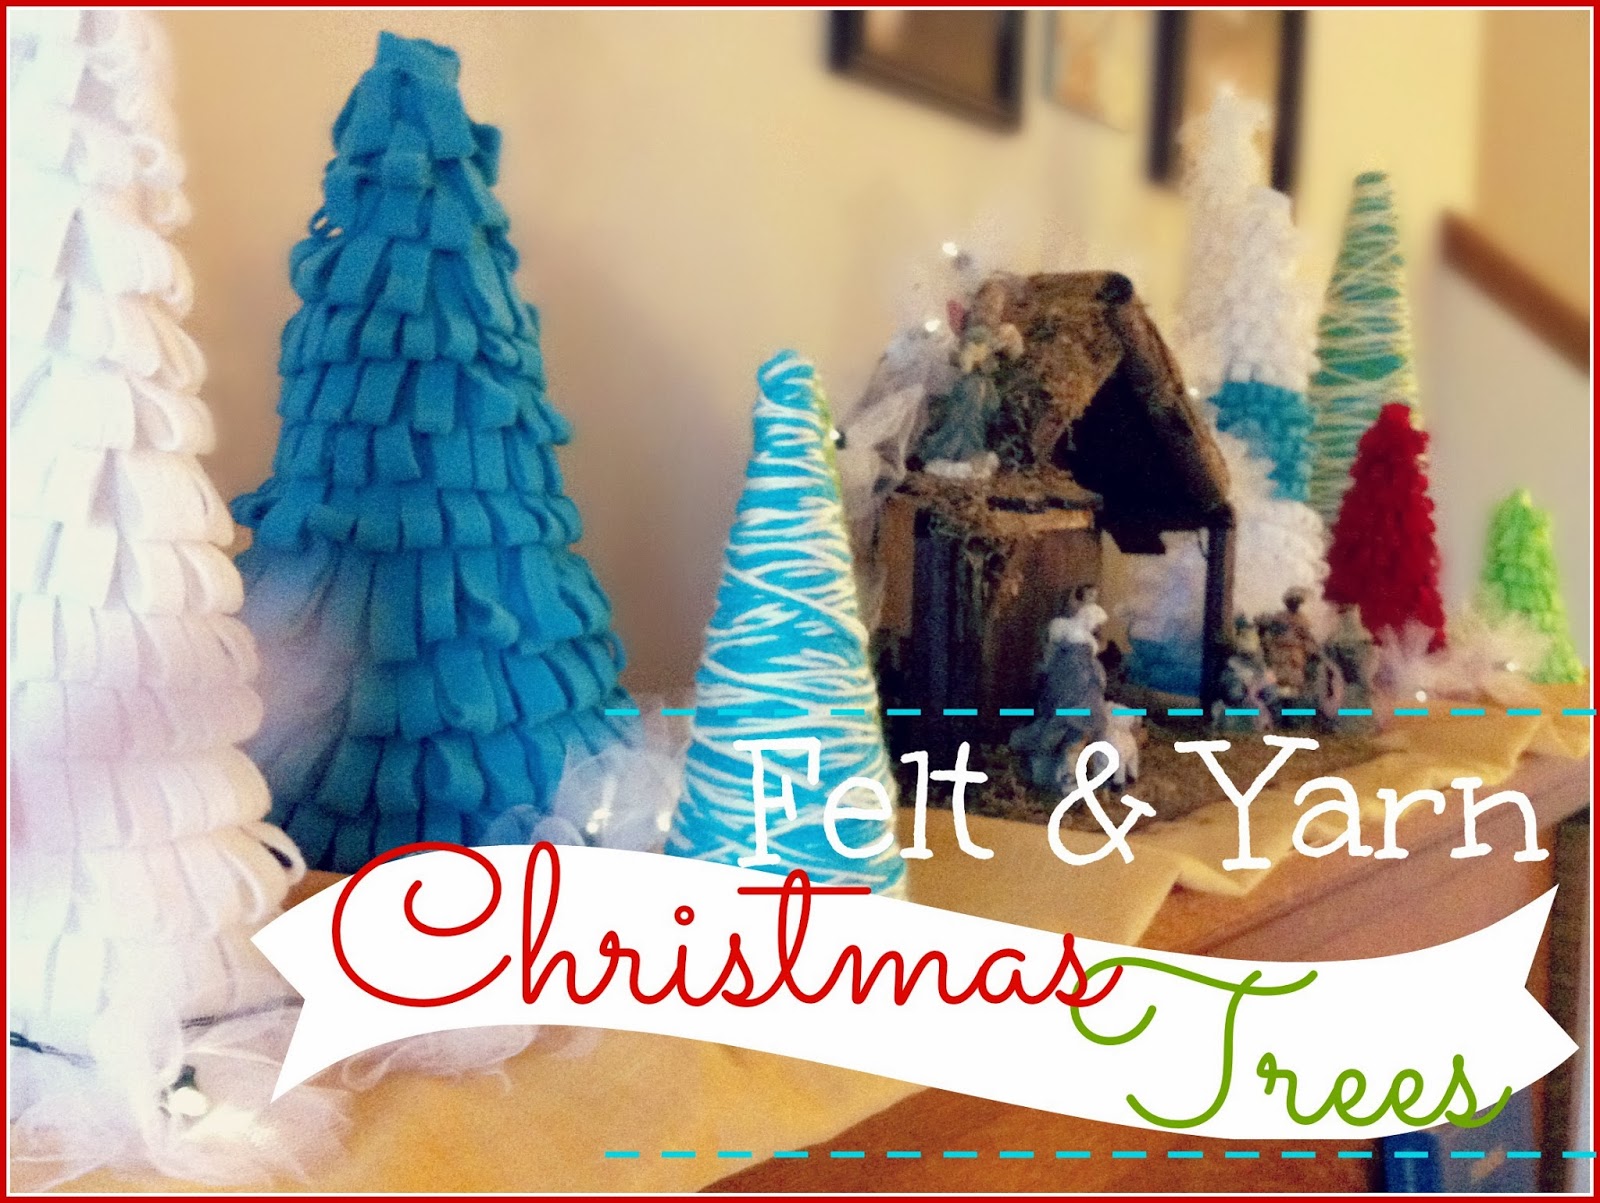
Easy trees.


Have you noticed a trend in my crafting lately?  Namely that they take next to no effort whatsoever?  Like, your average 5 yr old could probably do them?
That's because: 1. It's Christmas time.  I'm usually not even near the blog right now because I'm too busy making gifts I've procrastinated.  The only reason I'm posting crafts this year is because I'm STILL procrastinating.  It's going to be a rough week before Christmas, I'll tell you that.  AND B. My baby does not sleep.  Ever.  Like cat naps, seriously.  When he sleeps for an hour I rejoice.  (No, I really do.  I have a cheer and a dance.  I call it my "he finally slept for more than 15 minutes!" cheer.)  Also, he has decided he must be attached to my person at all times. All of this is totally different from my other two kids and therefore something I'm not used to so it's therefore eating up my time. 

So, enough with the explanation.  The point is, all these Christmasy crafts are EASY!  You can do them in no time flat.  Including this one:


You don't even need a tutorial (once again) but I'm giving you one anyway!  

You need:
Poster board
Felt in your choice of colors
Yarn in your choice of colors
Scissors
Hot glue gun

1. Make your "tree frame."  Sure, you can use styrofoam cones, but they're so stinking expensive.  And I don't think they come in ginormous.  So.  Buy some poster board, roll it on the diagonal to make a cone-type shape, hot glue it together to secure into said shape, then cut around the bottom to even the base out and make it able to stand.  Bam.  A tree frame.
2. (not pictured, sorry) Cut a strip of felt twice as wide as you want it to be and as long as possible.  Mine were cut at about 4-6 inches wide and, uh, very long.
3. Fold the strip in half the long way (hot dog style) and hot glue the edges together.
4. Make small cuts in the folded edge all along the whole length of the strip.  They look like little loops.
5. Starting at the base of the tree frame, hot glue your strip to the frame.  Secure it by the edge of the strip that doesn't have all the little cuts in it.  Overlap the strip as you wind it around the tree frame so that you cover the edge that is being hot glued down. 

6. When you get to the top, just squeeze the felt together in a kind of flat point.  Do this with all different sizes in your choice of colors.  Fun little loopy, shaggy trees!
7. I will not insult your intelligence by giving you a tutorial for the yarn trees.  Just know that for the turquoise and white one I wrapped the whole poster board tree frame in both strands at once and for the green and white one I wrapped the frame in first white and then green.  The difference is subtle, but it's there.  I used hot glue to secure the ends of the yarn.
8. Decorate with your fun trees to your hearts content.

I know, I know.  They don't have evergreens in Bethlehem.  But I liked this little vignette anyway.  And yes, those pictures have since come down from my wall.  And YES, I need to update them.

I have a little "tutorial" for the cute fluffy lights as well.  Coming up!


*Be sure to check the right sidebar for all the fun parties I link to!

Thursday, December 5, 2013

Super Duper Easy Shmeezy Christmas-y Type Craft.


Here's an easy little project for your Christmas decor.  (Because all I can manage right now is easy.)

Nothing to it, really.  You probably don't even need me to talk you through this, the pictures really say it all.

You need:
A short pillar candle
Hot glue gun 
Scissors
Decorative Cinnamon Sticks

And here you go.
1. Break your cinnamon sticks off so they are about the height of your candle - they don't all need to be the same, some shorter or taller is ok.
2. Take your hot glue and glue the sticks on the candle one at a time.
3. Try to place the sticks randomly so that the height of the sticks vary around the candle.  Place them touching each other.
4. Glue them all around the candle.
5.  Wrap twine around the whole thing and tie it in a knot.

Voila!  Cinnamon candle!


I used it on my Thanksgiving mantel, but I'm going to reuse it in my Christmas decor too.  Probably in a centerpiece.


*Be sure to check the right sidebar for all the fun parties I link to!

Friday, November 22, 2013

My Thanksgiving Mantel


It's my very first ever Thanksgiving mantel!  Pretty exciting.  As with pretty much every holiday until this point, I just threw up a wreath or two (not "threw up" in a disgusting way... that was weird wording) and stuck a few decorations around.

Now that our furniture is rearranged, and the piano is front and center, I've got a "mantel"!  

I used almost all things I had on hand.  
I made the book page leaf garland two years ago for Thanksgiving.  
The turquoise candlesticks are from ikea, we've had them forever, but they used to be silver.  Yea spray paint!  
The white stand I made about three years ago - it's a wooden plate that I glued to a wooden pillar candle holder.  It used to be gray and I sprayed it for Halloween.  White seemed an appropriate color for almost every holiday so that's what I went with.  
I reused the wooden green apples again.  I got them at a thrift store for 50 cents years ago and I don't know why I like them so much, but I do.  
The gold plate stand is one I got at a garage sale last year.  It was missing plates, so I bought some china at the thrift store for 50 cents each - they're white with gold along the edge.  I put some mini pumpkins and pinecones on top and multicolored corn on bottom.  Those were all on hand, so didn't cost me a dime.  Yea!  
You can see I also reused the green scrollwork wooden shelf from Hobby Lobby that used to be black and is now green as well.  Phew, what a run-on sentence... I find that putting it on its side gives me something fun to stack things on to add height.  So I stacked a handmade chalkboard I made - remember this one?  I made a new one in a different frame and added a quote I saw on pinterest that I really like.
 I filled my chevron painted vases with pinecones, mustard and red yarn balls, and fall colored lentils with cranberries.  I stacked them on the orange mini crate (from the Halloween mantel) and stacked that whole thing on top of two wire baskets which I turned upside down.  They were from the dollar section at target last year.

I turned some votive holders upside down for a taller candle holder - it seemed to get drowned out when I used it the intended way.  
I also used my slinky pumpkins.  Easiest craft ever.
See the cute little bird on the candlestick?  I got that at Hobby Lobby (half off) and I love him.  He's made out of book pages! 


I tossed some brown striped fabric up for texture and some books for filler.  Here's a secret.  I only had three books that fit the color scheme - red, orange and brown - so I spray painted one turquoise and one green.  Yep!  I spray painted some thrift store books to get what I needed! 
One the bottom section of the piano, I put three mini baskets I got at Hobby Lobby for half off.  I filled them with some fake fall fruit and leaves and such.

So there you have it!  A Shabby Chic, on-hand, Thanksgiving mantel.  All I bought special for this one was the book page bird for a dollar, the slinky pumpkins at about 3 dollars each, two votive candles and a pillar candle at 1 dollar each and the baskets at 1 dollar each.  That's a whole mantel for  $11!  I like the challenge of using what I have and seeing how I can put the same things together in different ways for different looks. 


*Be sure to check the right sidebar for all the fun parties I link to!
Related Posts Plugin for WordPress, Blogger...