Here's my favorite pumpkin post from last year, in case you weren't around then. I got podge happy and couldn't stop.
(First of all, I apologize for the awful color in most of the photos below. I was doing this project by the light of the half moon, and I didn’t have energy to edit them all...)
When I was younger, I loved scooping out all the pumpkin guts and squishing them around. I always got really excited to begin sculpting my masterpiece. BUT pumpkin is not the easiest medium to work with and I was inevitably disappointed with the resulting final product. As I got older, I also became more and more afraid of chopping a finger off, because that’s just something I would do...
So we started painting pumpkins, which I think is a great alternative that even our littlest littles can enjoy.
Lately, though, I’ve seen some mod podged pumpkins floating around, all different kinds, from fabric covered, to leopard print, to scrappy, and they are all very cool. All these mod podged pumpkins got my wheels turning.
(I don’t want to presume that this is an “original” take on the mod podged pumpkin, but I haven’t seen any that look like this finished product, which is why I’m adding my podged pumpkins to the growing list out there in blogland)
For podged pumpkins, you’ll need:
patterned tissue paper with a white background
mod podge
sponge brush
scissors
ribbon/string/tape measure
oh yes... and pumpkins.
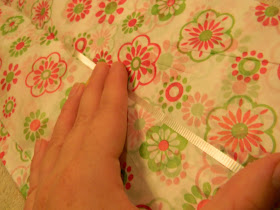
Start by “measuring” your pumpkin, from stem to bottom. Take your ribbon (or string or tape measure) and run it along the pumpkin, then cut it off at the bottom of the pumpkin.
Leave your tissue paper folded in several layers. (I unfolded mine once),
and lay out your length of ribbon on your tissue paper. Cut the tissue paper straight across here.
Then cut a “leaf” shape out of the tissue paper, going the length of the paper (so they are the same length as the ribbon you cut).
Do this with a contrasting pattern, as well.
Now, podge a section of your pumpkin,
lay down a leaf of tissue paper and press it flat with your fingers. You want to make sure to really smooth it down - the white background should look kind of translucent as you push it against the pumpkin.
Do this with the contrasting pattern, making sure the edges of the tissue paper meet.
Keep doing this around the pumpkin, alternating patterns.
If you have excess tissue paper by the stem,
just push it down flat with your finger.
No one will even notice it when it’s done.
Now, the best part. You can make some curly tissue paper vines to really make them cute.
Cut some skinny strips of tissue paper.
Podge it.
Twist it.
Wind it.
Let it dry.
Uncurl it very carefully. Cute right??
Put a blop (technical term) of mod podge on the pumpkin by the stem. Press and hold the vine in place for a few seconds. When it dries it will be nice and stuck.
You can do them with all one pattern too.
And here are some fancy damask pumpkins.
My goal was to make it look like the design is stamped or painted on, hence using tissue paper with a white background which turns translucent with the mod podge. When I first had the idea, I thought I’d like the bright colors of the pink and green pattern the best - I thought it fit my personality better. But now that they’re done? I’m totally in love with the black damask. I think it’s Halloween, but kind of fancy pants, you know?
And my love affair with mod podge remains intact.
You may also be interested in this pumpkin related post - which is a super easy pumpkin-y craft you can do with your kiddos:
Completely unrelated to pumpkins, but totally related to Halloween, you might enjoy these posts as well:
And because I'm not ready to end the pumpkin awesomeness just yet, there will be more pumpkin goodness into next week! Yea!

*Be sure to check just below for all the fun parties I link to!


Very cute, this would be a great idea for the dollar store pumpkins!
ReplyDeleteThese are FANTABULOUS!!!!!
ReplyDelete