Pages

Tuesday, December 28, 2010

PPD (nothing a little Baclava can't cure)

I have a confession.  I have this thing mr likes to call “post party depression.”  (I know, isn't he clever?...)  Anyway, so I have post-party depression after most holidays or big events, but this year I got it BAD after Christmas.  mr says it’s because of all the time and effort I put into homemade gifts for EVERYONE on our combined lists - because, you know, I’m insane - and I think he’s mostly right.  I also think it had to do with not feeling AT ALL Christmasy right up until Christmas Eve, and then BAM it was all over.  I did put an inordinate amount of stress on myself, and because I was crafting and sewing like a mad woman, I don’t have much in the way of tutorials to put up for the gifts I made... I felt like the white rabbit - “I’m late, I’m late, I’m late!”  I do have pictures and hope to give you some mini how-to’s this week.  Here’s a rundown of what you may find soon:

personalized clay key chains
personalized picture key chains
Glass charm necklaces
some headbands (zipper flowers, vintage earrings, buttons, felt...)
antique book page flower pin 
Asian Zing Sauce Knockoff (for any B-Dub fans out there... it’s good stuff.)
Many “Stay Put Bookmarks”
monogrammed aluminum water bottles
a pom-pom tutu with pom-pom accessories
wrist cuff from leather belt
An “all-in-one portable play kitchen” complete with felt breakfast, lunch and dinner (this one may have been my favorite)
Freezer paper stenciled “funny” shirts
2 sets of "Bowling Buddies"
2 Zipper pouches
4 sock snakes
1 sock owl
3 bow ties
3 beaded necklaces (three different kinds!)
2 more necklaces on chains
1 rolled rosette bib necklace
Ok, I feel like I missed something, but you get the idea.  It was craziness.  I should have started a year ago, and instead I made it all in about a week and a half.  Which is why the ones we sent in the mail were late.  (Merry Christmas today, people!)
I wish I could say the insanity is totally over for the season, but SOMEONE has a birthday (today) and that little boy wants a “planes, trains and automobiles” party.  We’ll see how that goes...
I did want to share something more worthwhile than my list of pure madness, though, so here is my new Baclava recipe I tried out this year!  Along with the usual peanut butter blossoms, cut out cookies, magic cookie bars, toffee squares, pecan balls, snickerdoodles, cake pops, and pecan pie bars that my mom and I made for Christmas, I decided to try Baclava.  I loved it!  Mom said this was the best Baclava she’d had, and my brother loved it too.  Having never made Baclava before, I can’t really compare it.  But I know it was yummy.

Pistachio Baclava
Ingredients
1 (16 ounce) package phyllo dough
1 pound chopped pistachios
1 cup butter (softened)
1 teaspoon ground cinnamon
1 cup water
1 cup white sugar
1 teaspoon vanilla extract
1/2 cup honey
Directions
Preheat oven to 350 degrees F(175 degrees C). Butter the bottoms and sides of a 9x13 inch pan.
Chop nuts and toss with cinnamon. Set aside. Unroll phyllo dough. Cut whole stack in half to fit pan. Cover phyllo with a dampened cloth to keep from drying out as you work. Place two sheets of dough in pan, butter thoroughly. (Make sure your butter is softened.  It will be much easier) Repeat until you have 8 sheets layered. Sprinkle 2 - 3 tablespoons of nut mixture on top. Top with two sheets of dough, butter, nuts, layering as you go. The top layer should be about 6 - 8 sheets deep.
Using a sharp knife cut into diamond or square shapes all the way to the bottom of the pan. You may cut into 4 long rows the make diagonal cuts. Bake for about 50 minutes until baklava is golden and crisp.
Make sauce while baklava is baking. Boil sugar and water until sugar is melted. Add vanilla and honey. Simmer for about 20 minutes.
Remove baklava from oven and immediately spoon sauce over it. Let cool. Serve in cupcake papers. This freezes well. Leave it uncovered as it gets soggy if it is wrapped up.
It was hard to cut it into diamonds.  But that was probably just my poor cutting ability and dull knives.
On another note, if you are like me and suffer from post-party depression, or any kind of Christmas-related let down... or even if you just aren’t quite ready to say good bye to the season yet, I encourage you to go HERE and read this amazing message from Jeffrey R. Holland.  It is INCREDIBLE and it totally changed my Christmas season.  I will read again next year, and the next and the next... and it will help me remember the real cause for celebration every time.


Monday, December 20, 2010

Overwhelmed. But here's some ornaments for you anyway.

Are you aware that I, like most of the rest of you I assume, am going absolutely stark raving mad?  Are you aware that every single year, starting on December first, I tell myself that the NEXT year will be different.  I will start getting ready in July - no, JUNE!  And the homemade presents will be done and wrapped and sent on their merry way by November 1st - no ifs, ands or buts!  Then I can make cookies throughout December and relax and focus on the things I want to focus on, like family and Santa.  Just kidding.  Not Santa.  But definitely family.  And Christ.  And are you aware, that every single year I begin making Christmas presents and figuring things out no sooner than the day after Thanksgiving?  Which is a far cry from June.  If you didn’t know that.  
Well, this is all just a lot of rigamarole for letting you know why I have, and will continue to be, completely MIA.  BUT - I did want to show you one last Christmas tutorial before I, you know, lose my sanity and start swearing at my sewing machine.  (I would never really do that.) (Or would I?)
I signed up for a Christmas ornament exchange over on The Rowdy Strowdy’s because I don’t have enough to do and needed to add some stress to my life, so why not agree to give 6 random strangers some homemade goodness?  No, really, I signed up in November, and it seemed like a fun way to share some Christmas cheer.  (Speaking of Christmas cheer, I have a whole long post just waiting to happen regarding that topic.)
Well, time to send them out rolled around and I still hadn’t had that “ah-ha!” moment.  Meaning I really wanted to make them something unique and fun, and kind of ME, and just couldn’t think of a thing.  But then I saw these awesome fuzzy Christmas socks at Walmart - you know the ones.  The ones that you get in your stocking like every year.  And for some reason I thought, now those would make a cool ornament.
I know, I know.  Socks on a tree?  What the what?  But I’d had a vision, and it all came back to the Grinch.
Yes, that nasty old Grinch:
Every Who down in Whoville liked Christmas a lot, but the Grinch, who lived just north of Whoville - did not. The Grinch hated Christmas - the whole Christmas season. Now, please don't ask why; no one quite knows the reason. It could be, perhaps, that his shoes were too tight. Or it could be that his head wasn't screwed on just right. But I think that the most likely reason of all may have been that his heart was two sizes too small.”
Fortunately, this story has a happy ending, and it always reminds me of the most important parts of Christmas - friends, family, and Christ.  Indeed, I enjoy remembering that “Maybe Christmas... doesn’t come from a store.  Maybe Christmas, perhaps, means a little bit more.”
And what better way to remind myself of this important lesson than with a Seussical Ornament?  And here’s the low down.
You’ll need:
Some fuzzy Christmas socks (not the ankle socks - you need the normal ones.  You can use adult or kid socks, depending on what size balls you want to make) (One pair of socks makes two ornaments)
Embroidery Floss to match
Large needle
Scissors
Heavy beading wire
Pliers
Beads to match the colors in your socks
A small length of ribbon
A tack of some kind - upholstery tack, thumb tack, etc.
And OF COURSE, hot glue
First, you’ll cut your sock.  Cut the toe clean off.  

And cut the bottom foot part from the top leg part, right at the heel.
Stuff your ball inside the sock and make sure it is in the middle - equal length of sock on both the top and bottom.
If your sock has stripes, make sure to wiggle the sock around until the stripes are straight and not wonky.
Take your floss and needle, and sew a gathering stitch around the top of the sock, tucking the top edge under as you do so (so it looks more “finished”).  
Cut the floss, leaving a tail.
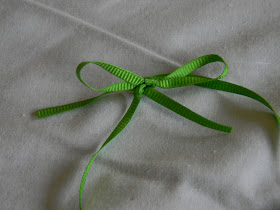
Tie the ends of your ribbon in a cute bow.  (Not like this one.  Cuter.)
Hold your ribbon on top of the ball.

Dab some hot glue on the pointy part of the tack 

and stick the tack into the top of the ball, through the ribbon.  The hot glue will help hold the tack and ribbon in place more securely.
Now, pull your gathering stitch tight.  Tie off the ends.
Sew a gathering stitch around the bottom part of the sock, folding the edge under just as you did with the top.
Cut the floss, leaving a tail.
Cut three lengths of heavy wire - about three inches long or so. 
Using a pliers, turn the end of the wire up and around, making kind of a curl, to form a stop for the beads.
Now add beads to your wire, in a random pattern.  I used all circular beads because I thought it was more Seuss-ish, but that's just me.
Leave about 1/4-1/2 inch of the wire unbeaded.
Dab some hot glue on the unbeaded part of the wire 

and stick it into the bottom of the ball, pushing it as far as it will go up to the beads.
Do this with all three wires.


“Curl” your beaded wires.  Just bend them into corkscrew shapes.  Pull the gathering stitch tight and knot the ends.

The wires shouldn't look identical.  They should be slightly different lengths, different bead patterns, and different directions and curliness with the corkscrews.

The kid's sized socks are great with smaller styrofoam balls.
That’s it!


And, when I showed my sister without telling her the inspiration, she said, "They look Seuss-ish!" AND my husband said, "They look like Dr. Seuss." (much less excitedly than my sister, hence the lack of exclamation point.  For five years we've been working on the "excitement factor" which in our marriage is totally different than what you're probably thinking.  For us, working on the "excitement factor" means training mr when he should be excited - i.e. when I make something I think is cool - and how he can show it.  It's a work in progress.)  POINT BEING, they totally saw what I was going for, so I guess it was a success!


I got this idea that it would be really fun to have a whole “Seussical” tree.  You could get those sparkly pokey stick things that are all curly, and use these fuzzy, stripey balls, and maybe even make shrinky dink Seuss characters!  How fun would that be?  Don’t steal my idea for next year... (actually the shrinky dinks were my sister's idea, I never would have thought of that...)
I sent these off to my ornament partners, hoping they got the humor AND the message.  I included the absolute best lines from the entire Grinch movie:
But this... this sound wasn't sad. Why... this sound sounded glad. Every Who down in Whoville, the tall and the small, was singing, without any presents at all! He hadn't stopped Christmas from coming, it came! Somehow or other, it came just the same...
He puzzled and puzzled till his puzzler was sore. Then the Grinch thought of something he hadn't before! Maybe Christmas, he thought, doesn't come from a store. Maybe Christmas... perhaps... means a little bit more! 
And what happened then? Well, in Whoville they say that the Grinch's small heart grew three sizes that day. And then - the true meaning of Christmas came through.”
And although I hope to be back with a post or two before Saturday, I’ll let you know now that I wish you a very, very, Seussical and Merry Christmas.


Monday, December 13, 2010

Welcome to the last edition of Monday Food Fest

 - for the year.  It’ll be back!  Just in a different form, and after the holidays.  I’m making myself crazy trying to get everything done... so a food fest break is in order.  

But on to tonight’s dinner:
Last night, mom requested comfort food - macaroni and cheese.  Gourmet, not Kraft.  Which is kind of funny since she makes the most phenomenal homemade mac and cheese EVER.  A bold statement, sure, but totally true. 
But I try to please, so I searched for some ideas.  I came across something promising on food.com (where else?) and found a yummy comfort dessert to go along with.  Mmmmm... chocolate...


So, tonight’s main dish was Butternut Mac and Cheese - which you can find on food.com, here.  Our response?  Delicious!  mr and mom swore they couldn’t taste the squash, but dad and I could.  Not in a bad way.  It didn’t detract.  We concluded that it was a great way to make the mac creamy, but a little healthier as well - since you use less cheese in the sauce.  It had a great flavor and crunch.  The only difference I made was using cheddar instead of, um, that cheese in the recipe I’ve never heard of.


For a side I made some beans and shook them up a bit.  Here’s the recipe:


Crisp Beans and Mushrooms
small package of mushrooms
1/2 white or yellow onion, chopped fine
1/2 pound string beans (I got the packaged ones that are already washed and prepared - I know, easy way out)
3 T butter
garlic salt
black pepper
salt
almonds - slivered
water
Melt 2 T butter in a large skillet.  Sauté the onion.  After a few minutes, add the mushrooms.  When the onion and mushrooms become somewhat soft, add 1 T butter and the beans.  Add the garlic salt, pepper and salt to taste.  Mix it up.  Add about 1/2 C or so of water.  Cover the skillet and let it simmer for about 15-20 minutes.  Drain the water and serve with the slivered almonds sprinkled on top.
I really liked the beans because FINALLY I did NOT over cook them!  They were nice and crispy and you could totally taste the natural flavors.  mr would have preferred them less crunchy, so next time I may cook them more in the 20 minute range.


I also whipped up some crispy french bread.  No, I didn’t make the BREAD, but I sliced it half way, spread the slices, spread some garlic butter on each slice and baked it for about 10 minutes.  It was perfectly crunchy, just like french bread should be.


And, finally, the piece de resistance - the yummiest part of the night - the delectable comfort food of dessert.  Chocolate cake.  But not just any chocolate cake.  The most moist and fudgy and gooey chocolate cake you’ve ever eaten.  I did make a few changes to the original recipe on food.com, so I’ll include it here.

Melt in Your Mouth Cake
1 package cake mix
1 4 oz. package of chocolate pudding mix
2 C sour cream
5 eggs
1 tsp almond extract
1 C melted butter
2 C chocolate chips
Preheat oven to 350.  In a medium bowl, stir together the cake mix and the pudding mix with a fork.  Make a well in the middle.  Add the sour cream, eggs, almond extract and butter.  Beat on low until well mixed.  Add the chocolate chips.  Mix them in well.  Pour into a greased pan.  Bake for about 50-55 minutes.  Dig in and just TRY to eat only one piece!
When I put the cake in the pan, I realized that the recipe didn’t include any kind of frosting.  No recipe, no “serve with...”, no mention of frosting at all.  I was a little worried, because I hadn’t picked any up at the store, and I really wasn’t in the mood to make any.  I figured if the cake really needed something, I could whip out the ice cream in the freezer.
So, the best part about this cake?  It doesn’t need anything else at all.  It is so deliciously chocolatey on its own, so moist and gooey, frosting would be overload.  The only thing you’ll need to serve with this cake is a big, tall glass of milk.  I love it.  What a great recipe to have in the arsenal for those times you forget to buy the frosting and don’t have time to make it!  (Yep, personal experience.)

So, if you try nothing else - although I would recommend the mac and cheese - try this dessert.  mom and dad had nothing but good things to say about the whole thing (of course) and mini was in Heaven.  bug even ate a little.  
The real star of tonight’s show?  


That’s right, baby.  I slew the beast and showed that sucker who was boss.  Is it wrong to be enamored with a dishwasher?  Because I’ve never felt this way about a kitchen appliance before.

This is the second time I've made macaroni and cheese for my parents on their anniversary.  We all agreed that this time was much better.  Happy Anniversary guys!


Texas MonkeyPhotobucket


Sumo Sweet StuffKeeping It SimpleThe Girl Creative


mmm buttonA Crafty SoireePonyTails and FishScales


CreativeShareWednesdaysShow and Tell Green


Creations by Kara


giveaways